
Coffee Machine Care
Under the Cabinet K Cup Holder: A Practical Storage Guide
Sep
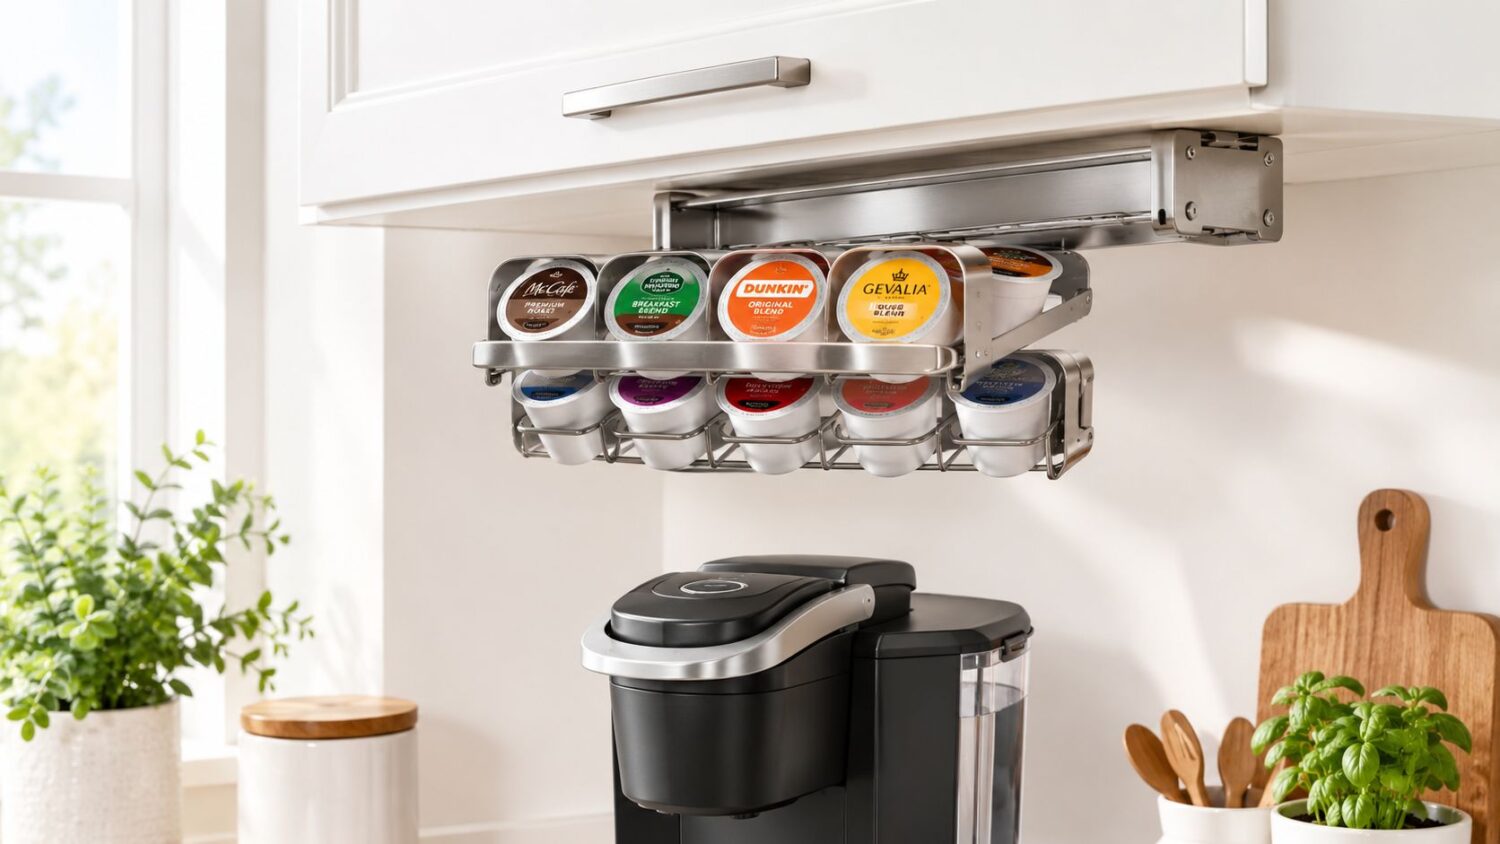
The Keurig is tucked into the corner, but the counter around it has disappeared. A sleeve of pods leans against the toaster, a few mugs occupy the only clear patch, and the flavor you want is always buried underneath three flavors nobody drinks. An under the cabinet K-Cup holder can reclaim that unused vertical space, but only if you choose the right clearance and mounting method.
The important choice isn't only whether the holder looks attractive. You need to decide whether your cabinet can support it, whether a swing-down tray will clear the brewer, and whether adhesive makes sense for your finish and daily use. Renters, homeowners, and small offices shouldn't install the same way.
Why Your Counter Looks Like a Pod Bomb Went Off
You clear the counter before breakfast, then watch it fill again. An opened pod box sits beside the brewer, loose flavors spread around the mugs, and the toaster loses its remaining workspace. Under-cabinet storage can solve that mess, but only if the cabinet, brewer, and holder work together.
An under-cabinet holder gives each pod a fixed location close to the machine. That makes daily selection faster and keeps spare boxes from taking over the counter. A swing-down tray can make access easier, but it also needs room to move and may waste space if its frame hangs lower than the brewer.
Your mounting choice should follow your situation. Renters should favor removable adhesive only on a clean, smooth cabinet finish, and they should treat humidity and repeated loading as real risks. Long-term owners can use screws when the cabinet material and finish permit drilling. A holder that stays attached but blocks a door, collides with the brewer, or reduces usable clearance is a poor installation, regardless of its capacity.
Why this format appeared
The under-cabinet format became visible in the coffee-accessories market relatively recently. A widely circulated November 2012 example used high-strength adhesive, mounted beneath a kitchen cabinet, swung down for access, and held up to 24 K-Cups, as shown in the original under-cabinet holder example.
The timing matched the expansion of pod brewing. Keurig's official history places K-Cup pods in the late 1990s, and reporting cited by PureHQ places the main K-Cup patent expiration in 2012. The same historical product discussion records U.S. coffee-pod machine sales increasing from 1.8 million units in 2008 to 11.6 million units by 2013, expanding demand in homes, offices, and breakrooms.
My practical view: Buy this format to reclaim a measured patch of cabinet space, not because the product claims a large capacity. If the tray steals clearance or adhesive cannot handle your cabinet finish and kitchen humidity, it creates a second problem.
Choose the holder only after deciding whether you are protecting a rental, improving a permanent kitchen, or working around a tight coffee station. That decision matters more than appearance.
Measure the Cabinet Before You Buy Anything
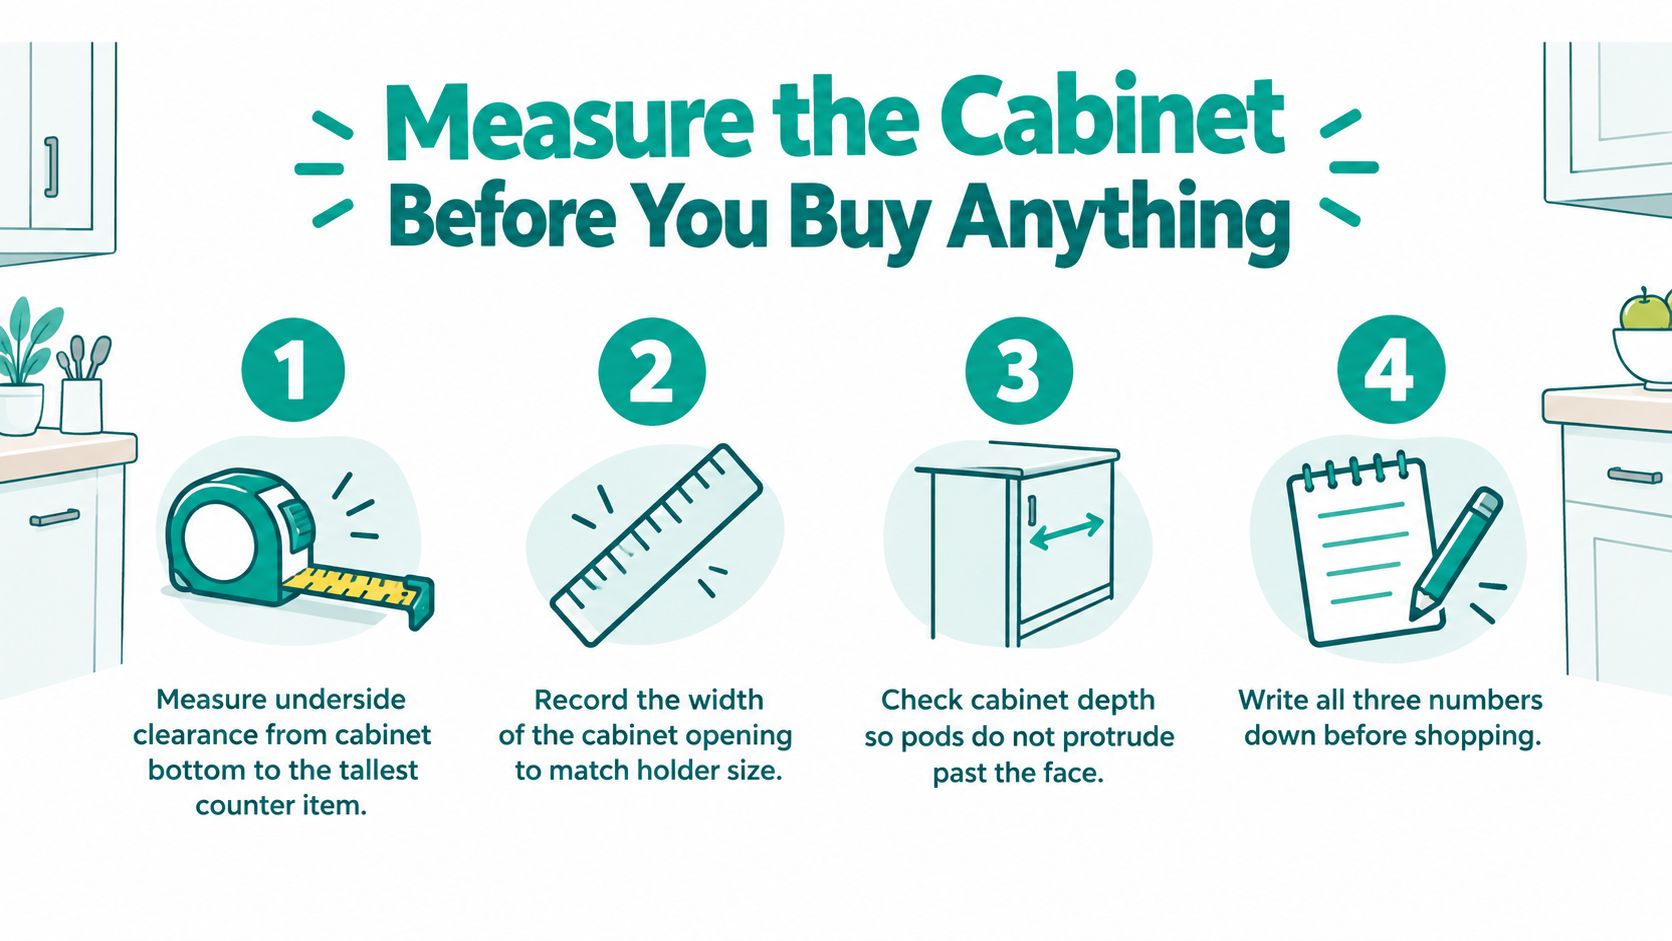
A holder that fits the product listing can still fail in your kitchen. The brewer, cabinet doors, backsplash, outlets, and countertop all occupy the same small operating zone, so measure the whole area rather than the cabinet underside alone.
Start with vertical clearance
Measure from the bottom of the cabinet to the tallest item on the counter. For a swing-down K-Cup tray, allow at least 3 to 3.5 inches of vertical clearance so the tray can open without striking the brewer, based on the clearance guidance in this coffee-pod-holder review.
Don't measure to the empty counter if your Keurig is already in place. Measure to the tallest fixed object, usually the brewer, and account for the holder's closed profile and open swing path. One reviewed unit measured 13 inches deep, 13.25 inches wide, and 3.25 inches tall, so a product's advertised footprint matters as much as its pod capacity.
Check movement, not just static fit
Open the cabinet doors fully. Then operate the holder through its complete arc and check the dishwasher handle, nearby trim, backsplash, and any appliance controls. A tray that clears the cabinet when closed may still hit a door edge when loaded and swung forward.
Measure front-to-back space under the cabinet lip. The tray shouldn't protrude so far that it blocks a drawer, covers a backsplash outlet, or forces you to stand at an awkward angle while brewing. Write down the cabinet underside, usable depth, and available width before comparing listings.
Confirm the mounting profile
Drill-free products can depend on cabinet thickness or an underside lip. One listing specifies a shelf thickness limit of 0.86 inches, or 2.2 centimeters, for drill-free mounting, which shows why the underside profile matters more than the number of hooks alone. Check the product's mounting specification against the actual cabinet edge.
For cup-style hanging organizers, leave about 2 to 3 inches below the hooks so handles don't hit the countertop, as advised in this cup-holder installation guide. Load the holder with a few pods before committing to adhesive or pilot holes. If the tray bumps anything during that test, return it or relocate it. Don't try to solve a bad location with a stronger adhesive.
Adhesive Versus Screws Versus Clamp Mounts
Mounting method determines whether the holder remains useful or becomes another kitchen repair. Adhesive is convenient, screws provide the dependable long-term connection, and clamp systems avoid both holes and bonding surfaces. None works equally well on every cabinet.
| Method | Best Cabinet Surface | Damage Left Behind | Weight Tolerance | Renter Friendly |
|---|---|---|---|---|
| Adhesive | Smooth, clean, nonporous finishes | Usually no holes, but removal can affect finish | Light to moderate loads, subject to product rating | Yes |
| Screws | Wood, MDF, and suitable rigid cabinet panels | Pilot holes remain | Best choice for sustained loaded storage | Usually no |
| Clamp or tension rail | Cabinet edges with a compatible lip | No drilled holes | Depends on clamp grip and cabinet profile | Yes, if the fit is secure |
Adhesive suits renters, with conditions
Adhesive-only installation is the renter-friendly choice when the cabinet underside is smooth, clean, and suitable for bonding. It becomes a poor choice on porous wood, textured paint, heavily grained laminate, or a surface exposed to regular steam. Independent guidance recommends cleaning with isopropyl alcohol and warns that adhesive alone may not provide long-term success under load, as explained in this K-Cup storage guide.
Humidity and heat matter because they challenge the bond at the exact moment the holder carries its greatest load. A smooth cabinet in a dry kitchen may accept adhesive well, while a textured or greasy underside near a kettle deserves reinforcement or a different mount.
Screws win for permanent installations
If you own the cabinets, screw fastening is my default. A screw-mounted steel frame handles repeated loading and unloading better than adhesive, and it avoids the uncertainty that comes from finish texture and humidity. Drill pilot holes carefully, check for cabinet construction before drilling, and use fasteners appropriate for the material.
Screws aren't automatically suitable for every cabinet. A thin decorative panel, metal underside, or rented kitchen may make drilling impractical. In those cases, a compatible clamp rail can offer a useful middle ground, but only when the cabinet lip matches the product specification.
Clamp mounts need a precise fit
Clamp and tension designs leave no adhesive residue and no screw holes, but they aren't universal. The cabinet needs a suitable edge, and the clamp must remain tight while the loaded tray moves. A loose clamp can shift, scrape the finish, or place the holder directly in the door's operating path.
Choose adhesive for a light, renter-friendly setup on a smooth surface. Choose screws for a permanent home installation or a busy breakroom. Choose a clamp only after measuring the cabinet lip and confirming that the hardware won't consume the clearance you need.
Reusable Pods and Descaling as Part of the System
The holder manages where your pods sit. It doesn't manage the grounds, rinsing, or mineral buildup that follow brewing. A tidy coffee station still becomes unpleasant if used pods collect beside the machine or the brewer develops restricted flow.
Reusable stainless K-Cups change the inventory equation. Instead of keeping every coffee preference in the tray, you can store ground coffee for the daily brew and retain only the flavored or specialty pods you use. The reusable pod needs a consistent place, so the holder becomes more useful when it stores the brewing supplies that support the routine.
Keep the maintenance loop close
After brewing, empty and rinse the reusable pod before the next use. Store it where it can dry rather than sealing it wet in a closed tray. A small container for grounds can also prevent the coffee station from collecting damp filters and loose residue.
Descaling belongs in the same system. Mineral buildup can interfere with brewing performance, so follow the brewer manufacturer's maintenance guidance and keep the descaling product near the machine rather than buried in a distant cabinet. For machine-specific steps, use this Keurig descaling guide.
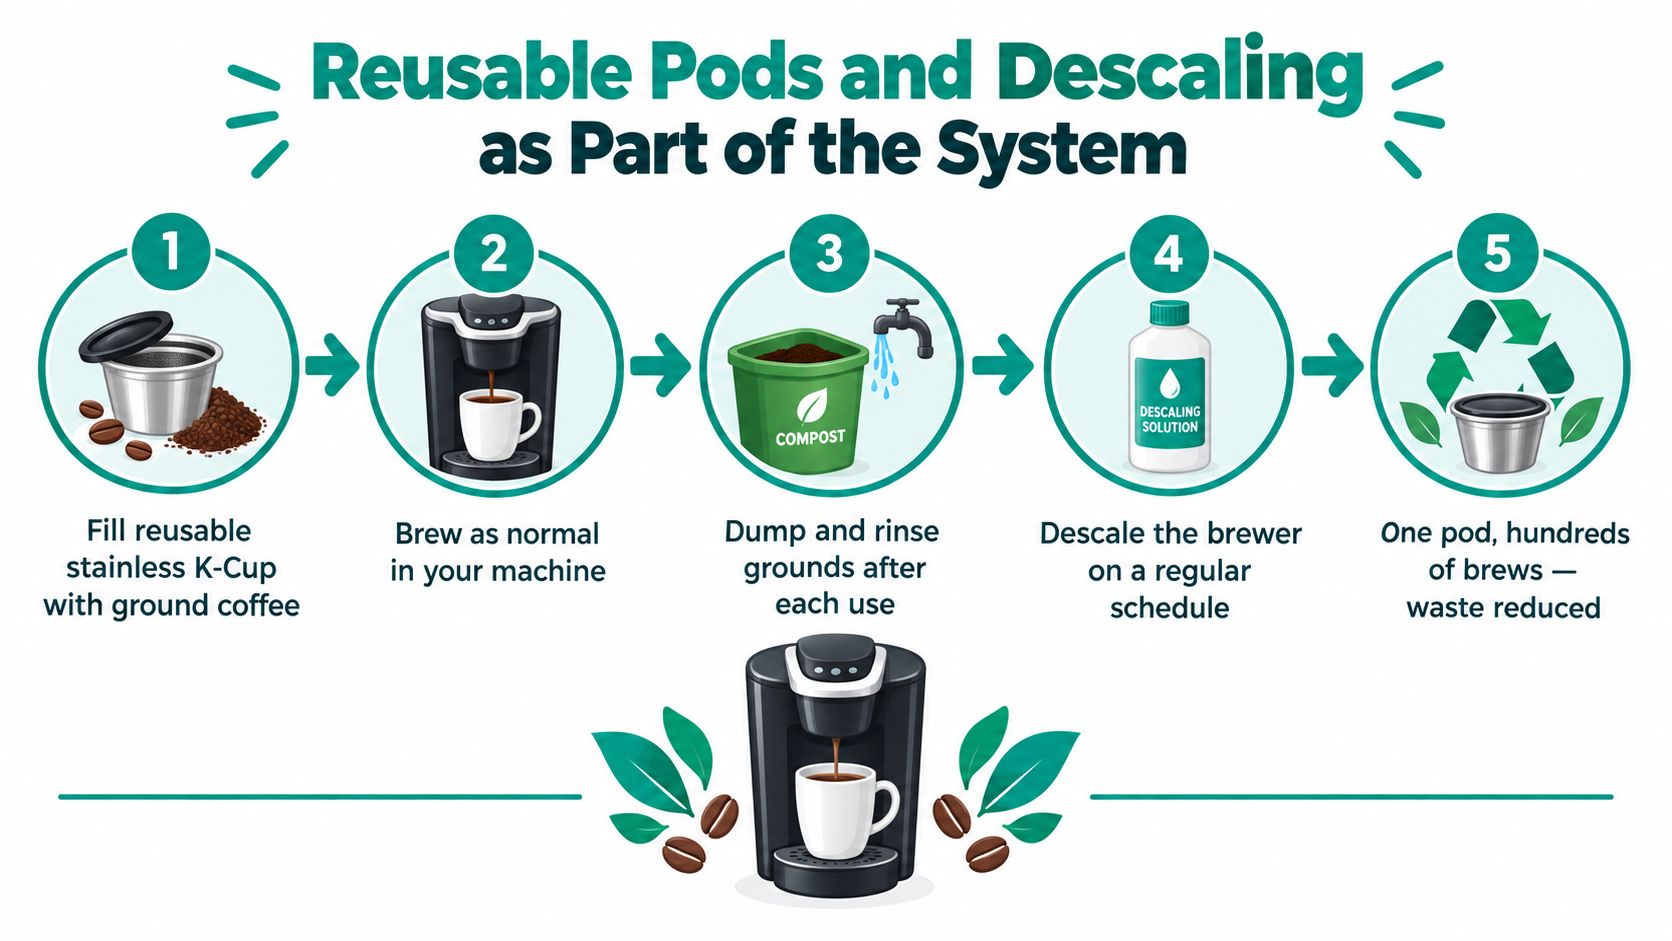
I recommend assigning the back row of the holder to maintenance items, provided the design keeps them dry and secure. Put the reusable pod, a small scoop, and the descaling packet there, while keeping the front row for daily coffee choices. That arrangement turns the holder into a visible reminder instead of a storage space you forget.
Reduce clutter without pretending pods disappear
Reusable pods reduce dependence on single-use pod inventory, but they still require grounds management and rinsing. They also need to match the brewer's pod holder and lid mechanism. Check compatibility before buying, particularly if your machine uses a narrower brewing area.
Filters and cleaning tablets can support the same routine, but don't overload the under-cabinet tray with unrelated supplies. The holder should remain easy to open and inspect. If maintenance products make the tray heavy or obstruct the swing, store them below the brewer and keep only the reusable pod within reach.
Premium Holders Compared to Generic Organizers
A premium holder earns its cost through the parts that move, support weight, and face steam. A cheap organizer can look adequate in a product photo, but thin joints, brittle end caps, and weak mounting materials show their limitations once the tray gets regular use.
The first failure point is usually the frame connection. Welded stainless wire or powder-coated steel generally gives a holder a more rigid structure than crimped tabs. The second is the swing hardware. A pivot that feels loose before installation won't improve after repeated loading.
| Tier | Frame Material | Rated Pods | Swing Hardware | Price |
|---|---|---|---|---|
| Premium | Stainless wire or powder-coated steel | Manufacturer-rated capacity, with usable access prioritized | Rigid pivot with adjustable or replaceable hardware | Premium |
| Mid-range | Coated steel with mixed hardware | Moderate capacity, depending on tray design | Functional pivot, inspect for play | Mid-range |
| Generic | Thin chrome or plastic components | Often advertised above the comfortable working capacity | Basic hinge, tabs, or flexible joints | Budget |
Capacity claims need a reality check
The category has expanded beyond the early 24-pod adhesive rack. A 2026 Amazon results page displayed 475 search results for Keurig rack-style organizers, and a current marketplace listing described an under-cabinet holder that accommodates up to 50 K-Cups. Another listing showed a 13-inch black under-cabinet organizer, as shown in the current Keurig rack marketplace results.
Those figures describe advertised or listed capacity, not necessarily comfortable daily access. A swing-down holder may technically accept a dense load while making the rear pods difficult to see or increasing stress on the mount. The original 24-pod format and today's higher-capacity listings show how the category has moved toward denser storage, but bigger isn't automatically better.
For a practical setup, favor a wire frame when you want to see inventory at a glance. Solid trays can hide pods, collect dust, and retain stale coffee odors if users leave empty or damp items inside. Before choosing a premium design, compare its pivot, back rail, finish, and replacement hardware rather than paying only for a larger capacity label. A useful comparison of dispenser formats appears in this K-Cup dispenser guide.
Install the Holder So It Actually Stays Up
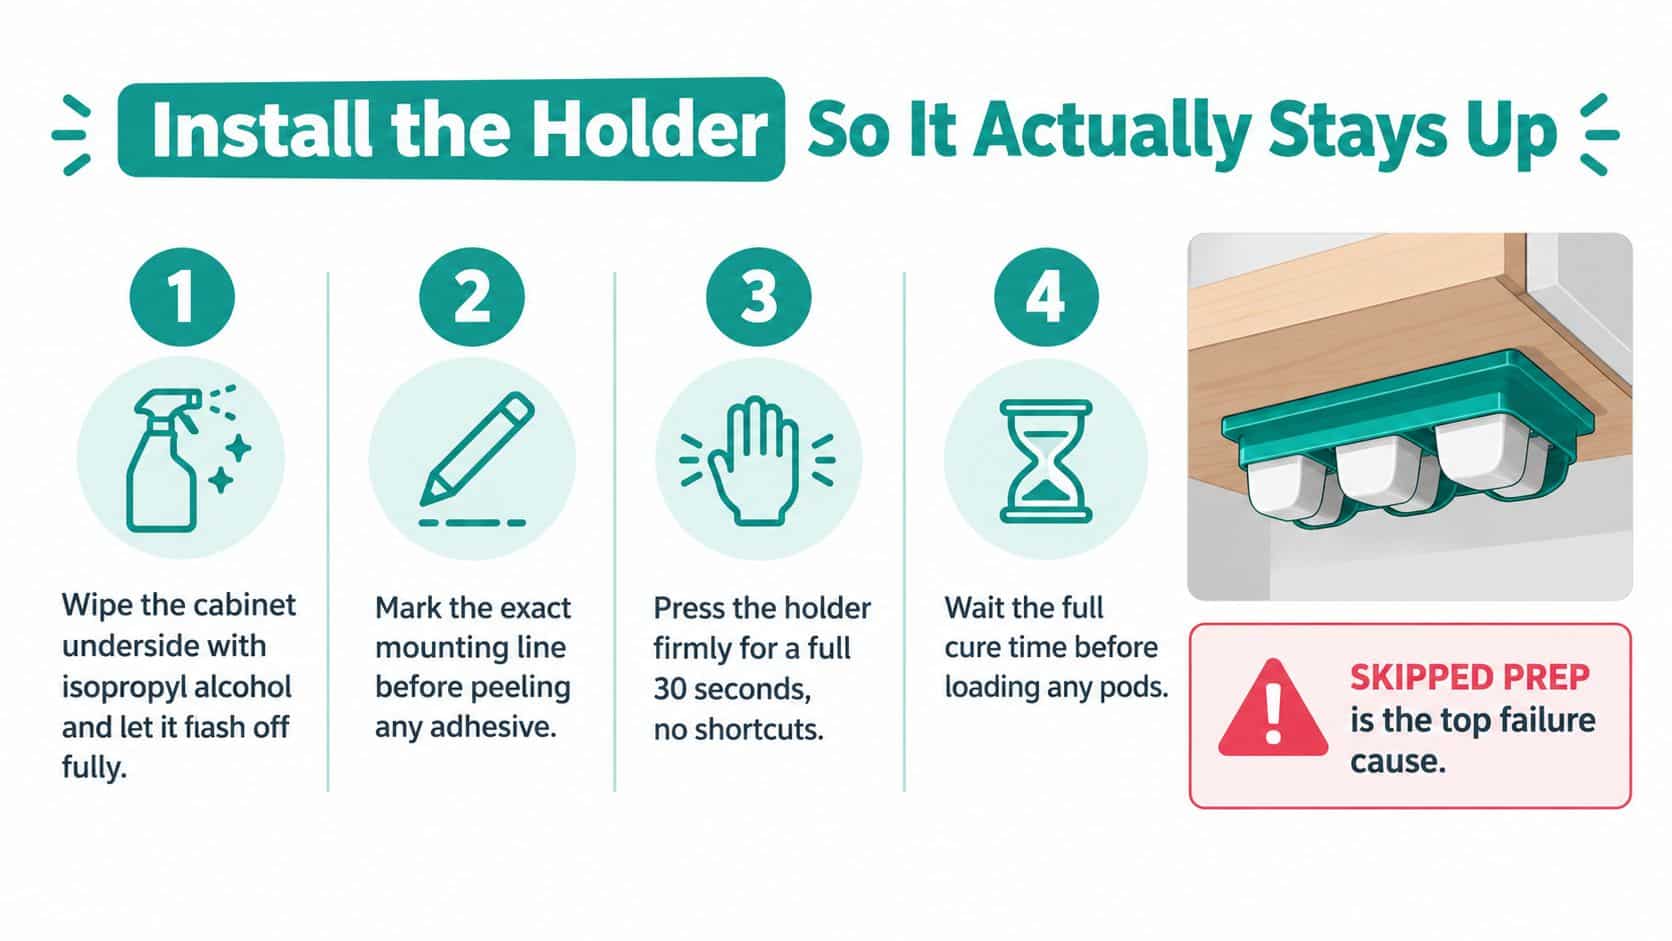
Installation fails when people rush the preparation. Adhesive doesn't bond reliably to grease, dust, or a textured surface, and a screw-mounted holder can still interfere with the brewer if nobody dry-fits the swing path.
Start by wiping the cabinet underside with isopropyl alcohol. Let the surface dry completely before applying any strip or pad. Mark the mounting line, then hold the empty holder in position with a few pods loaded so you can check the full movement arc.
Build in a load test
Apply the adhesive according to the manufacturer's instructions and hold it in place for the specified pressure time. Don't load the holder immediately. The bond needs its full cure period before it carries a tray of pods, particularly beneath a cabinet exposed to warm moisture.
For a permanent installation, add screw reinforcement through the back rail when the cabinet material and ownership situation allow it. Independent product guidance consistently identifies screws as the more secure long-term method, while adhesive alone remains the main failure concern under load. If you need to understand fastening options for a different surface, this guide to wall mounting brackets offers useful context from XTREME EDEALS INC.
Load the tray gradually rather than filling it at once. Test the swing with one hand while removing a pod. If the tray drifts, binds, or flexes, stop and correct the pivot or mounting before adding more weight.
A holder that stays attached but sags into the brewer is still installed badly. Recheck the cabinet clearance, tighten the pivot if the design permits it, and relocate the unit if the cabinet door or countertop remains in the swing path.
Pick the Right Holder and Stock Your Station
Match the holder to the measurements you recorded, not to the largest capacity shown in a listing. A renter with a smooth cabinet should start with a compatible adhesive mount or clamp system, while a long-term owner should choose a screw-mounted steel frame when the cabinet can accept it.
Keep the holder's front row for the pods you use most often. Store overflow below the brewer, and keep the tray light enough that the swing remains controlled. Verify the Keurig model, confirm that the holder clears the brewer and cabinet edges, and run an empty swing test before your first morning brew.
Rotate reusable pods through your routine instead of leaving one permanently buried behind packaged K-Cups. Keep compatible filters, cleaning supplies, and descaling products in the same coffee zone, but don't let accessory storage overload the holder. The K-Cups storage guide can help you organize the overflow without returning pods to the counter.
For most homeowners, I recommend a screw-mounted steel holder with a controlled swing and a capacity chosen for comfortable access. For renters, I recommend a slim adhesive or clamp model only after checking the cabinet finish, product load rating, and clearance. That decision prevents the two most common disappointments, a holder that falls and a holder that technically fits but makes the coffee station harder to use.
PureHQ Inc. offers reusable K-Cups, stainless refillable pods, filters, cleaning tablets, and descaling solutions for compatible Keurig and other coffee systems. Visit PureHQ Inc. to choose the maintenance accessories that fit your brewer and complete your under-cabinet coffee station.

