
Coffee Machine Care
Keurig 2.0 K Cup Holder

Sep
You usually notice the Keurig 2.0 K-Cup holder only when the machine stops acting normal. The handle suddenly won't close. The screen throws an “Oops!” message. Or the brew starts, then spits wet grounds into the cup instead of a clean stream of coffee.
In a lot of 2.0 machines, that moment points back to one part people overlook. Not the pump first. Not the descaling light. The pack-holder assembly is the part that positions the pod, supports the puncture points, and helps the brewer read whether the pod is seated correctly. Treat it like a serviceable assembly, and the diagnosis gets much easier.
Why Your Keurig 2.0 K-Cup Holder Deserves Attention
Most owners start by blaming the pod or the machine electronics. I get why. Keurig made the 2.0 system more restrictive when it launched in fall 2014, using compatibility technology to limit unlicensed or older pods, and that change affected how people used pods, accessories, and holders across the platform, as described in the Keurig product history. When a brewer flashes an error, it's easy to assume the software is being fussy.
But the holder often creates the problem before the brewer does.
The part under the handle isn't just a cup-shaped insert. It's the physical gateway for the brew cycle. If it sits low, the pod can ride crooked. If the funnel is packed with old grounds, the exit path narrows. If one side tab gets tired, the whole assembly can feel installed even when it isn't fully locked.
Practical rule: If the lid won't latch cleanly or the pod area looks messy after brewing, inspect the holder before you chase pump or board issues.
What a bad holder looks like in real use
A worn holder usually gives itself away through small mechanical clues:
- The handle resists closing because the pod isn't sitting at the right height.
- The holder feels mushy on release instead of popping free with a crisp side-button action.
- Grounds collect outside the pod because the assembly isn't guiding the pack squarely into the needles.
- The brewer reads pods inconsistently because fit and seating aren't repeatable.
A lot of owners never inspect that assembly closely because it feels like part of the brewer body. It isn't. Keurig's own service materials treat the holder as a distinct module, and if you want a useful overview of how these removable parts fit into coffee makers generally, this guide to coffee maker parts is a good reference point.
Identifying the Pack-Holder Assembly on Keurig 2.0 Models
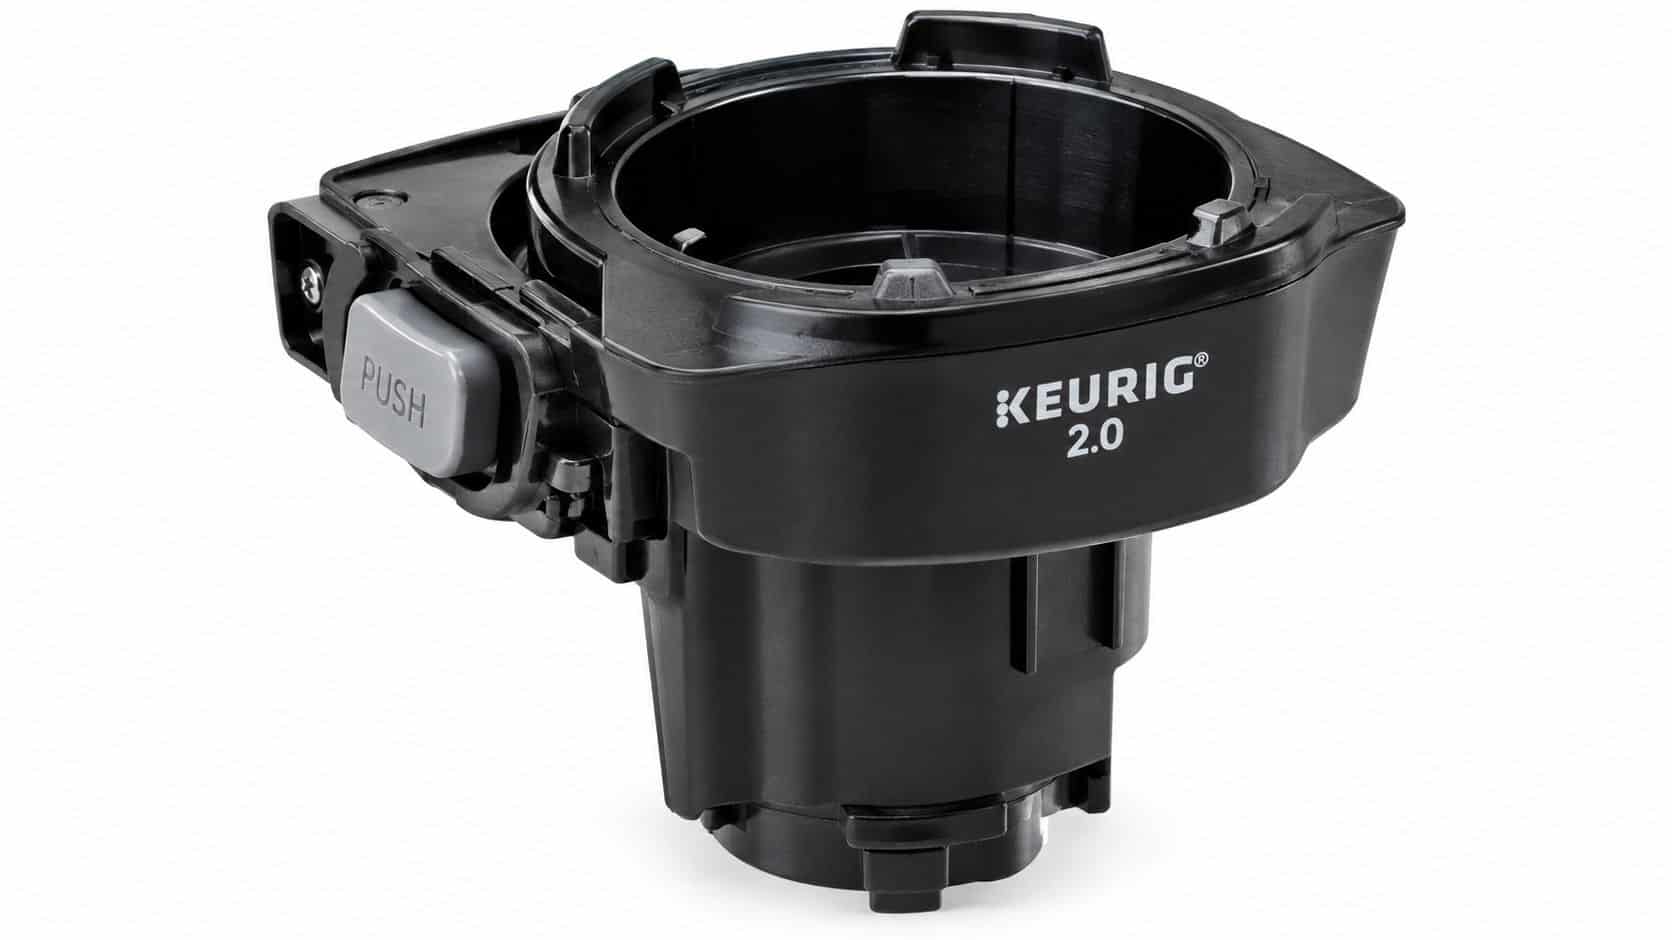
The first useful check is simple. Open the brewer and look at the removable insert under the brew head. That black plastic piece is the pack-holder assembly. On Keurig 2.0 machines, it's the part you remove, rinse, inspect, and sometimes replace as a unit.
What to put your hands on
On 2.0 brewers, the user manual identifies the K-Cup holder as part of the pack-holder assembly, and teardown guidance for K550-class units describes releasing side buttons to separate that assembly from the housing. Replacement-part guides also show the full holder assembly installing as one module, which is why many failures are handled by swapping the assembly rather than repairing tiny sub-parts in place, according to the Keurig K550 manual.
When you press the side buttons, pay attention to feel. A healthy assembly releases cleanly. A tired one may drag, stick halfway, or need extra finger pressure on one side.
Where damage usually shows up
Inspect these areas closely:
- Top rim: If the rim looks warped, the pod can sit off-center.
- Hinge-tab area: Small cracks here often turn into poor seating and latch issues.
- Funnel throat: Built-up grounds in the funnel can slow flow and push coffee where it shouldn't go.
- Lower puncture area: If coffee residue cakes around the exit point, brew pressure and drainage both suffer.
If grounds are pooling outside the pod instead of staying inside it, I don't assume a bad pod first. I assume the holder isn't guiding or sealing the pack correctly.
A quick diagnosis before you buy anything
Use the machine as your clue source. If the pod chamber closes awkwardly, if the holder doesn't sit flush after cleaning, or if release buttons feel uneven left to right, stop treating it as a generic clog. That's usually the point where cleaning may help, but replacement becomes a realistic answer.
How Keurig 2.0 Compatibility Affects Your Holder Choice
Keurig 2.0 machines don't brew any cup-shaped pod that fits the chamber. The system uses pack identification. Official user-guide material says K-Cup packs with the outside ring are recognized by the brewer, while K-Carafe packs use a distinct outside ring plus a green dot for carafe brewing, as shown in the Keurig 2.0 user guide.
That matters because the holder is a passive carrier. The scanner reads the pod, not the holder itself. But if the holder changes how high or how square that pod sits, the machine may act like the pack is wrong even when the pod is fine.
The compatibility problem most people miss
A generic holder can fail without looking broken. If the top lip sits slightly off, or the pod settles too deep into the funnel, the scanner may not register the pack the way the factory geometry expects. That's why people often blame pods when the issue is holder shape.
Keurig also states that 2.0 brewers won't work with packs that do not carry the Keurig Brewed seal or the Keurig logo, and some Keurig-brand pods made before January 2014 may not be enabled for the 2.0 system, according to the official Keurig 2.0 use and care guide.
For reusable options, there's another trap. Keurig 2.0 brewers are not compatible with the My K-Cup reusable filter accessory, as noted in the Keurig accessory documentation. If you're sorting through reusable pod options, this guide on which reusable K-Cup fits each Keurig style helps separate 2.0-safe choices from accessories that won't work.
Keurig 2.0 Holder Compatibility Checkpoints
| Checkpoint | Required Spec | Failure Symptom |
|---|---|---|
| Pod type | Keurig 2.0-compatible pack with recognized outside ring | “Oops!” or refusal to brew |
| Pack branding | Keurig Brewed seal or Keurig logo on supported packs | Pod rejection |
| Holder seating | Holder sits fully flush in the chamber | Handle won't close or scanner errors |
| Funnel geometry | Pod sits at proper height and doesn't rock | Intermittent read failures |
| Carafe use | Compatible K-Carafe pack and correct carafe seating | Carafe option doesn't appear |
Removing, Inspecting, and Reinstalling the K-Cup Holder
If the holder is the problem, the fix needs to be physical and specific. Don't just wipe around the chamber and hope. Pull the assembly out and inspect the parts that touch the pod and carry the flow path.
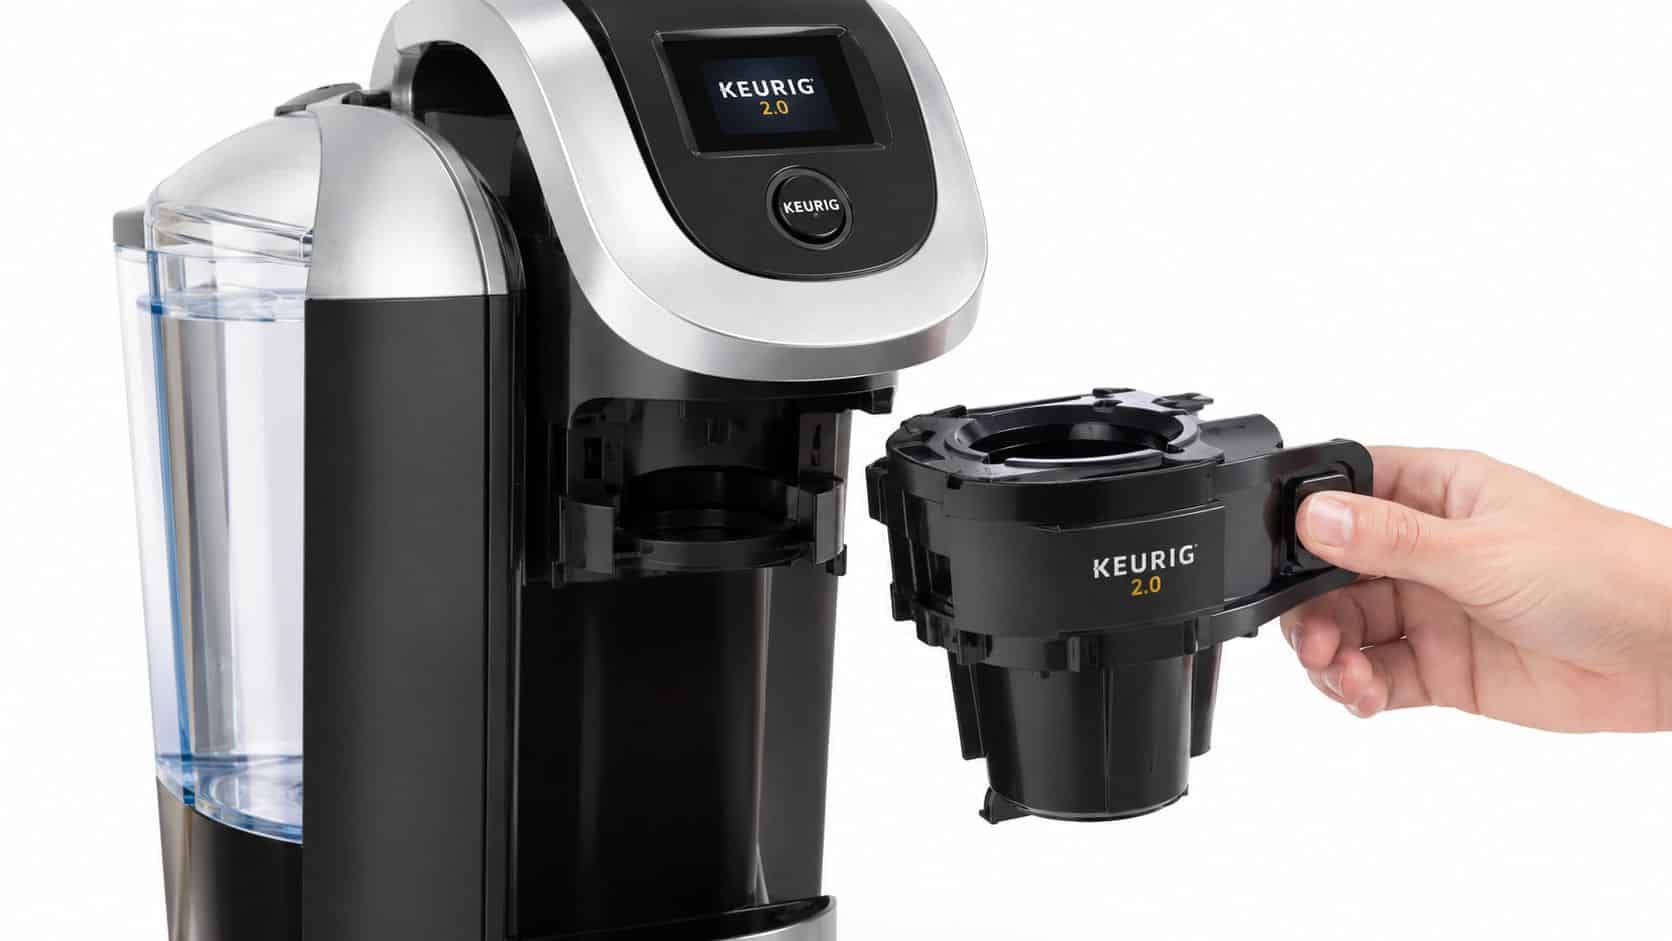
The practical repair sequence in Keurig service material is straightforward: open the brewer, remove the holder, inspect the needle and holder for clogs or damage, clear blockages, rinse the holder in warm water, reseat it firmly until it snaps in place, then run a water-only brew cycle to confirm flow and seating before normal use, based on the Keurig service guide.
The removal sequence that works
- Unplug the brewer first. You're working near puncture points, and the handle area needs to stay still.
- Lift the handle fully. That gives the holder enough room to drop free.
- Press the release points and remove the assembly. Don't pry on one side only. If it binds, re-center your grip and try again.
- Inspect the upper and lower puncture areas. Look for packed coffee, mineral crust, bent metal, or a rim that no longer looks even.
- Rinse under warm water. Let water run through the funnel and out the bottom.
- Clear the exit needle carefully if needed. A paper clip works for debris at the exit point. Don't gouge plastic around it.
- Dry the assembly and reinstall it squarely. Press it in until the tabs engage with a clean snap.
- Run a water-only brew cycle. Use no pod for this check.
What “seated” actually feels like
A properly installed holder doesn't wobble in the chamber. It sits flush, the side tabs engage, and the handle closes without that rubbery half-stop that tells you something is misaligned. If you have to push the handle harder than normal, pull the holder back out and try again.
A holder that's “almost in” causes some of the most confusing Keurig 2.0 symptoms. The machine may close, but brew quality and pod recognition won't be consistent.
A quick visual helps if you want to compare your machine's motion with a live removal example:
When cleaning isn't enough
Replace the assembly instead of reusing it if you find:
- A warped top edge that won't hold the pod level
- Cracks near side tabs or hinge points
- Persistent fit issues after reinstalling
- Needle damage that changes puncture shape
- Repeated grounds in the cup after a proper rinse and reseat
That's the dividing line. Dirt washes off. Distortion doesn't.
OEM Versus Third-Party Replacement Holders
Not every replacement holder behaves the same once it's inside a 2.0 brewer. With these machines, close-enough fit can still create scanner errors or latch problems.
OEM vs Third-Party Keurig 2.0 K-Cup Holders
| Feature | OEM Keurig Holder | Third-Party Holder |
|---|---|---|
| Fit in brew chamber | Usually matches factory seating and latch feel | Can vary by mold quality |
| Side-button release | Typically crisp and even | May feel stiff, soft, or uneven |
| Pod positioning | Usually consistent with original geometry | Can let pods sit slightly high or low |
| Needle alignment | Generally predictable | Depends on manufacturing consistency |
| Compatibility confidence | Better choice when the brewer is picky about pod reads | Fine in many machines, but less forgiving |
| Cost | Higher | Usually lower |
The real trade-off
OEM parts usually make sense when the machine already has pod-recognition problems. Keurig's 2.0 platform was highly controlled when it launched. One legal filing stated that Green Mountain estimated it controlled at least 86% of the compatible cup market, and another report described Keurig's market share as 86% of the K-Cup market around 2014, according to the Silverman v. Keurig complaint filing. In a system built around compatibility control, precise geometry matters.
Third-party holders still have a place. If your brewer mainly runs standard supported pods and you need a budget repair, an aftermarket assembly can work well. The objection I hear most is fit. That's fair. Some generic holders don't click in with the same firmness, and that soft fit is exactly what can turn a minor part swap into an “Oops!” chase.
The practical buying rule is simple. If your old holder failed from wear and your brewer has become fussy about pod recognition, lean OEM. If the original holder is physically broken and your machine was never scanner-sensitive, a decent third-party assembly can be enough.
Troubleshooting Common Keurig 2.0 Holder Problems
Most Keurig 2.0 holder complaints fall into a short list. The trick is separating a holder-level fault from a brewer-level fault before you buy parts you don't need.
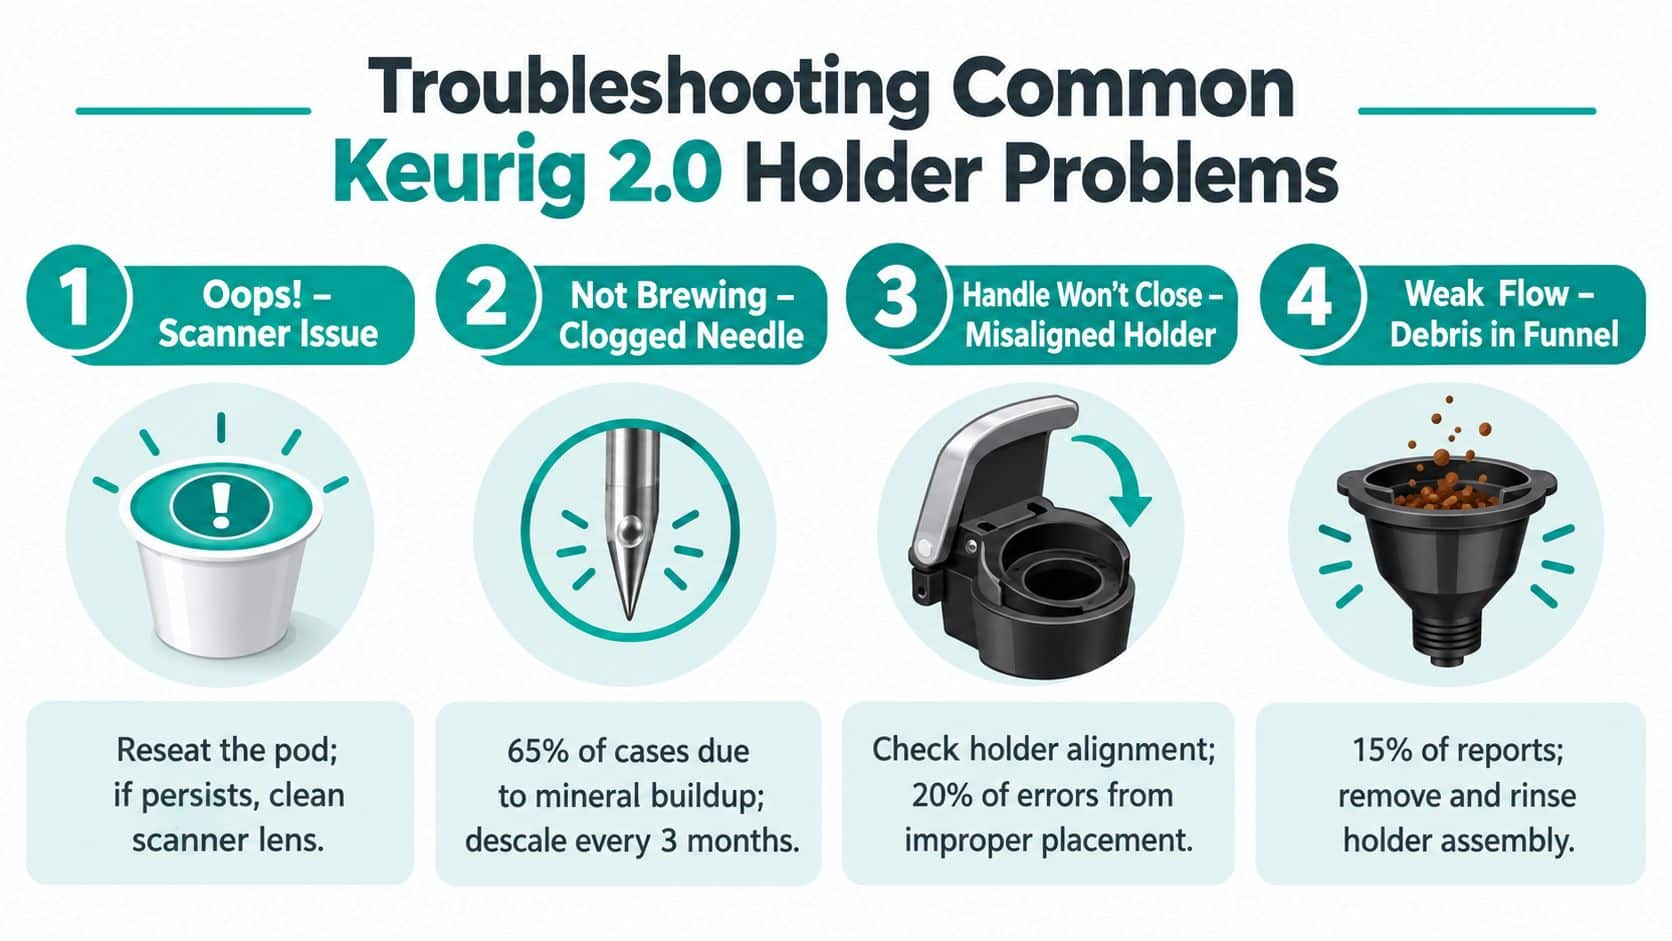
Independent troubleshooting reports keep circling back to the same weak spots: the removable holder, the entrance needle, and debris under the holder often drive failures that many people mistake for a general machine cleaning issue, as discussed in this Keurig 2.0 troubleshooting guide. If you also use reusable pods, this overview of a refillable K-Cup for Keurig 2.0 is useful because pod shape and holder fit can interact in ways that look like machine faults.
Four symptoms and what they usually mean
“Oops!” on screen
Start with the holder. Remove it, reinstall it, and make sure the rim sits flush. If supported pods still fail, the holder may be warped or the scanner area may need attention.You hear the click, but water doesn't dispense
Check the exit path in the holder first. A blocked lower puncture area or packed coffee in the funnel can stop flow even when the machine sounds normal.Grounds in the cup
This usually points to puncture or alignment trouble around the holder assembly. A crooked pod, damaged lower area, or poor seating is more likely than a pump problem.The lid won't latch
Most of the time, the holder isn't fully seated. Pull it out, inspect for cracks or warping, and reinstall until both sides lock properly.
If the handle won't close, don't force it. Forcing the lid can deform a marginal holder even more and create a second problem on top of the first.
When to stop blaming the holder
Some failures do belong to the brewer itself. Community troubleshooting also shows that compatibility errors can come from pod recognition issues, improper insertion, or pods the machine won't accept, and users continue to report needle-height or holder-fit issues that make the lid hard to close even when the pod looks fine, as noted in this Keurig 2.0 compatibility troubleshooting discussion.
If a confirmed good holder sits correctly, supported pods still won't read, and the machine's chamber is clean, the problem may be higher in the brewer than the holder.
Final Checks and Where to Buy the Right Replacement
After you install a replacement holder, don't judge success by whether the machine powers on. Judge it by one clean brew test. Run a water-only cycle into a large mug and watch for steady flow, a normal puncture drip pattern, and no return of the “Oops!” message. For carafe-capable units, remember that the brewer only enables carafe brewing after you insert a compatible K-Carafe pod and seat the carafe correctly, as described in the Best Buy Keurig 2.0 carafe compatibility note.
A short buying checklist
Look for these before you order:
- Model match: Make sure the listing clearly states Keurig 2.0 compatibility.
- Assembly type: Buy the full holder assembly when fit or tab wear is the issue.
- Photo accuracy: Avoid listings that show the My K-Cup accessory for a 2.0 repair.
- Return clarity: Useful when you're testing fit against an older machine.
Keurig expanded the 2.0 line in 2015 with the K200 series, announced on March 2, 2015, with availability beginning May 12, 2015 on Keurig.com and later at major retailers, and one source listed the least expensive Keurig 2.0 brewer at $149.99, according to the same legal filing referenced earlier. That wider rollout is one reason so many near-lookalike parts still circulate today. Double-checking fit matters.
If you're buying a new holder, it also makes sense to add a descaling solution and a charcoal water filter. A clean flow path helps the new assembly stay cleaner, and better water management reduces the residue that often builds around the pod area. For a third-party option, PureHQ offers Keurig accessory parts and maintenance items that fit the same upkeep routine as a holder replacement.
If your brewer's handle won't close cleanly or supported pods keep throwing read errors, the right fix is usually a properly fitting holder assembly, not another round of random cleaning. PureHQ Inc. offers Keurig-compatible accessories and maintenance items that make it easier to keep a 2.0 brewer running correctly, including the support items that often matter right after a holder swap.

