
Coffee Machine Care
How to Assemble a French Press the Right Way
Aug
You've opened a brand-new French press, but the lid sits slightly loose, the plunger leans at an odd angle, and a thin metal screen seems to have appeared from nowhere. You may even wonder whether a piece is missing. That uncertainty is common because a French press arrives as several nested parts, and a filter stack can look correct from the outside even when it's flipped, loose, or assembled in the wrong order.
Learning how to assemble a French press becomes much easier when you identify each part before fitting anything together. The basic design has remained recognizable for more than 170 years, from the pressed-filter device patented by Henri-Otto Mayer and Jacques-Victor Delforge in 1852 to later refinements in 1929 and 1958 (historical overview of the French press design). Once you know what each disk, spring, and crossbar does, assembly is a short, no-tools task.
Why Assembly Feels Harder Than It Looks
The first challenge isn't the glass carafe. It's the filter assembly. A new press may include a beaker, a plastic or metal frame, a lid, a rod, a crossbar, a spring, and one or more metal screens. Several parts are circular and shiny, so they can appear interchangeable even though their positions and orientations matter.
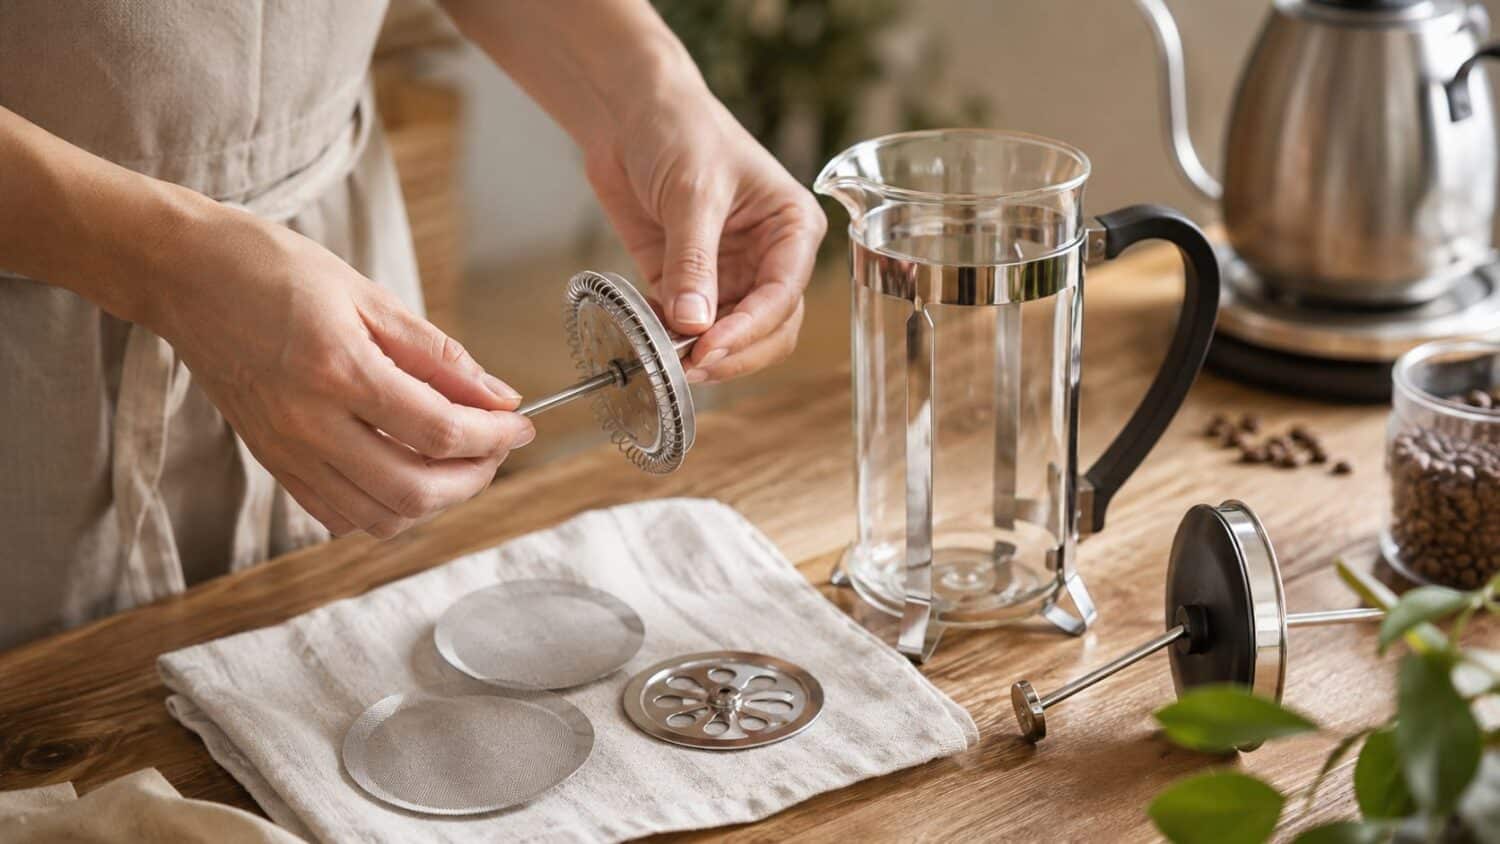
Start by placing every piece on a clean, dry towel. This simple layout keeps the small filter parts from rolling away and gives you a visual reference before you begin.
Identify the pieces before fitting them
The carafe or beaker is the cylindrical vessel that holds the coffee and water. If your press has a separate base or cage, that frame supports the vessel and helps it sit securely on the counter. Some models use plastic frames, while others use metal frames around glass or stainless-steel bodies.
The lid normally includes the pouring spout and a central opening for the plunger rod. The spout tells you which way the lid should face when you pour, while the opening guides the rod during pressing.
The plunger rod is the long shaft attached to the knob. At its lower end, the rod holds the filter stack. The crossbar, sometimes called a cross plate, anchors the stack against the rod. The mesh screen separates brewed liquid from coffee grounds. Some presses add a spring around the edge or a second mesh layer to improve contact with the carafe wall.
Practical rule: If a part looks unfamiliar, don't force it into place. Lay it beside the rod and filter disks first, then identify what it touches.
A useful visual introduction appears in this guide to what a French press coffee maker is. The important idea is reassuringly simple: the beaker holds the brew, the lid guides the plunger, and the filter stack moves through the liquid.
Meeting Every Part of Your Press
Hold the empty carafe by its frame or handle rather than gripping the rim. The glass beaker should sit evenly in its base, with no rocking. If you have a stainless-steel body, you'll still use the same assembly logic, but the body may be permanently integrated with the handle and base.
The lid is next. Its spout should line up with the handle or pour side, depending on the design. The lid doesn't need to create a pressure seal. It mainly covers the opening, retains heat during steeping, and keeps the plunger rod centered.
Follow the filter stack from top to bottom
The plunger rod passes through the lid and ends at the filter assembly. At the bottom, you may find a round mesh screen, a spring or crosshair-shaped support, and a crossbar that attaches to the threaded or press-fit end of the rod. Some models use a second mesh screen. Others combine the spring and plate into one molded or stamped piece.
The crossbar holds the screen in place. The mesh does the filtering. The spring pushes the outer edge of the filter toward the carafe wall, which helps reduce the path available for grounds to slip around the screen.
Don't assume every replacement part follows the same stack order as the original. Mixed-brand components can have different hole sizes, thread patterns, or plate shapes. A replacement screen may look compatible yet sit too high, tilt inside the spring, or leave a visible gap around its edge.
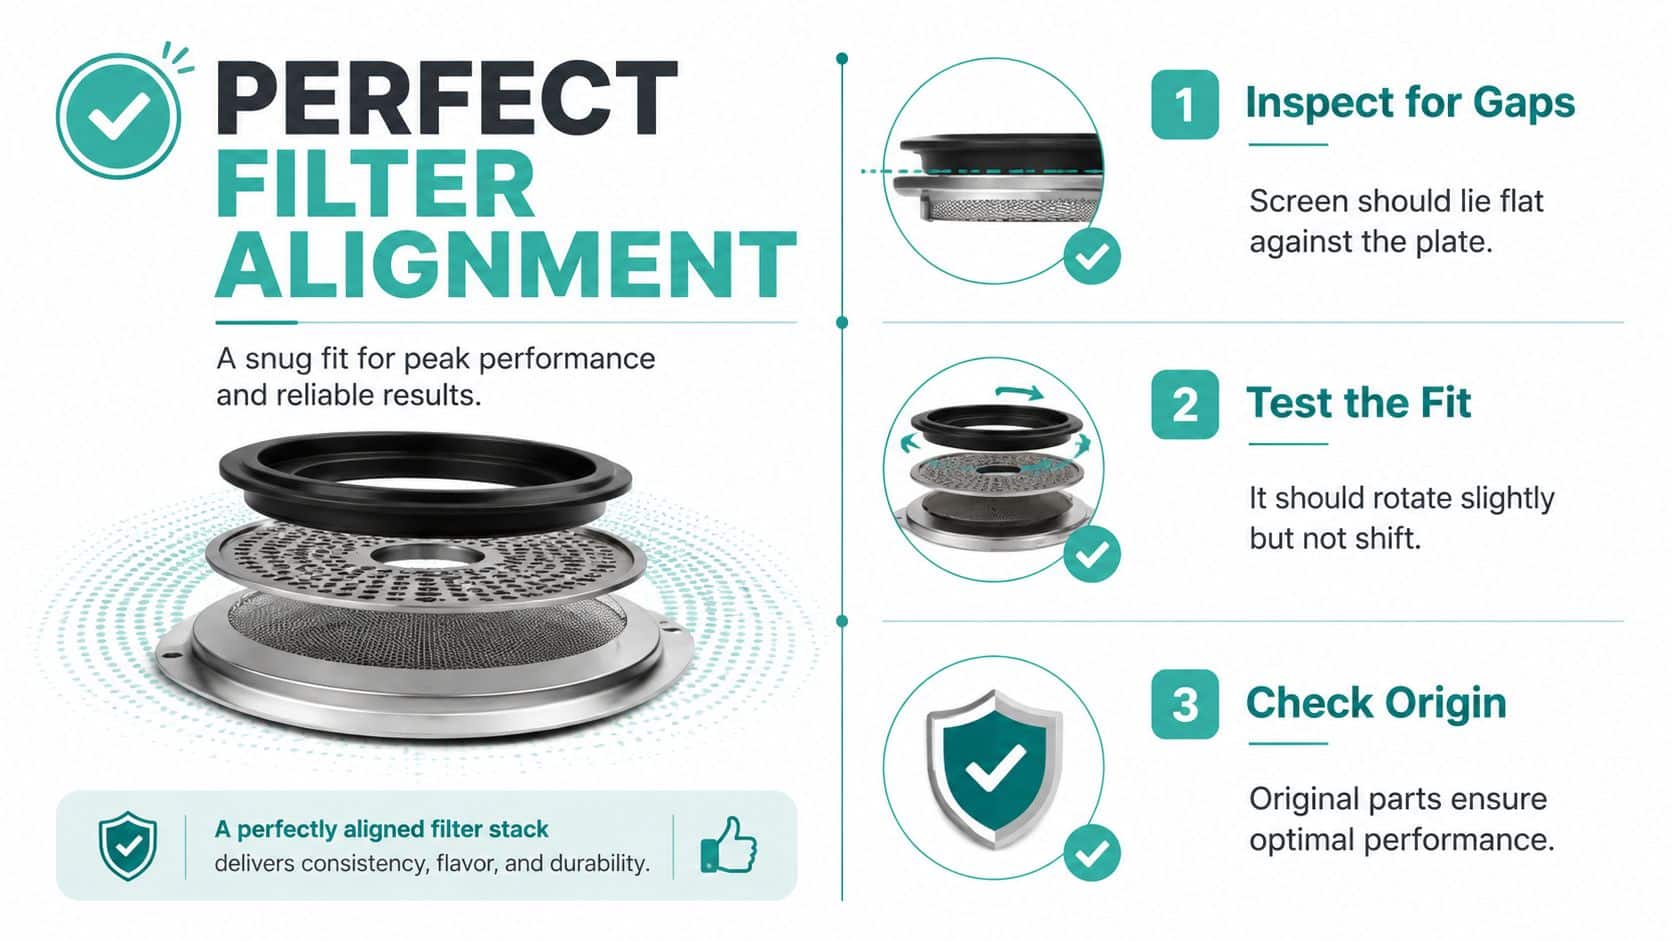
Before you attach anything, hold the screen against the spring and plate. The screen should sit flat, and the surrounding spring should contact it evenly. If the metal disk curls upward or shifts sideways, set it aside and inspect it for bending.
A complete parts line usually looks like this:
- Carafe and frame: The vessel stays stable while you brew.
- Lid and rod: The lid covers the opening and the rod moves through its center.
- Screen and spring: These parts separate grounds from liquid.
- Crossbar: This piece secures the lower filter layers to the rod.
Putting Your French Press Together Step by Step
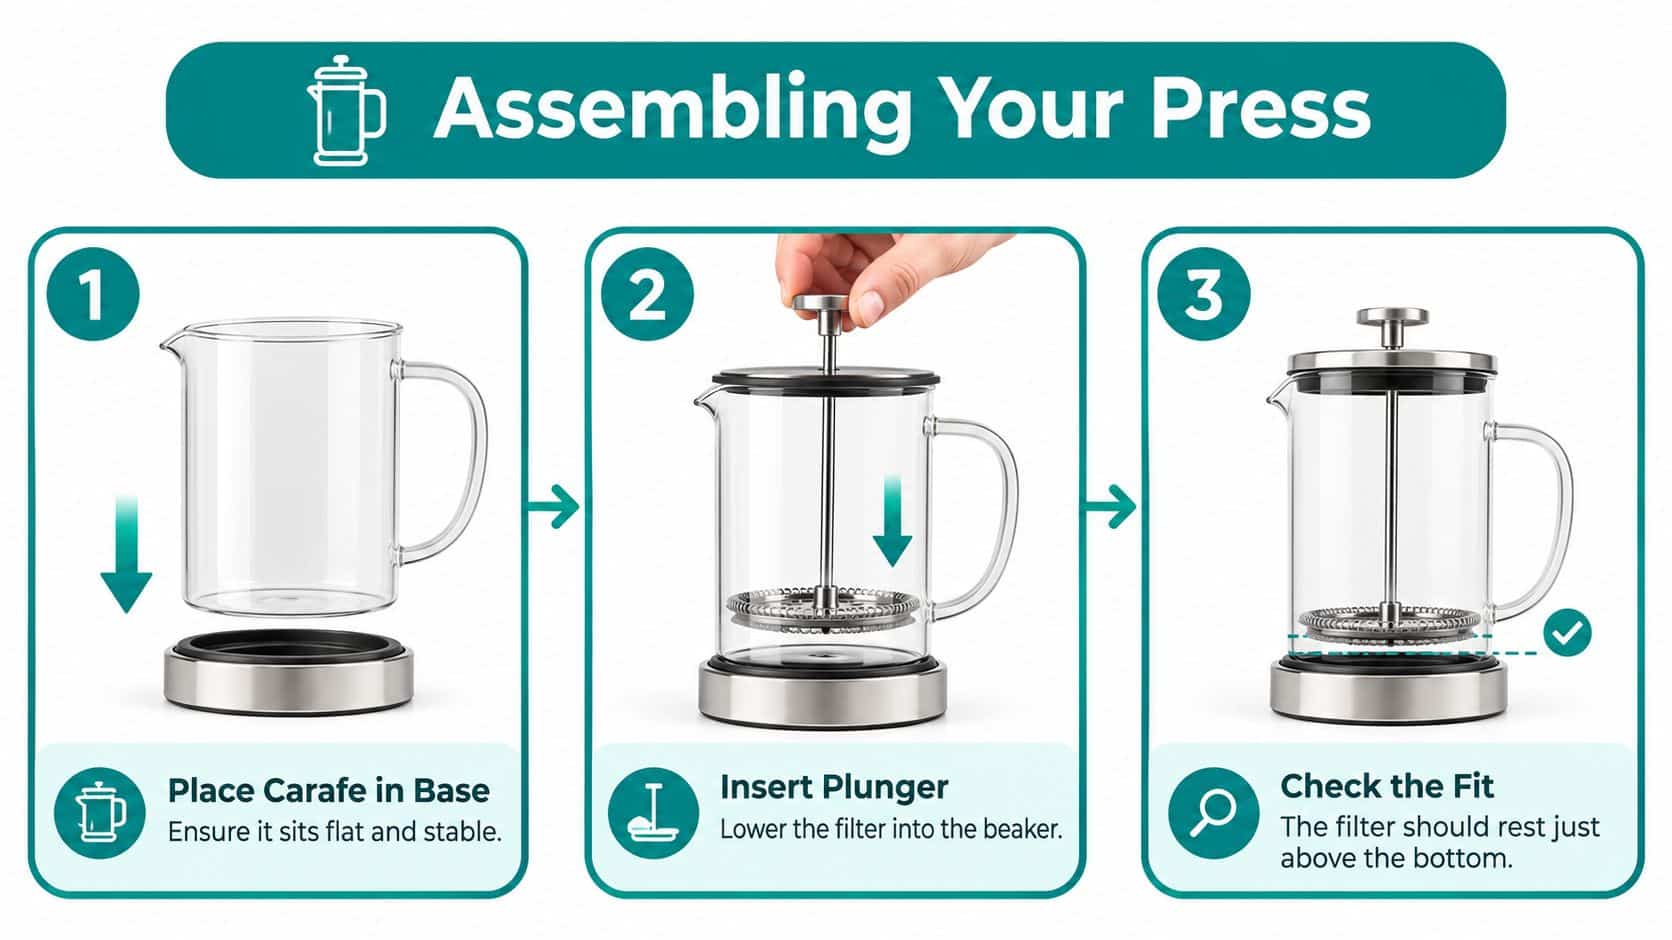
Set the carafe into its base or cage first. Press gently until it sits flat and stable. A frame that holds the glass at an angle can make the plunger appear misaligned later, so correct the foundation before touching the filter.
Pick up the plunger rod and find its lower end. Slide the main filter disk onto the rod with the mesh facing down, toward the bottom of the empty carafe. If your model includes a spring or a second mesh screen, place those components in the position they occupied in the original assembly. The exact hardware can vary, but the filter layers must remain centered and level.
Attach the crossbar across the bottom of the rod. Depending on the design, it may screw onto the rod or press into place. Tighten it only until the filter stack feels secure. A loose stack can let grounds bypass the screen, while excessive force can bend or deform the mesh, a problem also noted in French press filter assembly guidance.
Test the movement before brewing
Lower the assembled plunger into the empty carafe. The screen should enter without striking the glass, and the rod should move with steady, smooth resistance. A properly assembled plunger moves smoothly up and down, while a loose filter weakens the seal and an overtightened filter can deform the screen.
If the plunger scrapes one side, pull it out and check whether the screen is centered on the rod. Don't solve a sticking problem by pressing harder. The resistance usually indicates that the filter stack is tilted, warped, or too large for the carafe.
Place the lid on top of the carafe with the spout aligned for pouring. Guide the plunger rod through the lid opening, then raise the knob fully. The rod should travel freely without catching on the lid.
Finish with a quiet inspection. The filter should sit level, the lid should rest evenly on the rim, and the spout should point toward the intended pour side. A snug, aligned stack matters more than brand loyalty, because even an original-looking part performs poorly if it tilts or leaves gaps.
How to Know Your Filter Stack Is Truly Aligned
Look closely at the mesh before you brew. The screen should lie flat inside the circular plate, with no curled edge, folded section, or visible distortion. A bent edge can create a bypass route for grounds and can also make the plunger drag against the carafe.
Next, inspect the spring or crosshair support. Its pressure should reach the filter evenly rather than pushing one side higher than the other. The screen may rotate slightly when you handle the assembled rod, but it shouldn't shift loosely from side to side.
Use a dry plunger test
Insert the empty plunger into the carafe and move it slowly. You should feel consistent resistance through the stroke. If the plunger catches halfway, stalls on one side, or produces a metal-on-glass scraping sensation, remove the assembly and reseat the spring crosshairs.
You can also flip the mesh disk and repeat the test. A screen that behaves differently after flipping may have a bent rim or an uneven surface. If neither orientation works, the replacement part may not match the carafe diameter or rod hardware.
| Check | Correct result | Warning sign |
|---|---|---|
| Mesh surface | Lies flat inside the plate | Curled or raised edge |
| Spring support | Presses evenly around the screen | One side sits higher |
| Dry movement | Smooth, steady resistance | Sticking or scraping |
| Filter fit | Centered with no obvious gap | Grounds can pass around the edge |
A wrong assembly creates recognizable symptoms. Loose mesh can allow sediment into the cup. A tilted stack can make the plunger stop halfway. A screen that rubs the glass can damage the filter or create an unpleasant grinding sensation.
Premium Presses Versus Standard Glass Models Compared
A standard glass press makes the brewing process easy to observe, including the movement of the grounds and the settling bed. A premium stainless body offers a different experience, especially for someone concerned about drops or long-term handling. Double-mesh designs can reduce the amount of grit that reaches the cup, but their tighter fit makes alignment more important because extra drag becomes easier to feel.
| Feature | Standard Glass Press | Premium Stainless / Double-Mesh Press |
|---|---|---|
| Body | Glass lets you watch the brew, but it requires careful handling | Stainless steel hides the brew but tolerates drops more readily |
| Heat behavior | The carafe can lose heat more quickly if you skip preheating | The metal body generally retains heat well |
| Filter design | A single mesh screen is common | Double-mesh or finer-weave designs may reduce sediment |
| Plunger feel | A correctly fitted screen usually moves easily | A tighter filter can create more drag |
| Replacement fit | Generic screens may not match the original diameter | Replacement compatibility still depends on the exact design |
| Main objection | Concern about cracking or replacement parts | Concern about hidden coffee and a tight, binding plunger |
Premium construction doesn't automatically solve a fit problem. A stainless press can still leak grounds if its filter stack is loose, and a double-mesh screen can still bind if the parts are installed unevenly. Choose the model and replacement parts as a system rather than assuming every circular screen is universal.
For owners comparing brewing equipment more broadly, this guide to glass French presses helps frame the trade-off between visibility and durability. If you also enjoy whisked tea, the same interest in careful preparation carries over to learning how to make cafe quality matcha at home.
Your First Brew After Assembly Without the Guesswork
Warm the empty carafe with hot water, then discard that water. Preheating prevents the vessel from pulling heat away from the brew, which supports more consistent extraction.
Add coarsely ground coffee using a 1:15 coffee-to-water ratio, or about 67 grams of coffee for 1,000 milliliters of water (French press ratio reference). Pour water around 93 to 96°C, or 200 to 205°F, as recommended in this French press brewing guide. Start the timer as the water reaches the coffee bed.
Give the grounds one gentle stir so the water reaches the whole bed. Set the lid on top with the plunger fully raised, then let the coffee steep for four minutes. This keeps the filter ready without pressing grounds prematurely.
Press slowly and steadily. Stop when the filter reaches the settled grounds rather than forcing it deeper.
Serve promptly after pressing. If you leave the brewed coffee over the grounds, extraction continues and the cup can become muddier or more bitter. Rinse the mesh under hot water immediately, and use this French press grind-size guide when you need to adjust the texture of your grounds.
Quick Troubleshooting and a Confident First Cup
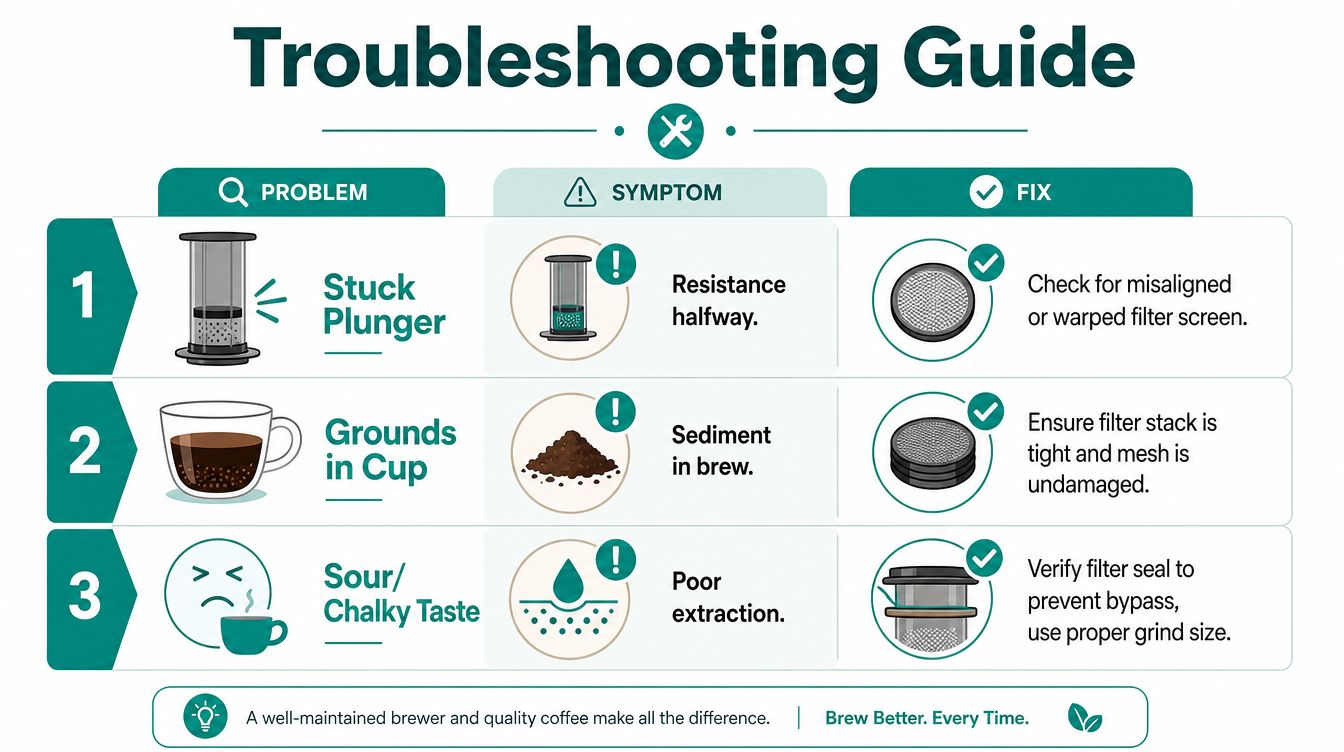
A sticking plunger usually points to a warped or off-center screen. Remove the rod, reseat the spring crosshairs, and check that the mesh lies flat. If the screen remains curled, replace it rather than forcing the rod through the carafe.
Grounds in the cup usually indicate a loose filter edge, damaged mesh, or a replacement part that doesn't match the press. Coffee that tastes sour or chalky can also signal poor brewing conditions, so verify the filter seal and keep the water below 200°F when adjusting the brew, using the temperature guidance in the French press brewing guide.
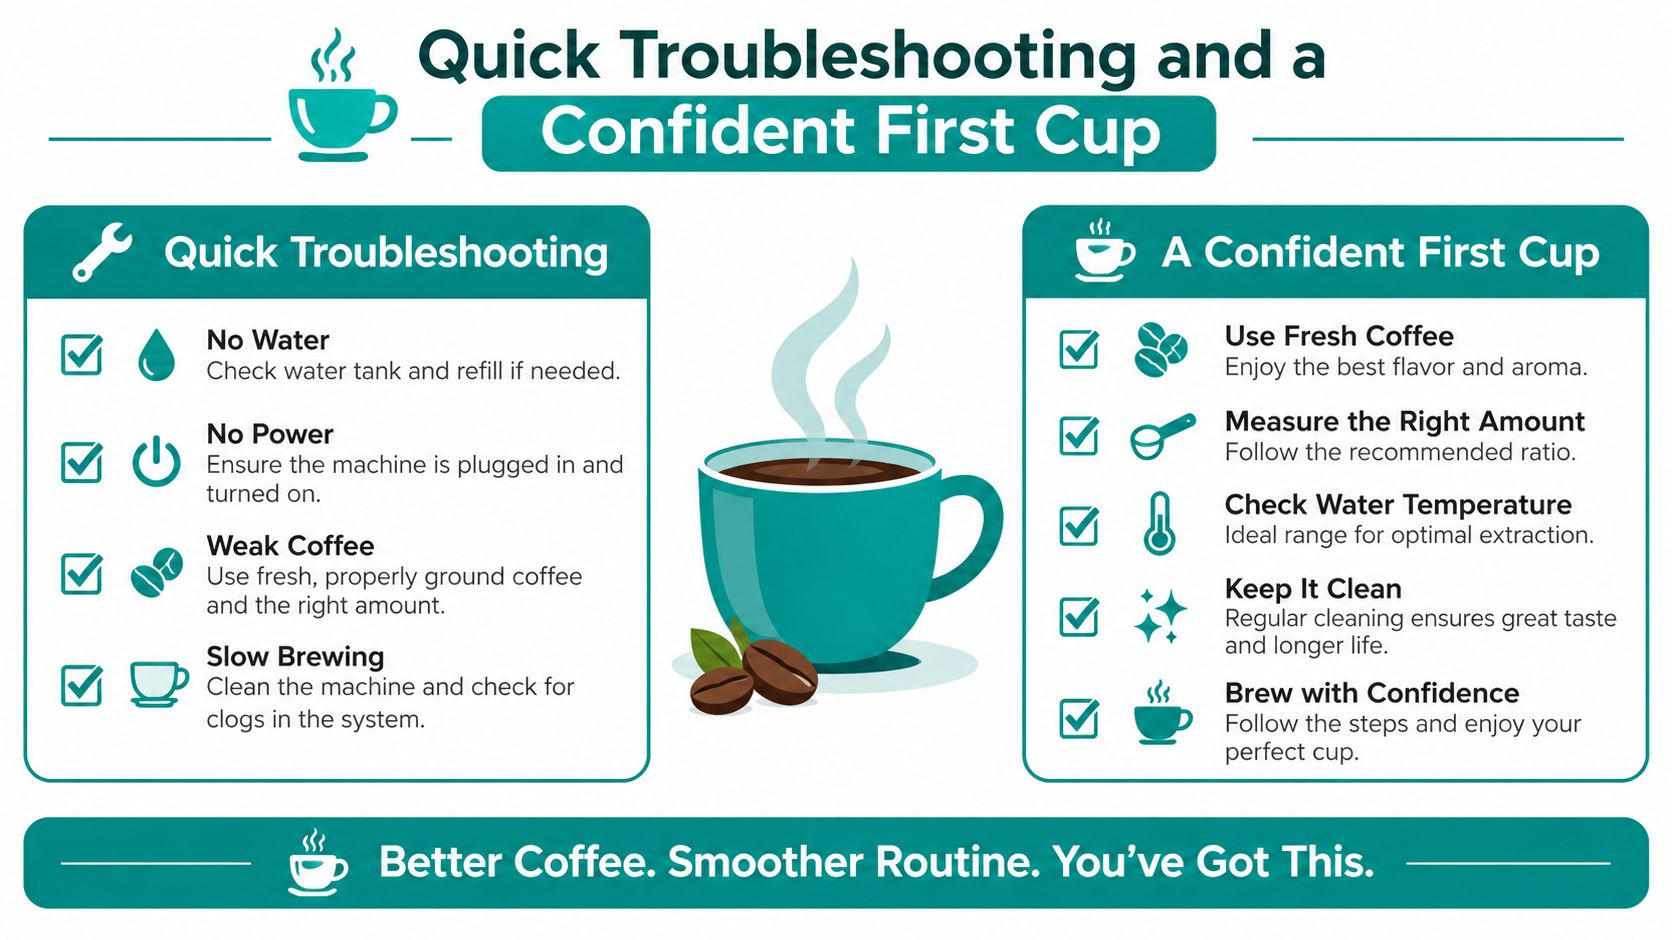
A careful owner gets better results than someone who tightens every part as hard as possible. Before your next brew, confirm four points:
- Parts are accounted for: The carafe, frame, lid, rod, screen, spring, and crossbar are present.
- Plunger movement is smooth: The rod travels without scraping or stopping.
- Lid alignment is clean: The spout points toward the pour side.
- The cup tastes balanced: Sediment and harshness aren't dominating the brew.
For readers who want a cleaner maintenance routine, PureHQ Inc. offers reusable coffee filters, universal descaling solutions, and cleaning tablets for compatible coffee equipment. Visit PureHQ Inc. to explore maintenance accessories that can support a simpler, lower-waste home brewing setup.

