
Coffee Machine Care
Water Filter Installation for Keurig, Ninja, and Breville
Aug
You're halfway through making coffee when you notice the filter holder is empty, the old cartridge is well past its useful life, or the new charcoal cartridge is still dry on the counter. You drop it into the reservoir, start a brew, and get sputtering, a weak cup, or a slow leak under the machine.
That failure usually isn't caused by the coffee maker. Water filter installation is a small plumbing job, even inside a Keurig, Ninja DualBrew, or Breville. Direction, priming, sealing, and flushing all affect how water reaches the brewer. The process is manageable for most home and small-office machines, but the small details decide whether the first cup tastes clean or like wet charcoal.
What Most People Get Wrong About Water Filter Installation
A pitcher filter is forgiving. You pull out the old cartridge, drop in the replacement, and fill the pitcher. A coffee machine filter holder isn't quite so generous. The cartridge has to sit in the correct position, the spring and mesh cap must remain aligned, and the holder must lock into its mount without disturbing the reservoir float.
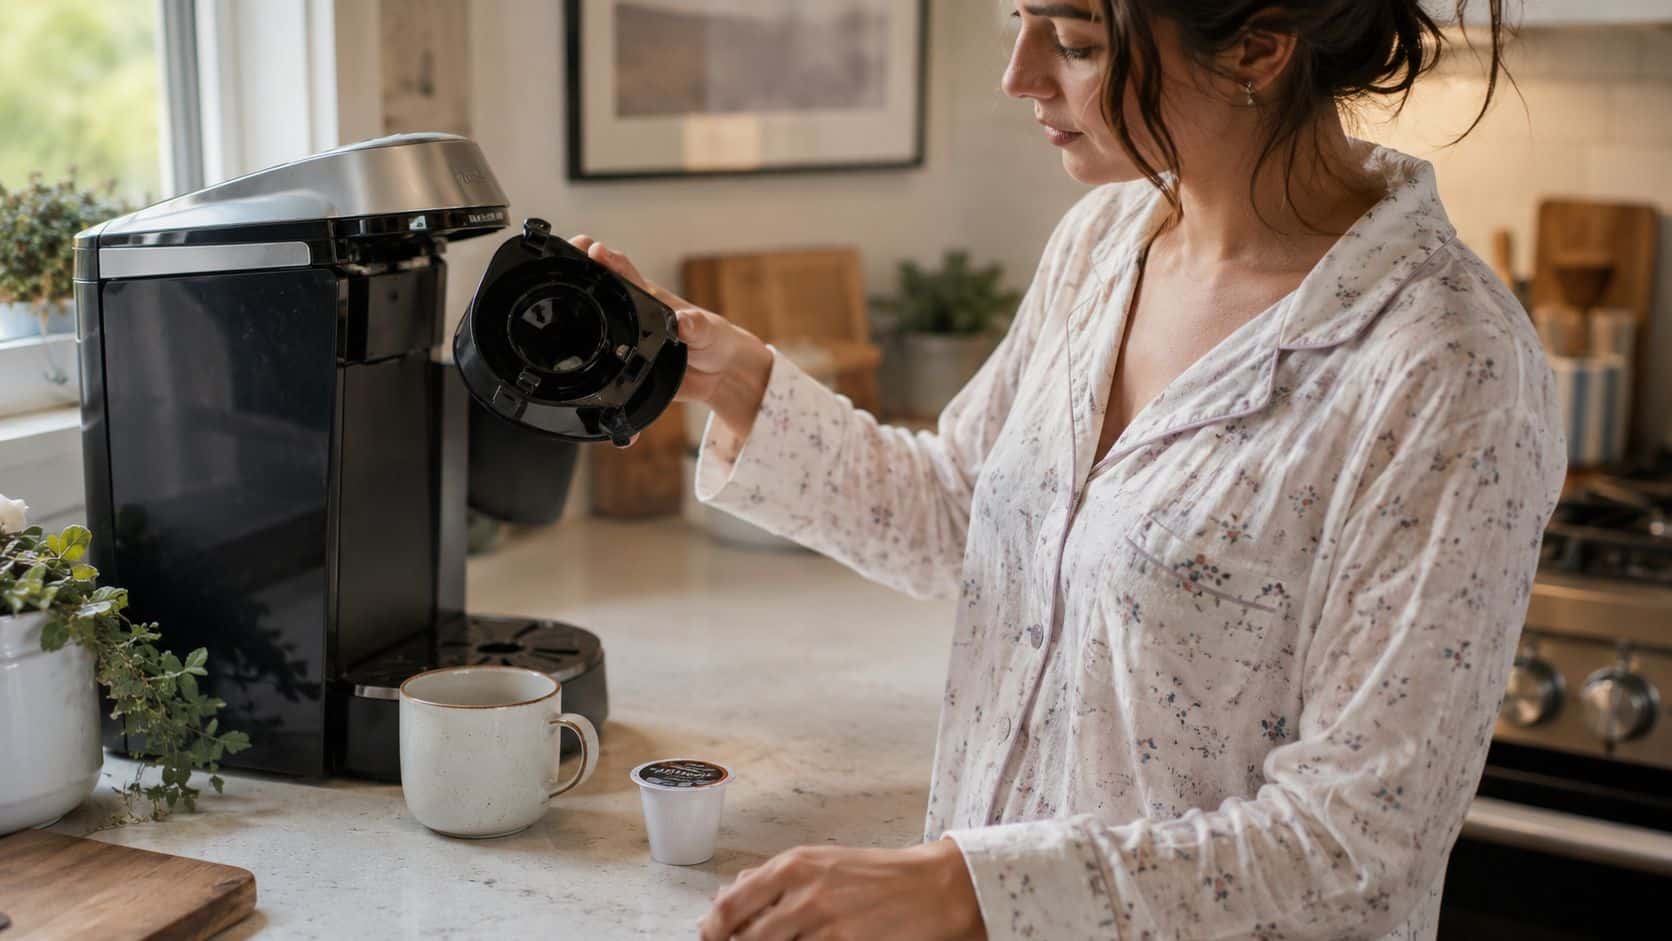
The first common mistake is installing a dry carbon cartridge. Dry carbon contains trapped air, so water can move around the media unevenly during the first few cycles. The machine may hiss, spit, or deliver a cup that tastes dusty. A short cold-water soak gives the media time to saturate before the cartridge enters the holder.
The second mistake is treating the holder as if it has no orientation. Keurig-style holders commonly use a lower assembly, a spring, and a small mesh cap. If the spring sits upside down or the cap doesn't cover the cartridge properly, the filter can rattle, float, or fail to seat. An incorrectly positioned O-ring creates a different problem, a slow leak that may not appear until the reservoir is full.
Practical rule: If the holder doesn't seat with light, controlled pressure, stop and inspect it. Forcing the assembly can damage plastic parts or distort the seal.
The same principle applies to larger under-sink systems. Installation guidance recommends checking clearance for future cartridge changes, using the cold-water line only, confirming acceptable inlet pressure, and restoring flow gradually while inspecting every joint. One independent guide cites roughly 40 to 60 PSI as an ideal operating range and says pressure below about 30 PSI may be unsuitable for reliable performance. The under-sink installation guidance also estimates about 45 to 60 minutes for a basic carbon system and about 90 minutes for reverse osmosis because RO systems add a tank and drain connection.
For a brewer, the job is smaller, but the failure modes are familiar: trapped air, reversed flow, poor seating, and skipped flushing. Get those points right and the machine usually needs nothing more complicated than a clean reservoir, a compatible cartridge, and a deliberate test cycle.
Pre-Install Checklist and Tools You Actually Need
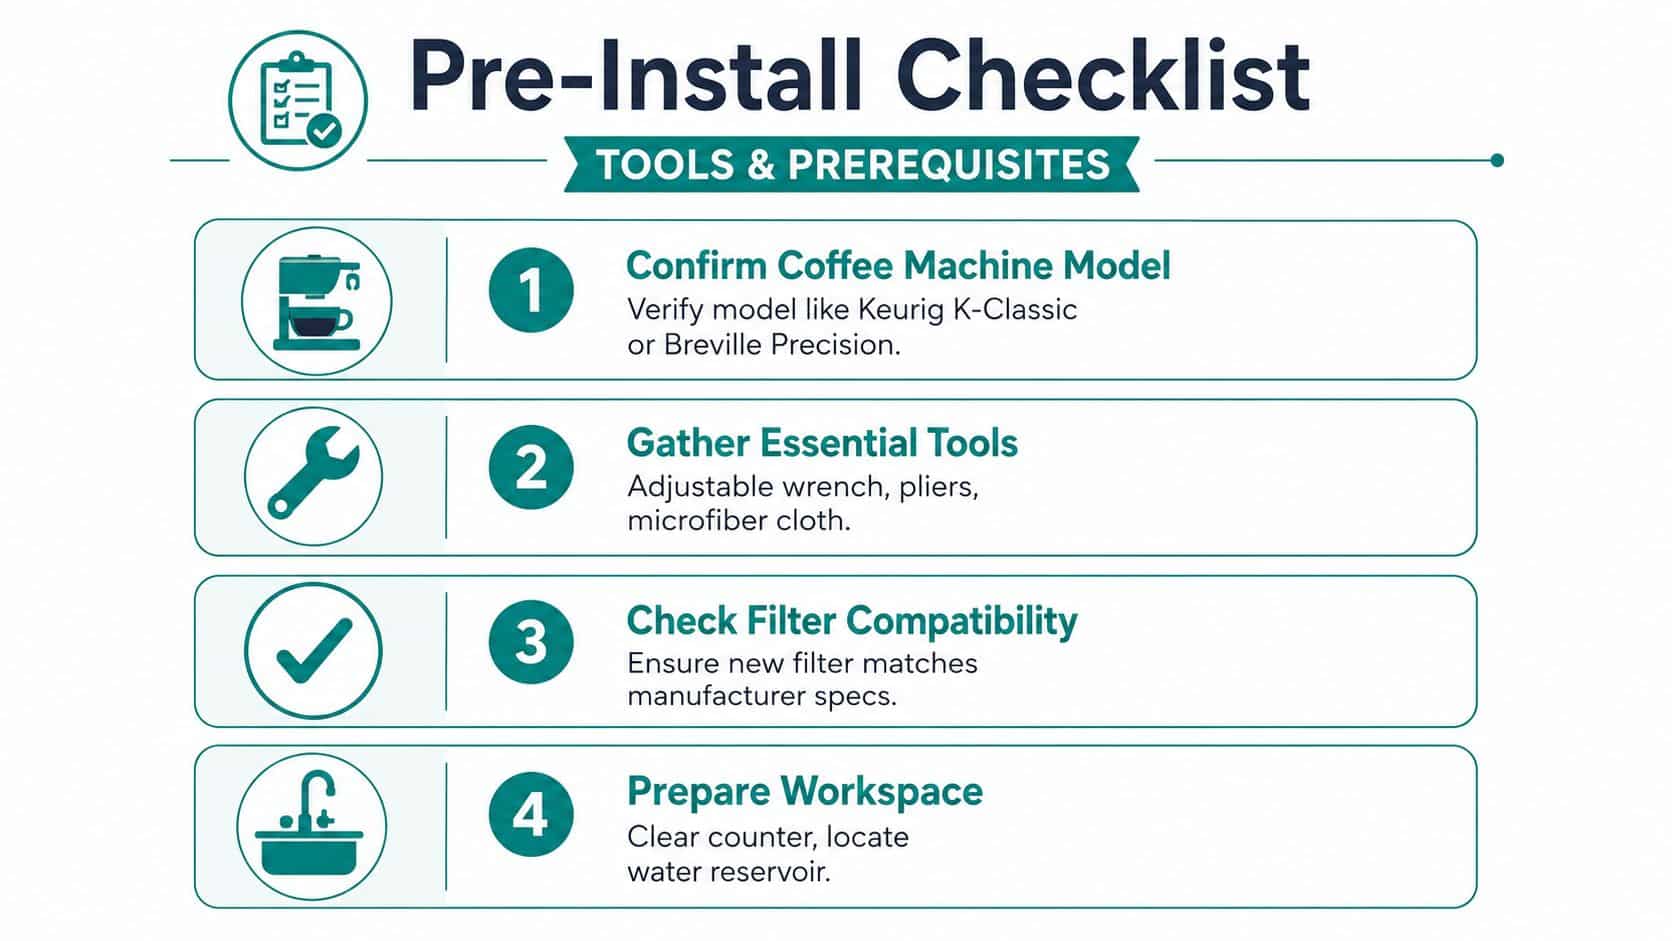
Start with the exact machine model. A filter holder for a Keurig K-Classic may not match the arrangement used by a K-Supreme, K-Slim, K-Duo Gen 2, K-Duo Essentials, Ninja DualBrew, or Breville Barista line. Check the brewer's manual or the replacement product specifications before opening the cartridge package.
Set the machine on a stable, flat workspace near a sink. Remove the reservoir, empty old water, and rinse away loose sediment. Don't use hot water as a substitute for flushing. Hot water can stress or damage filtration media in systems designed for cold-water operation, while proper flushing moves trapped air and loose carbon particles through the intended water path.
Gather only what helps:
- Clean gripping tools: Tongs or tweezers can lift a stubborn filter basket without tearing the mesh.
- A soaking cup: Use a clean cup filled with fresh cold water for the charcoal cartridge.
- A soft cloth: Wipe the reservoir seat, holder well, and counter before you reinstall anything.
- Fresh filtered water: Keep enough water available for soaking and the first clean cycles.
- The machine manual: Use it to locate the filter reminder, reset procedure, and holder orientation.
If you're working on an under-sink filter rather than an in-machine cartridge, shut off the cold-water supply before disconnecting any tubing. Verify the inlet and outlet direction, leave enough cabinet clearance for future changes, and inspect the O-rings or gaskets before restoring pressure. The PureHQ guide to testing water hardness can also help you decide whether local water conditions justify a shorter maintenance rhythm.
Before inserting the cartridge, inspect three points: the direction arrow, the O-ring position, and the connection type. The arrow must follow water flow. The O-ring must lie flat in its groove rather than ride up the side. Under a sink, the connection must use the cold-water line, never the hot line.
Everything before installation should take longer than the installation itself. That pause prevents most half-finished swaps.
Removing the Old Filter and Prepping the New One
Keurig-style filter holders typically sit inside or behind the water reservoir. Remove the reservoir first so you can see the holder clearly. Hold the filter assembly by its handle and pull it upward with steady pressure. Don't yank on the float or use the float arm as a grip, because that part controls water-level sensing and can move independently of the filter holder.
Discard the old cartridge instead of trying to reinstall it when the carbon has been in service for an unknown period, smells stale, or has visible buildup. Reusing a questionable cartridge transfers the original problem into the fresh setup. Once the holder is out, rinse the plastic parts with warm water and wipe the well with a soft cloth. Skip soap, because residue can linger in the holder and affect the next brews.
Build the cartridge in the correct order
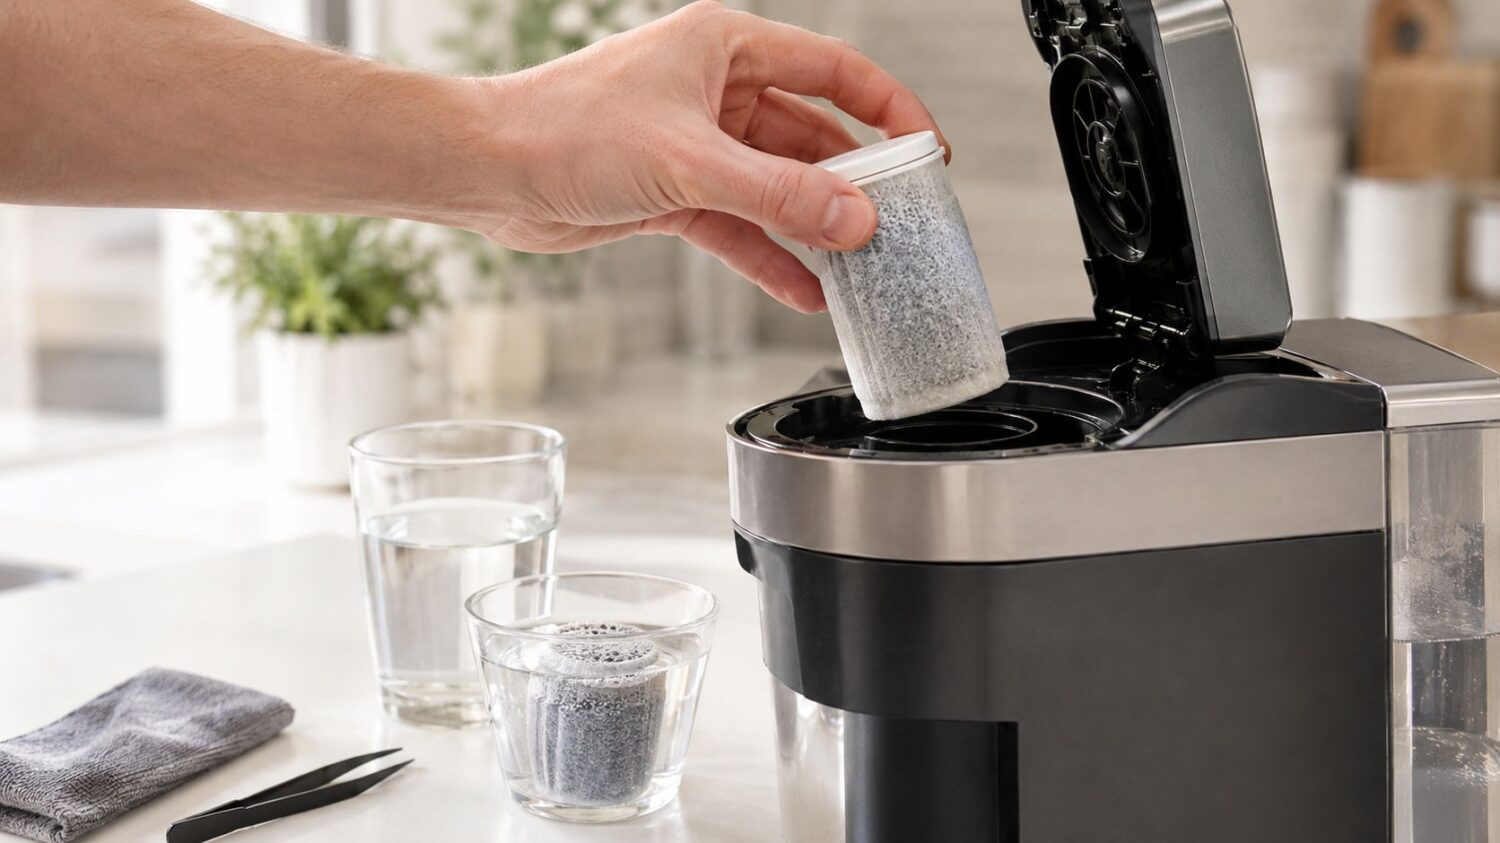
Place the new charcoal filter in a cup of fresh cold water. A soak of about 5 minutes, or until the bubbles stop, helps saturate the carbon before the machine pushes water through it. Dry carbon can make a faint rattling sound, almost like cereal in a small box, and it often releases more fines during the first contact with water.
While the cartridge soaks, inspect the holder:
- Check the spring: Position it according to the holder design, usually beneath the cartridge so it pushes the filter upward into the mesh cap.
- Fit the mesh cap: The cap should cover the cartridge evenly and remain flush with the surrounding plastic.
- Insert the soaked cartridge: Push it down without twisting it sideways.
- Confirm the seat: You should feel a small click or a clear stop when the cartridge reaches its intended position.
A loose fit deserves attention. Generic cartridges sometimes have slightly different dimensions, and a holder that allows movement may not seal or filter consistently. Don't add tape, extra plastic, or improvised packing material. Those changes can obstruct flow or prevent the holder from locking into the reservoir.
Reinstall without disturbing the float
Lower the assembled holder into its mount using the handle. Keep the assembly vertical, align its guide points, and press until it locks down. Move the float gently to confirm it isn't trapped beneath the holder. The reservoir should sit flat on the brewer without rocking.
For Breville-compatible cartridges, use the same basic discipline, but follow the holder's specific click-in arrangement. A cartridge that looks installed from above may still be tilted inside the tank, so check the seating point before filling the reservoir.
Priming, Flushing, and Testing the New Filter
The first water cycles are part of the installation, not wasted coffee preparation. Once the reservoir is seated, fill it with clean water and run a brew cycle without a pod. Select a large cup setting when the brewer offers one and dispense into the sink.
For Keurig machines, treat the first 2 to 3 brews as flush cycles, not drinks. Carbon fines and trapped air may make the water look faintly gray or give it a dusty taste at first. Continue until the water runs clear and the machine dispenses without coughing or stopping.
Match the flush to the brewer
Keurig models vary in their reminder controls. After the cartridge is installed and flushed, reset the filter reminder or descale-related notification using the machine's manual. A reminder that remains active doesn't necessarily mean the new cartridge failed. It may mean the brewer hasn't received the reset sequence.
The Ninja DualBrew uses a filter indicator on the side. After installing a compatible cartridge, run the recommended two-cup flush without coffee. Watch the water stream rather than relying only on the indicator. A full-volume stream with no sputtering tells you more about the immediate installation than a light alone.
Breville-compatible charcoal filters need a proper pre-soak before they enter the tank. Run water through the tank separately during the initial flush, then reinstall the tank and test the machine's delivery path. This separates loose carbon from the coffee circuit before you judge the taste.
The EPA advises following the manufacturer's instructions exactly, assembling every included part, and priming cartridges after installation. Its water-filter installation guidance supports treating setup and post-installation use as one process rather than stopping when the cartridge is physically in place.
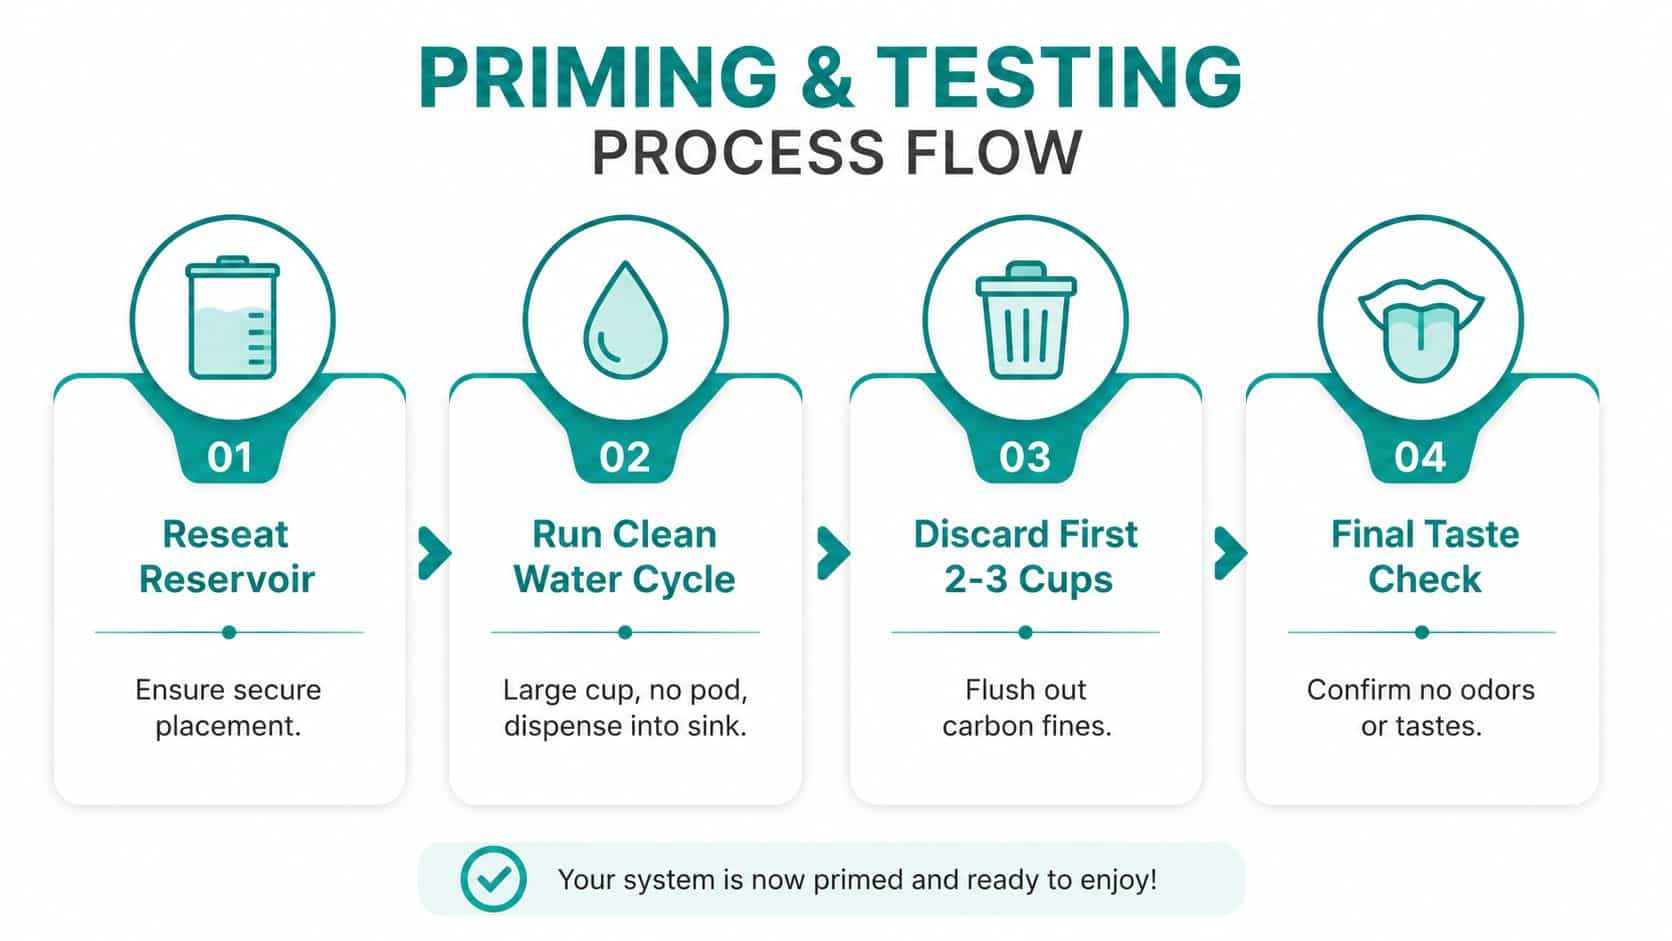
Use this quick test after flushing:
- Volume: The brewer delivers the selected cup size without stopping early.
- Flow: Water comes out in a steady stream instead of sputtering or spitting.
- Taste: The water has no plastic, dusty, or charcoal flavor.
For a broader maintenance walkthrough, use this coffee maker water filter replacement guide.
If the machine passes all three checks, brew coffee only after the flush water tastes neutral. If it fails one, don't compensate by grinding finer or changing the pod. Diagnose the filter seating and water path first.
Reusable Filters vs Standard Cartridges Worth the Upgrade
The right replacement depends on what you value. A reusable filter can reduce disposable-cartridge waste and let you refill the housing, while a standard cartridge offers a simpler swap. Neither option works well if it fits loosely, seals poorly, or forces water around the media instead of through it.
Evaluate four practical points:
- Fit: The filter must match the holder and sit at the same height as the original cartridge. A loose generic unit can rock inside the basket and create inconsistent water contact.
- Durability: Reusable designs need a holder that tolerates repeated cleaning and handling. A durable material doesn't help if the mesh cap or latch wears out first.
- Taste: Carbon needs meaningful contact with the water. A refillable pod packed too loosely can let water shortcut the media, while an overpacked pod can restrict flow.
- Long-term value: Compare refill media, cleaning effort, and replacement parts with the convenience of sealed cartridges. The useful figure is your cost per cup over the period you expect to keep the brewer.
Fit beats price: A cheap filter that shifts inside the holder can create more trouble than a standard cartridge that locks in cleanly.
Side-by-side comparison
| Filter Type | Fit & Sealing | Taste Impact | Replace Every | Cost Per Cup |
|---|---|---|---|---|
| Reusable stainless steel or refillable pod | Depends on exact holder compatibility and correct packing | Can provide consistent filtration when carbon stays evenly contained | Refill and clean according to condition | Usually calculated from refill media and cleaning supplies |
| Generic paper cartridge | May fit loosely across models | Can work well when the cartridge seals and the carbon is properly flushed | Replace when taste, flow, or service condition calls for it | Depends on purchase price and replacement frequency |
| OEM cartridge | Designed for the matching machine family | Predictable when installed and flushed correctly | Follow the machine or cartridge guidance | Depends on cartridge price and usage |
A reusable option makes sense for owners who want control over refill material and less dependence on sealed cartridges. It doesn't make sense when the pod requires force, leaves gaps around the holder, or repeatedly causes cloudy water after proper flushing.
Standard cartridges suit offices and shared kitchens where the next person needs a simple, low-judgment swap. OEM units generally reduce compatibility uncertainty, but a well-made compatible cartridge can also work when its dimensions and holder interface match the brewer.
PureHQ Inc. offers refillable pods and compatible water-filter accessories for Keurig families, Ninja DualBrew models, and selected Breville setups. Pairing a refillable pod or replacement cartridge with descaling tablets keeps the filter task separate from mineral removal, which is important because those products address different parts of the machine.
Maintenance Schedule That Keeps Your Machine Happy
A filter swap only works if the calendar continues after installation. Most small brewers don't measure cartridge life directly, so record the installation date and use a reminder based on time, gallons, or the machine's own indicator.
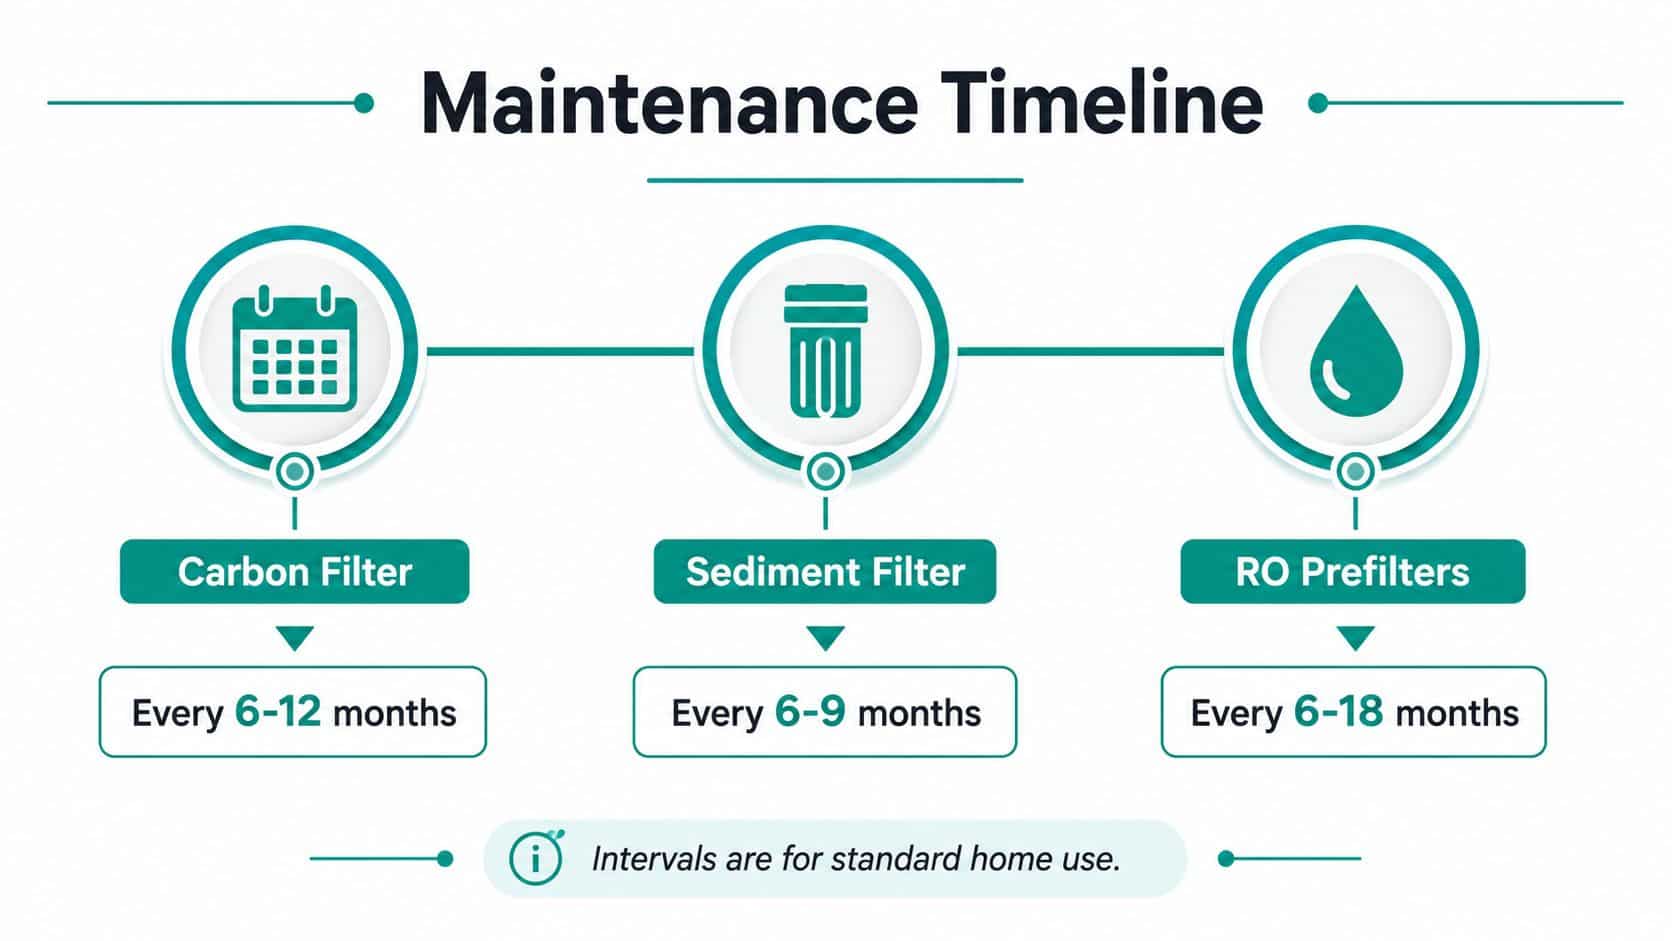
Pentair publishes these service ranges for common filtration types: carbon filters every 6 to 12 months, sediment filters every 6 to 9 months in homes, and reverse-osmosis prefilters every 6 to 18 months. Its filter replacement guidance also says RO membranes typically last about two years. Those intervals describe filter categories rather than a universal coffee-machine rule, so use them as a reference point and follow your brewer's instructions first.
| Filter type | Published interval | Practical use |
|---|---|---|
| Carbon filter | 6 to 12 months | A useful reference for in-machine charcoal cartridges |
| Sediment filter in a home | 6 to 9 months | Relevant to systems handling visible particulate load |
| RO prefilter | 6 to 18 months | Applies to RO stages, not a small reservoir cartridge |
| RO membrane | About 2 years | Requires system-specific testing and maintenance |
Hard water, heavy use, and a reservoir that sits warm between brews can shorten the useful interval. If mineral content is a concern, adjust the schedule conservatively rather than waiting for a bitter cup or a visibly restricted stream. A whole-home softener may reduce mineral load, but it doesn't remove the need to follow the coffee machine manufacturer's filter instructions.
The EPA recommends using only a cartridge compatible with the filter system and following the manufacturer's replacement directions. If the unit has no indicator light, its maintenance guidance says to track days or gallons since installation and set a replacement reminder.
Descaling and filter replacement solve different problems. The filter treats water before brewing, while descaling removes mineral deposits from internal water paths. Use calcium deposit removal guidance for coffee machines when buildup affects heating or flow, and keep descaling tablets alongside replacement cartridges so one task doesn't cause you to neglect the other.
Troubleshooting Problems After Installation
A new filter can expose an installation mistake immediately. The machine may hum, dispense slowly, sputter into the cup, or leave water around the reservoir base. Start with the water path, not the control panel.
Slow flow or a weak brew
A slow stream usually points to a restriction, trapped air, or a cartridge that was installed too tightly. Remove the reservoir and inspect the holder for a tilted cartridge, a blocked mesh cap, or a spring that has shifted sideways. If the cartridge was never soaked, remove it, prepare it correctly, reinstall it, and repeat the clean-water flush.
A missed prime can also make a healthy brewer look defective. Air pockets interrupt the pump's ability to move water steadily, so the machine may deliver less water than selected or pause during the cycle. Run another clean cycle without a pod and listen for the transition from hollow humming to a consistent water stream.
A cartridge that is too fine or incompatible can reduce flow even when it appears to fit. Don't enlarge openings, trim the filter, or push it down harder. Those changes can create bypass, damage the holder, or turn a flow problem into a leak.
Sputtering, spitting, or an airlocked line
Sputtering usually means air remains in the reservoir outlet or internal line. Remove the reservoir, check that the outlet valve is clean, and reseat the tank firmly. Then run another flush cycle with no coffee installed.
If the machine spits only during the first few seconds, continue flushing until the stream becomes steady. If it sputters on every cycle, inspect the cartridge seating and the tank's contact point with the brewer. A filter holder that sits slightly high can prevent the reservoir valve from opening fully.
Don't judge the filter by the first few ounces of water. Judge it after the cartridge has been saturated and the carbon fines have been flushed.
A leak at the reservoir base
Water under the reservoir usually comes from a displaced seal, an incorrectly seated holder, or debris on the valve contact surface. Remove the tank and wipe both mating areas with a soft cloth. Check that the holder has clicked down and that no part of the spring or mesh cap protrudes above its intended position.
If the leak continues, inspect the reservoir valve for damage and look for a cracked plastic component. Don't overtighten plastic parts or force a holder into place. Guidance for larger filtration systems identifies overtightening as a cause of cracked housings and slow leaks, and the same mechanical lesson applies to small coffee-machine fittings.
A leak from an under-sink system requires a different check. Confirm that tubing is pushed fully into each quick-connect fitting, that compression nuts and rings sit squarely, and that threaded joints use the correct sealing method. Restore water gradually and inspect before leaving the system pressurized.
The descale light won't reset
A descale light and a filter reminder may be separate functions. Replacing the filter won't necessarily clear a descale alert, and descaling won't prove that the new cartridge is seated. Use the brewer's reset procedure for the specific model, then run the required cleaning or descale cycle if the machine still calls for it.
Don't keep resetting the light without addressing restricted flow, scale, or an overdue cartridge. The indicator reports a maintenance state. It doesn't diagnose whether the cartridge is compatible.
The pump hums but water doesn't dispense
Start with the reservoir. Confirm that it contains water, sits level, and presses the brewer's inlet valve correctly. A filter holder trapped under the float can interfere with water delivery or make the machine believe the tank is empty.
Next, remove the filter holder and test a clean-water cycle only if the manufacturer's instructions allow that configuration. If the machine dispenses without the holder, the cartridge or holder is restricting the path. If it still hums without dispensing, the issue may involve air in the line, a blocked inlet, or a pump problem that filter installation didn't cause.
Reverse-osmosis and drain concerns
Under-sink RO installation needs more than a leak check. Recent independent guidance recommends an air gap or air break for RO drain routing because it provides backflow protection and is required by the Uniform Plumbing Code. The RO installation guidance explains why drain routing and cross-connection protection matter when wastewater and treated water share a sink setup.
A compact under-sink unit still needs room for cartridge changes, correctly routed tubing, and a compatible faucet and drain arrangement. If your sink already has an air-gap fitting or a crowded drain connection, verify compatibility before cutting tubing. A system that fits physically may still be unsuitable for the local plumbing configuration.
Use this under-a-minute recap after any filter swap:
- Model confirmed: The holder and cartridge match the Keurig, Ninja DualBrew, or Breville-compatible setup.
- Cartridge prepared: The charcoal filter was soaked and rinsed as directed.
- Holder seated: The spring, mesh cap, O-ring, and locking points are correctly positioned.
- Flush completed: At least the required clean-water cycles ran without a pod.
- Indicator handled: The filter reminder or descale control was reset using the correct procedure.
- Reminder saved: The installation date is in your calendar.
Good water filter installation improves the odds of cleaner coffee and consistent flow, while correct maintenance reduces the temptation to discard a machine over a fixable restriction. It also helps you avoid unnecessary cartridge waste caused by installing the wrong size or replacing a filter that was never properly primed.
For a compatible setup, browse PureHQ filters matched to your specific Keurig, Ninja DualBrew, or Breville-compatible machine, then add the appropriate descaling tablets for the boiler and internal water path. A well-installed filter is inexpensive insurance for a coffee machine that costs far more than the cartridge protecting it.
PureHQ Inc. offers compatible coffee-machine water filters, refillable pods, and maintenance accessories for Keurig, Ninja DualBrew, and selected Breville setups. Visit PureHQ Inc. to choose the filter that matches your machine and pair it with descaling tablets for a cleaner, steadier brew.

