Coffee Machine Care
Keurig Water Filter Location: A 5-Minute Guide
May
Your Keurig worked fine last month. Now the coffee tastes flat, the brew seems slower, and you're staring into the water tank wondering where the filter is supposed to be. That's a common spot to be in.
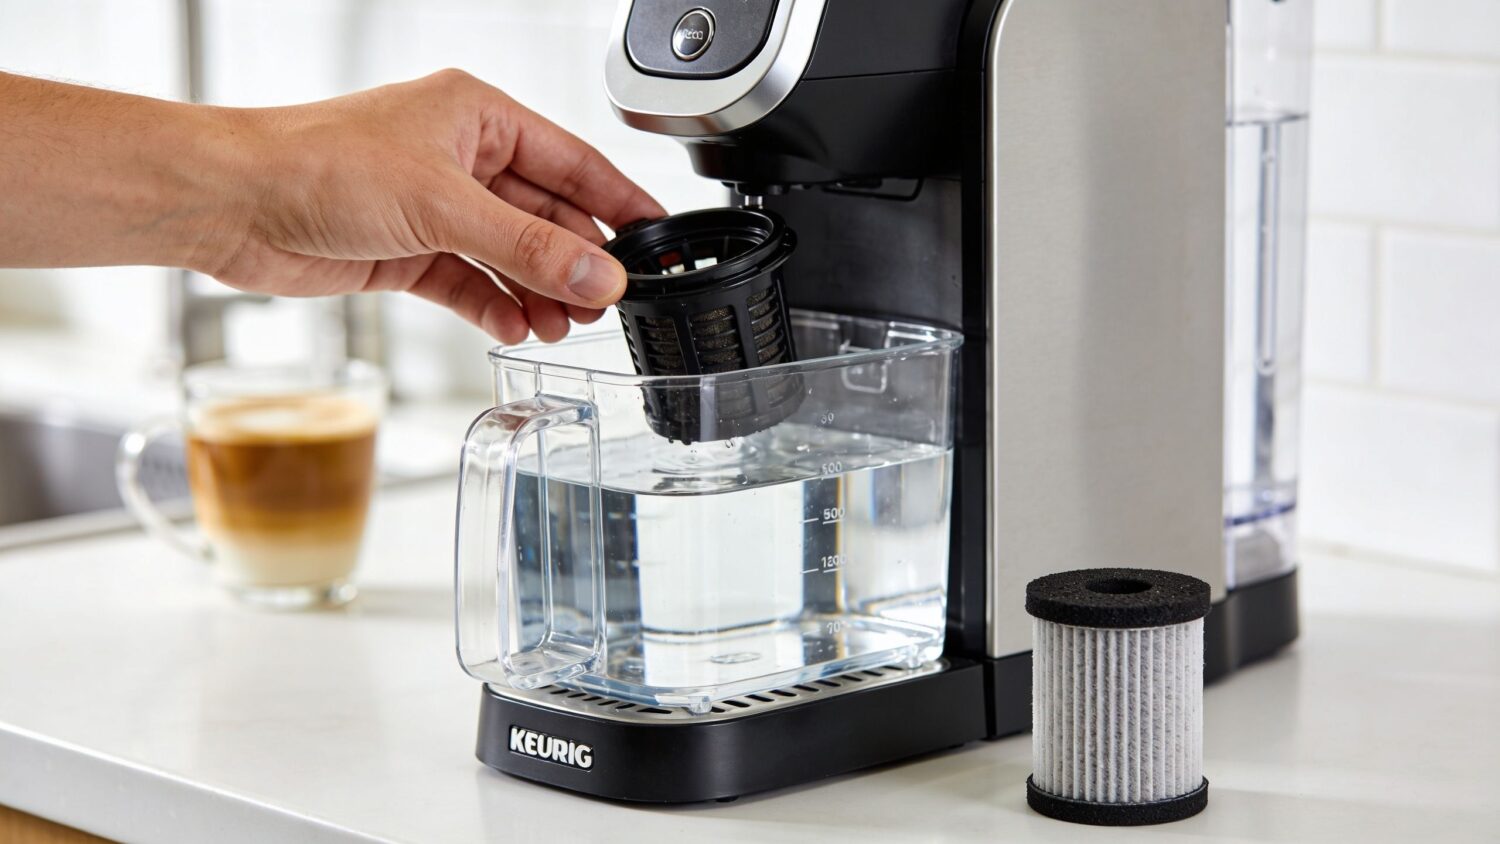
The good news is that the keurig water filter location is usually easy to find once you know the visual cue that matters. In most compatible machines, you're not hunting through the brewer body or opening panels. You're looking inside the removable reservoir for a small filter holder with a handle.
Why Your Coffee Tastes Off and How to Fix It
A bad cup usually starts with the water, not the pod. If your coffee suddenly tastes dull, bitter, or slightly stale, the filter is one of the first things to check.
That matters more than most owners realize. The USGS National Water Quality Assessment reports that 85% of U.S. tap water contains detectable contaminants, which can affect taste and machine performance. Even when the water looks clear, minerals and off-flavor compounds can still make their way into the brew.
The second problem is wear on the machine itself. When water quality slips, your Keurig can start brewing unevenly, heating less consistently, or showing slower flow through the pod side. If you've already cleaned the exterior and swapped pods with no improvement, the filter setup is the practical next check.
Practical rule: If the coffee tastes off and the machine still powers on and brews, inspect the reservoir filter before assuming the brewer is failing.
It's common to lose time expecting the filter to be hidden somewhere complicated. It usually isn't. Once you know where Keurig places it and how the holder is supposed to sit, the job takes only a few minutes.
If you want the broader health and taste angle behind filtered brewing, this breakdown of purified water in your Keurig and the health benefits connects the maintenance step to what ends up in your cup.
Finding the Water Filter on Your Keurig Model
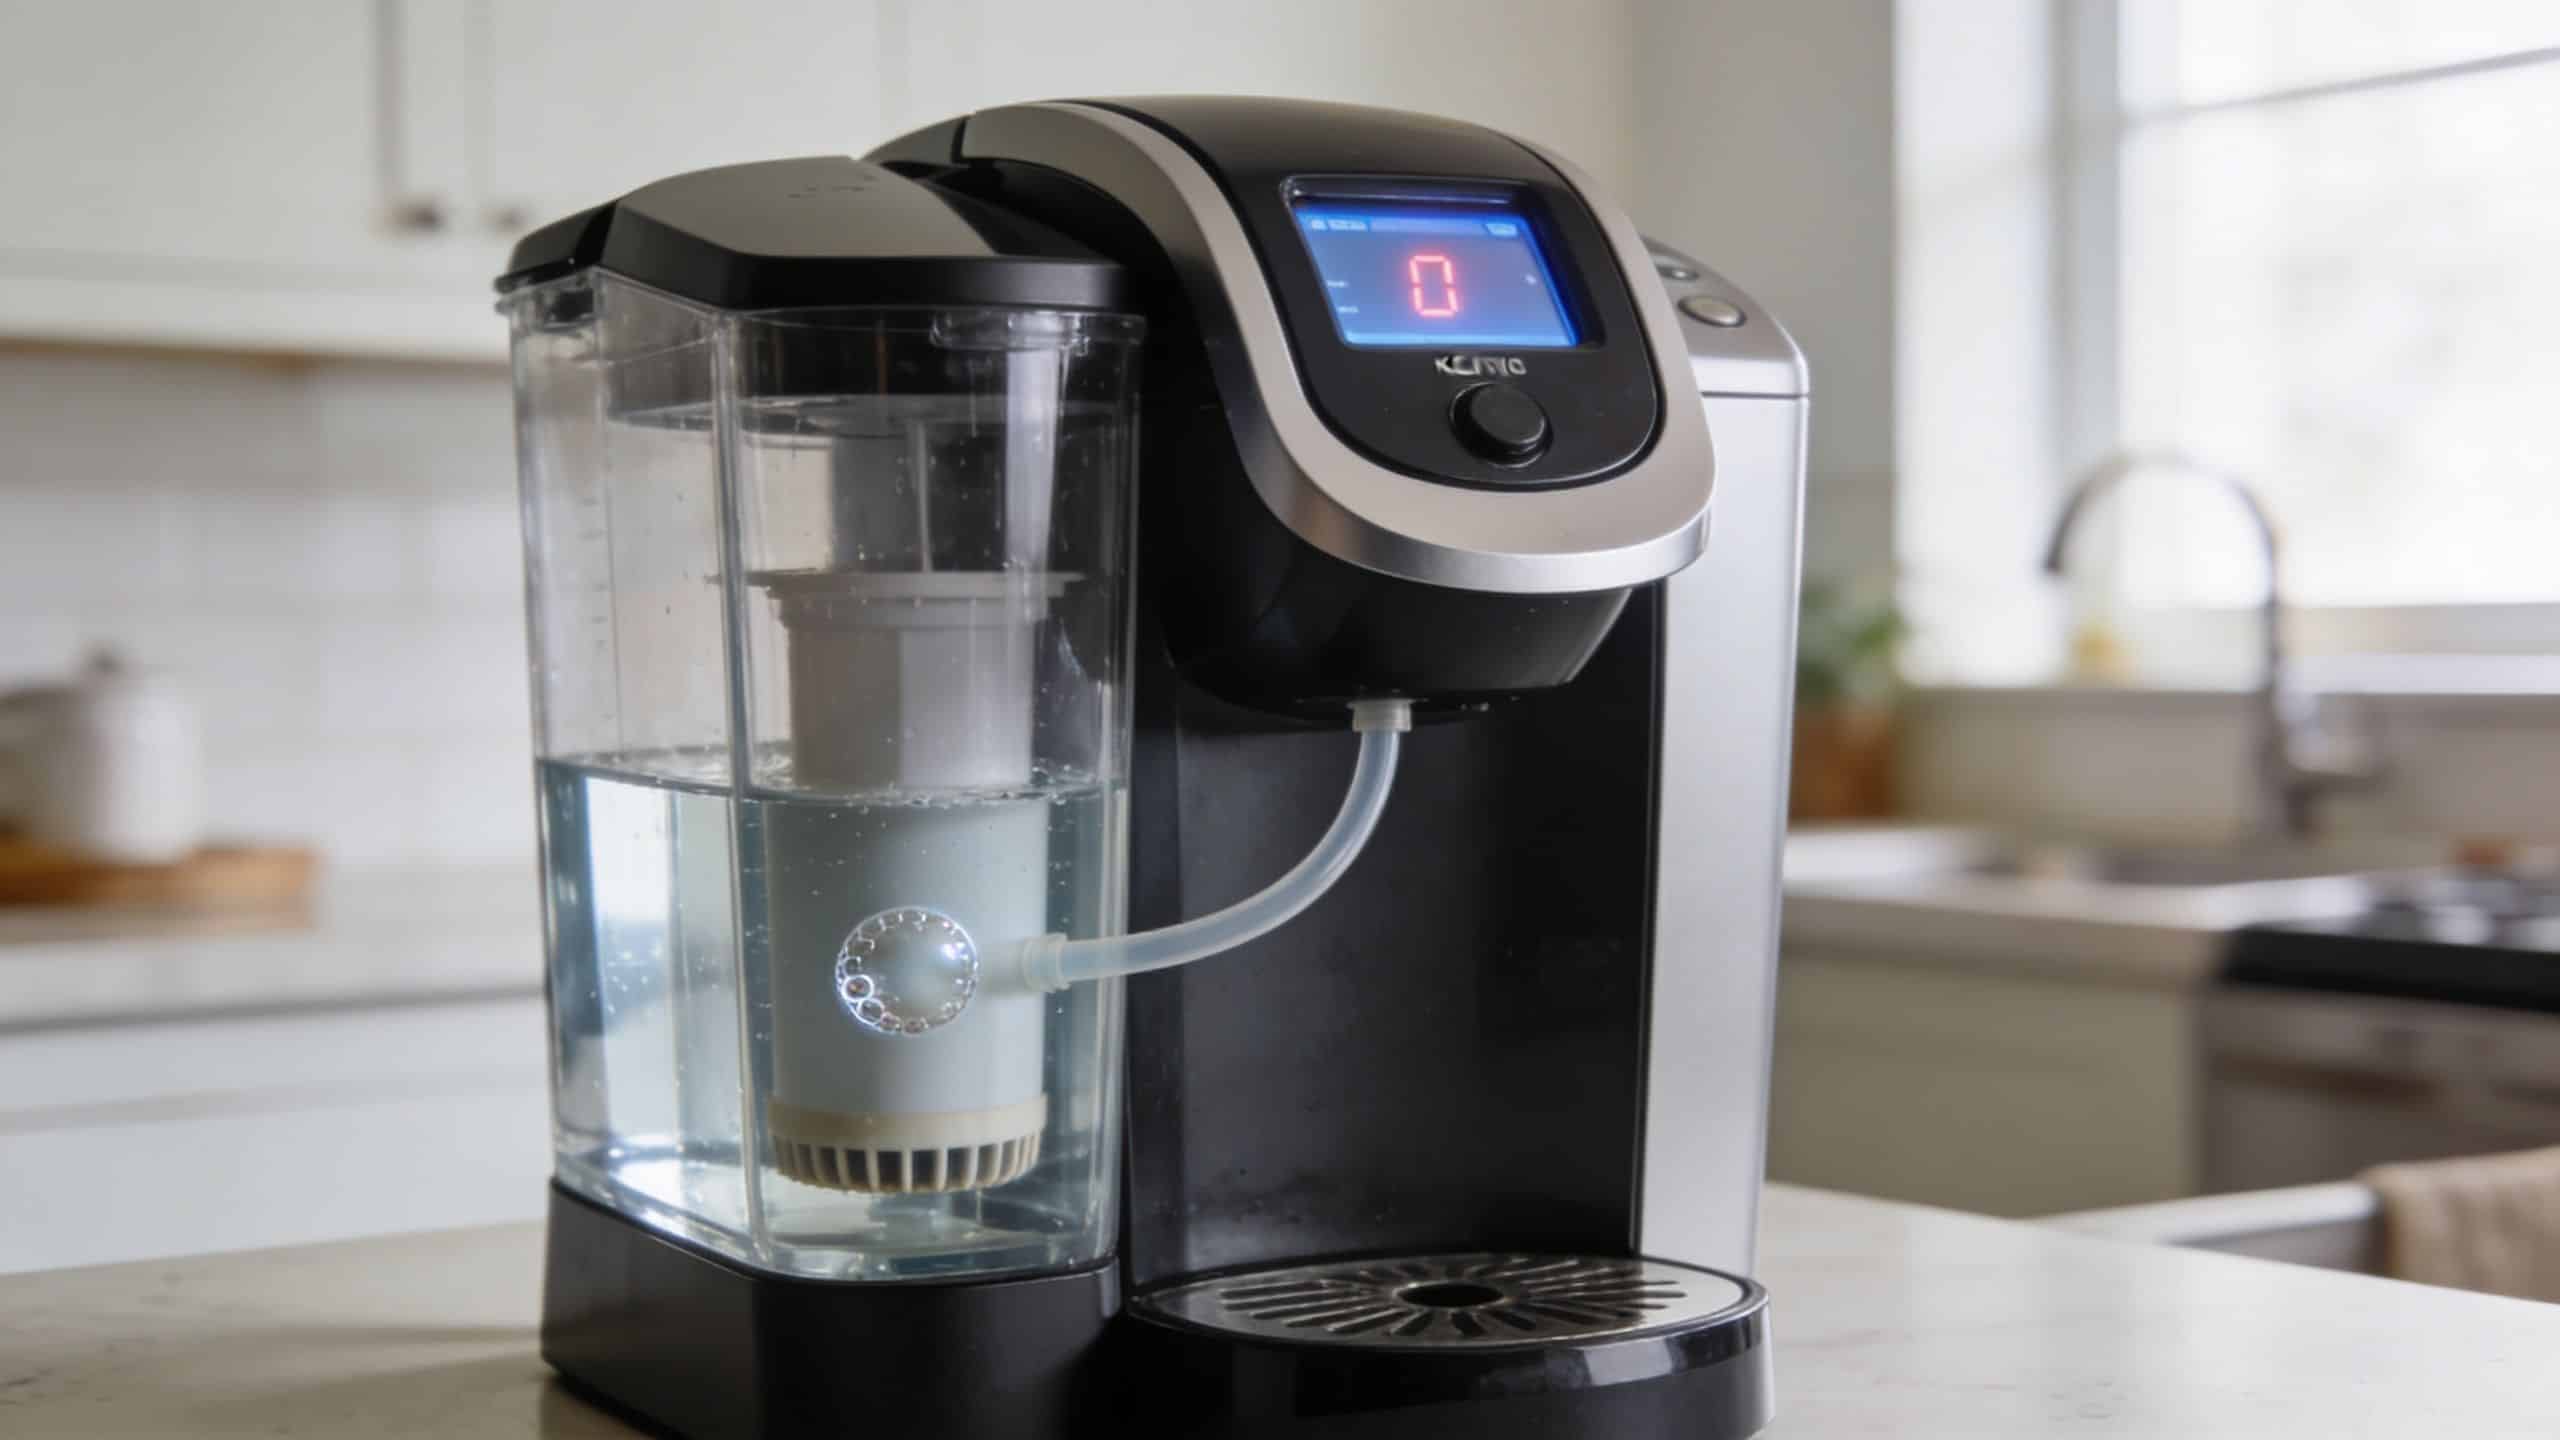
Most owners search in the wrong place first. They look under the drip tray, behind the brewer, or near the pod holder. On compatible models, the filter is normally inside the water reservoir.
According to this Keurig filter setup guide, across 95% of Keurig models, including the K-Classic, K-Supreme, and K-Duo series, the water filter housing is positioned on the left side of the removable water reservoir when facing the machine, and it has a small handle that makes it easier to identify and remove.
The visual cue that matters
Ignore the shape of the tank for a moment and look for two things:
- A small handle rising above or near the rim of the reservoir
- A slim plastic holder attached down the left interior side of the tank
If you see that handle, you've found the filter housing. Pulling it straight up usually removes the whole assembly.
If you don't see it, that doesn't always mean you're missing it. Some holders sit lower and are easier to spot after you remove the reservoir and hold it at eye level under kitchen light.
What common models look like
Older and widely used models such as the K-Classic and K-Elite usually have a taller holder. It looks like a narrow plastic column inside the tank. When people say “I can see a black piece in the reservoir,” this is often what they mean.
The K-Supreme style is more compact. The holder still lives in the reservoir, but it can look shorter and less obvious at first glance. Owners often mistake it for part of the tank molding until they notice the handle.
On the K-Slim and K-Duo lines, the side-mounted tank changes the angle, not the basic location. You're still looking to the left side of the removable reservoir while facing the machine.
If your tank is off the machine and you're still unsure, rotate it slowly and look for any insert that appears removable rather than molded into the reservoir wall.
What trips people up
The most common mistake is confusing the water intake point with the filter holder. A small dark spot or opening near the reservoir floor is not the cartridge itself. That's just part of the brewer's water path.
Another issue is assuming every Keurig includes a usable filter setup out of the box. Some machines may be compatible with a filter without having the holder installed at the moment you check.
A quick way to verify model compatibility before buying parts is this guide on whether your Keurig has a water filter.
Fast model check
| Model family | Where to look | What you'll usually see |
|---|---|---|
| K-Classic and K-Elite | Left side inside reservoir | Taller holder with visible handle |
| K-Supreme | Left side inside reservoir | Shorter, compact holder |
| K-Slim | Left side of side-mounted reservoir | Slim holder, easy to miss from above |
| K-Duo | Left side inside removable tank | Holder seated near reservoir wall |
A Step-by-Step Guide to Replacing the Filter
Once you've found the holder, the actual replacement is simple. Most filter problems come from rushing the prep, not from the install itself.
Remove the old filter correctly
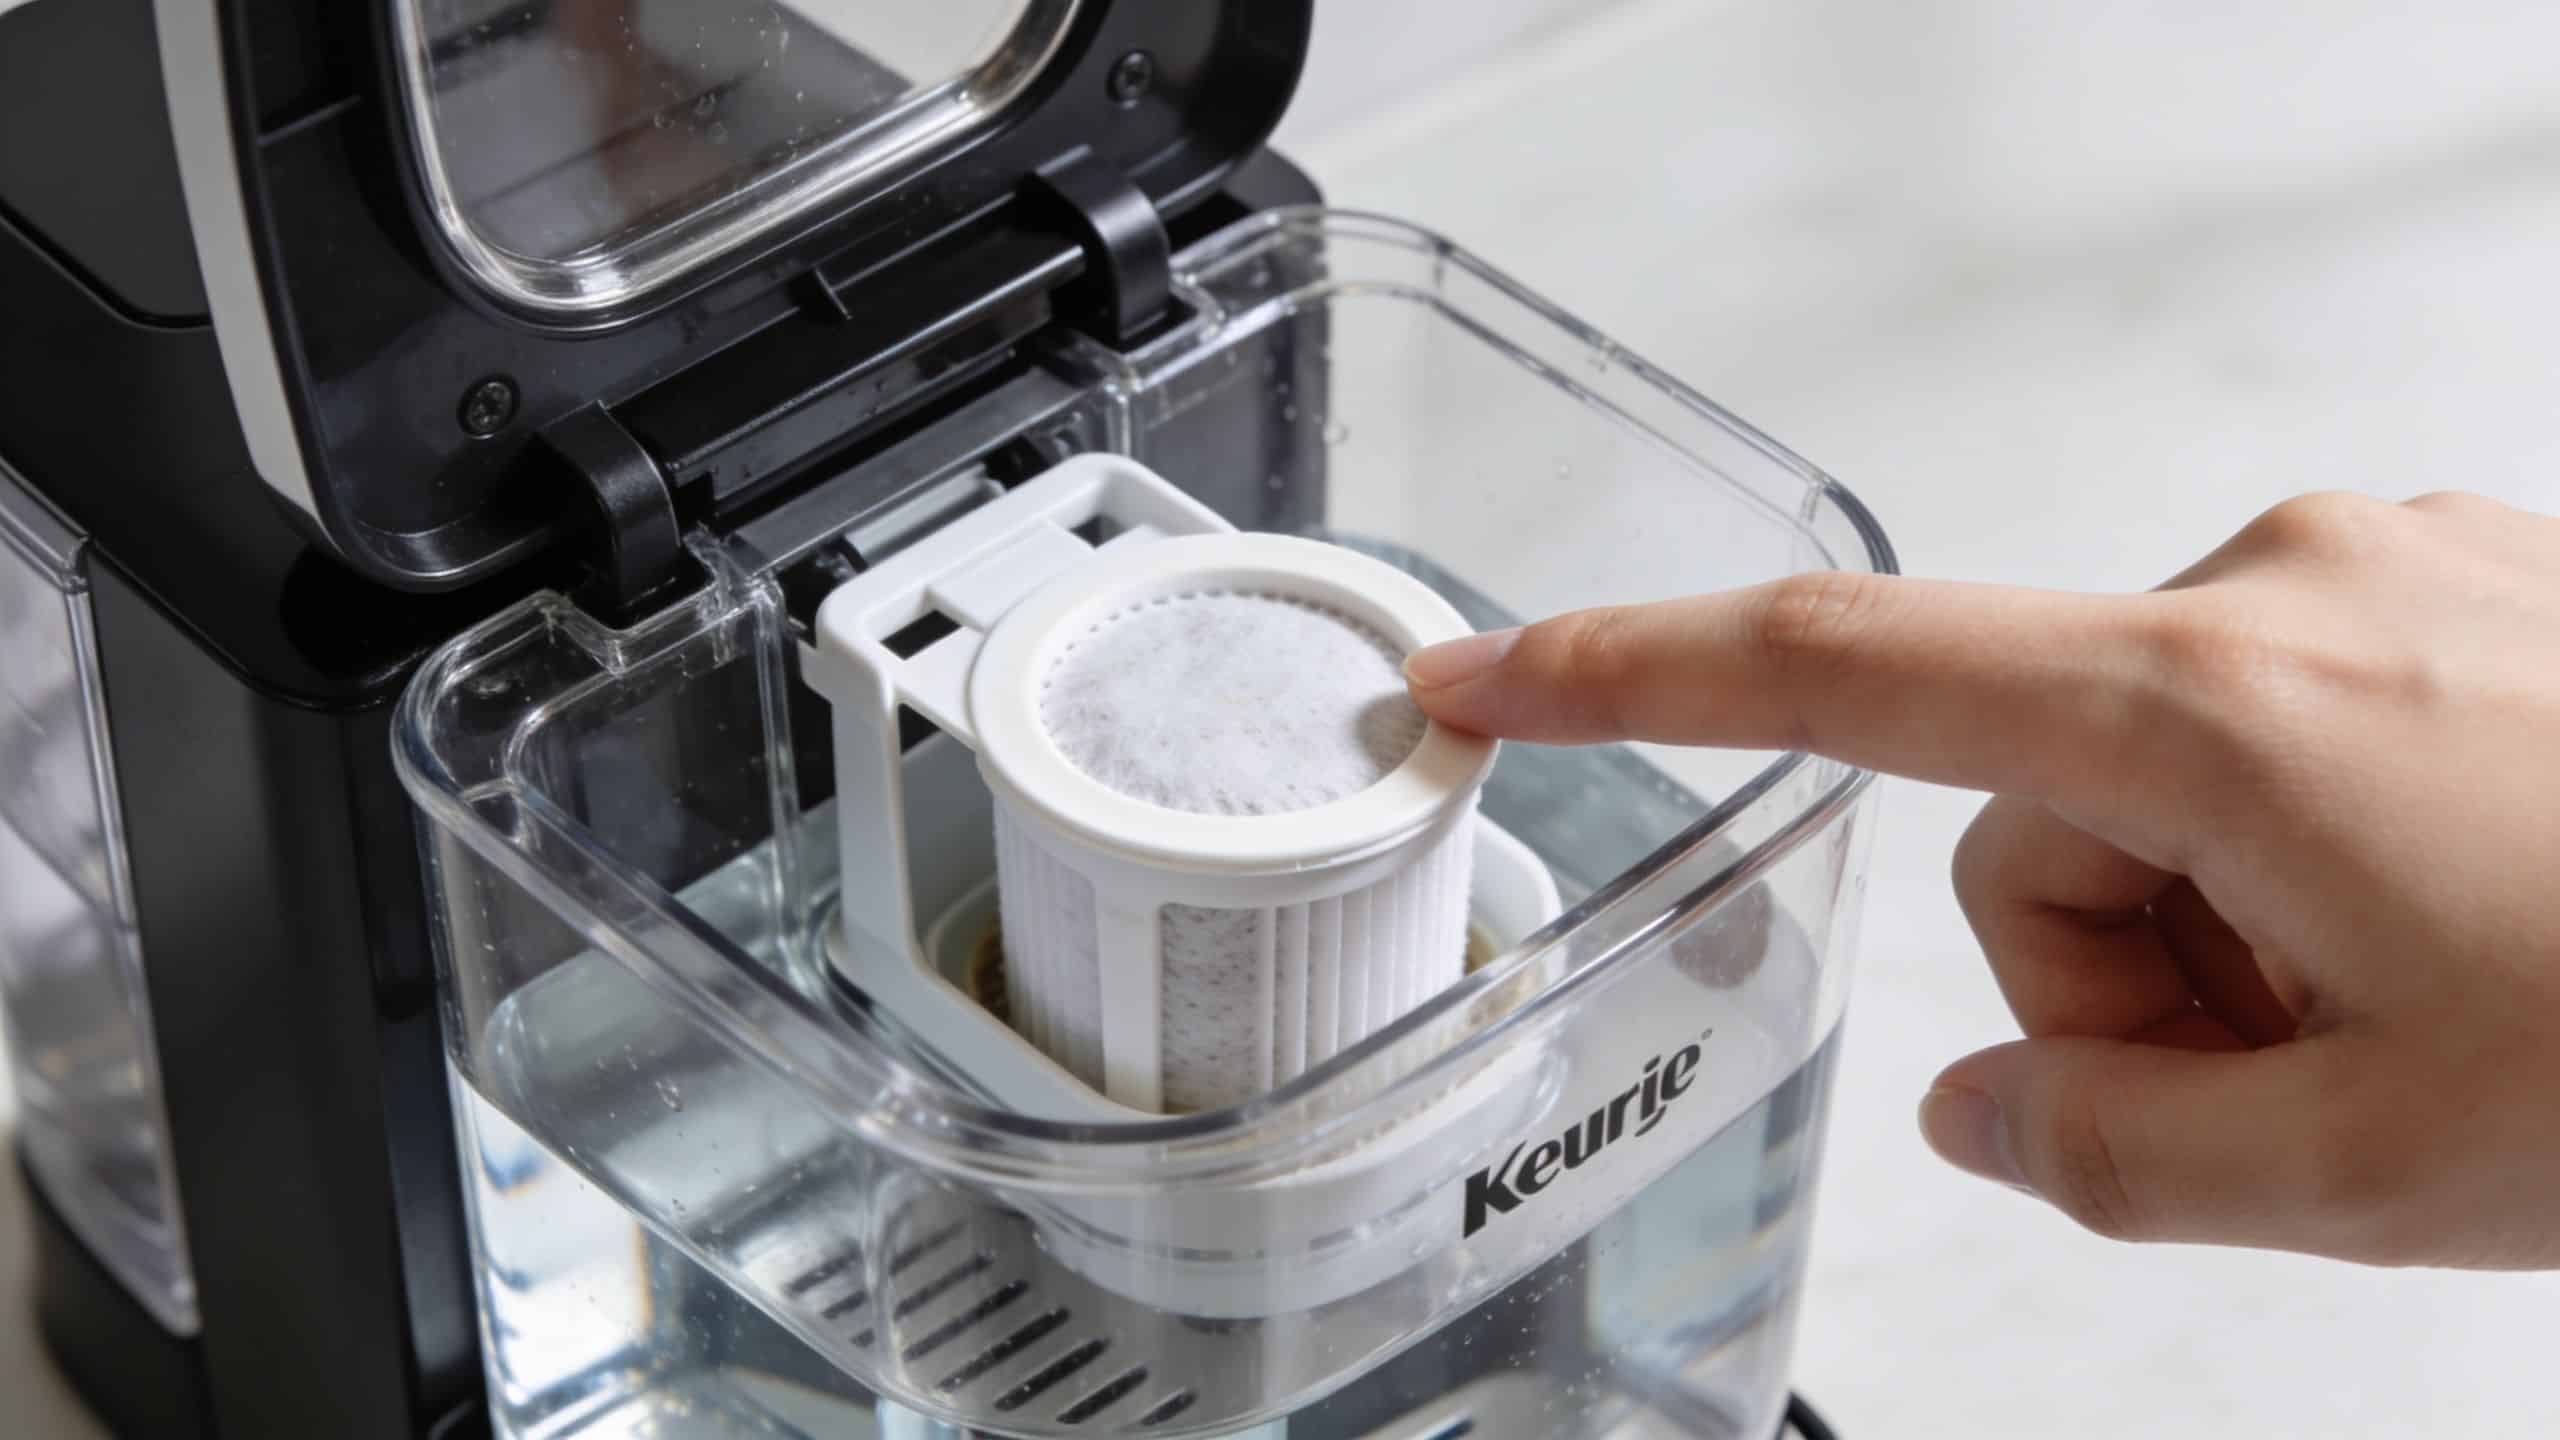
Start with the machine off and the reservoir empty or nearly empty. Lift the water tank off the brewer, then grip the filter holder handle and pull the assembly straight up.
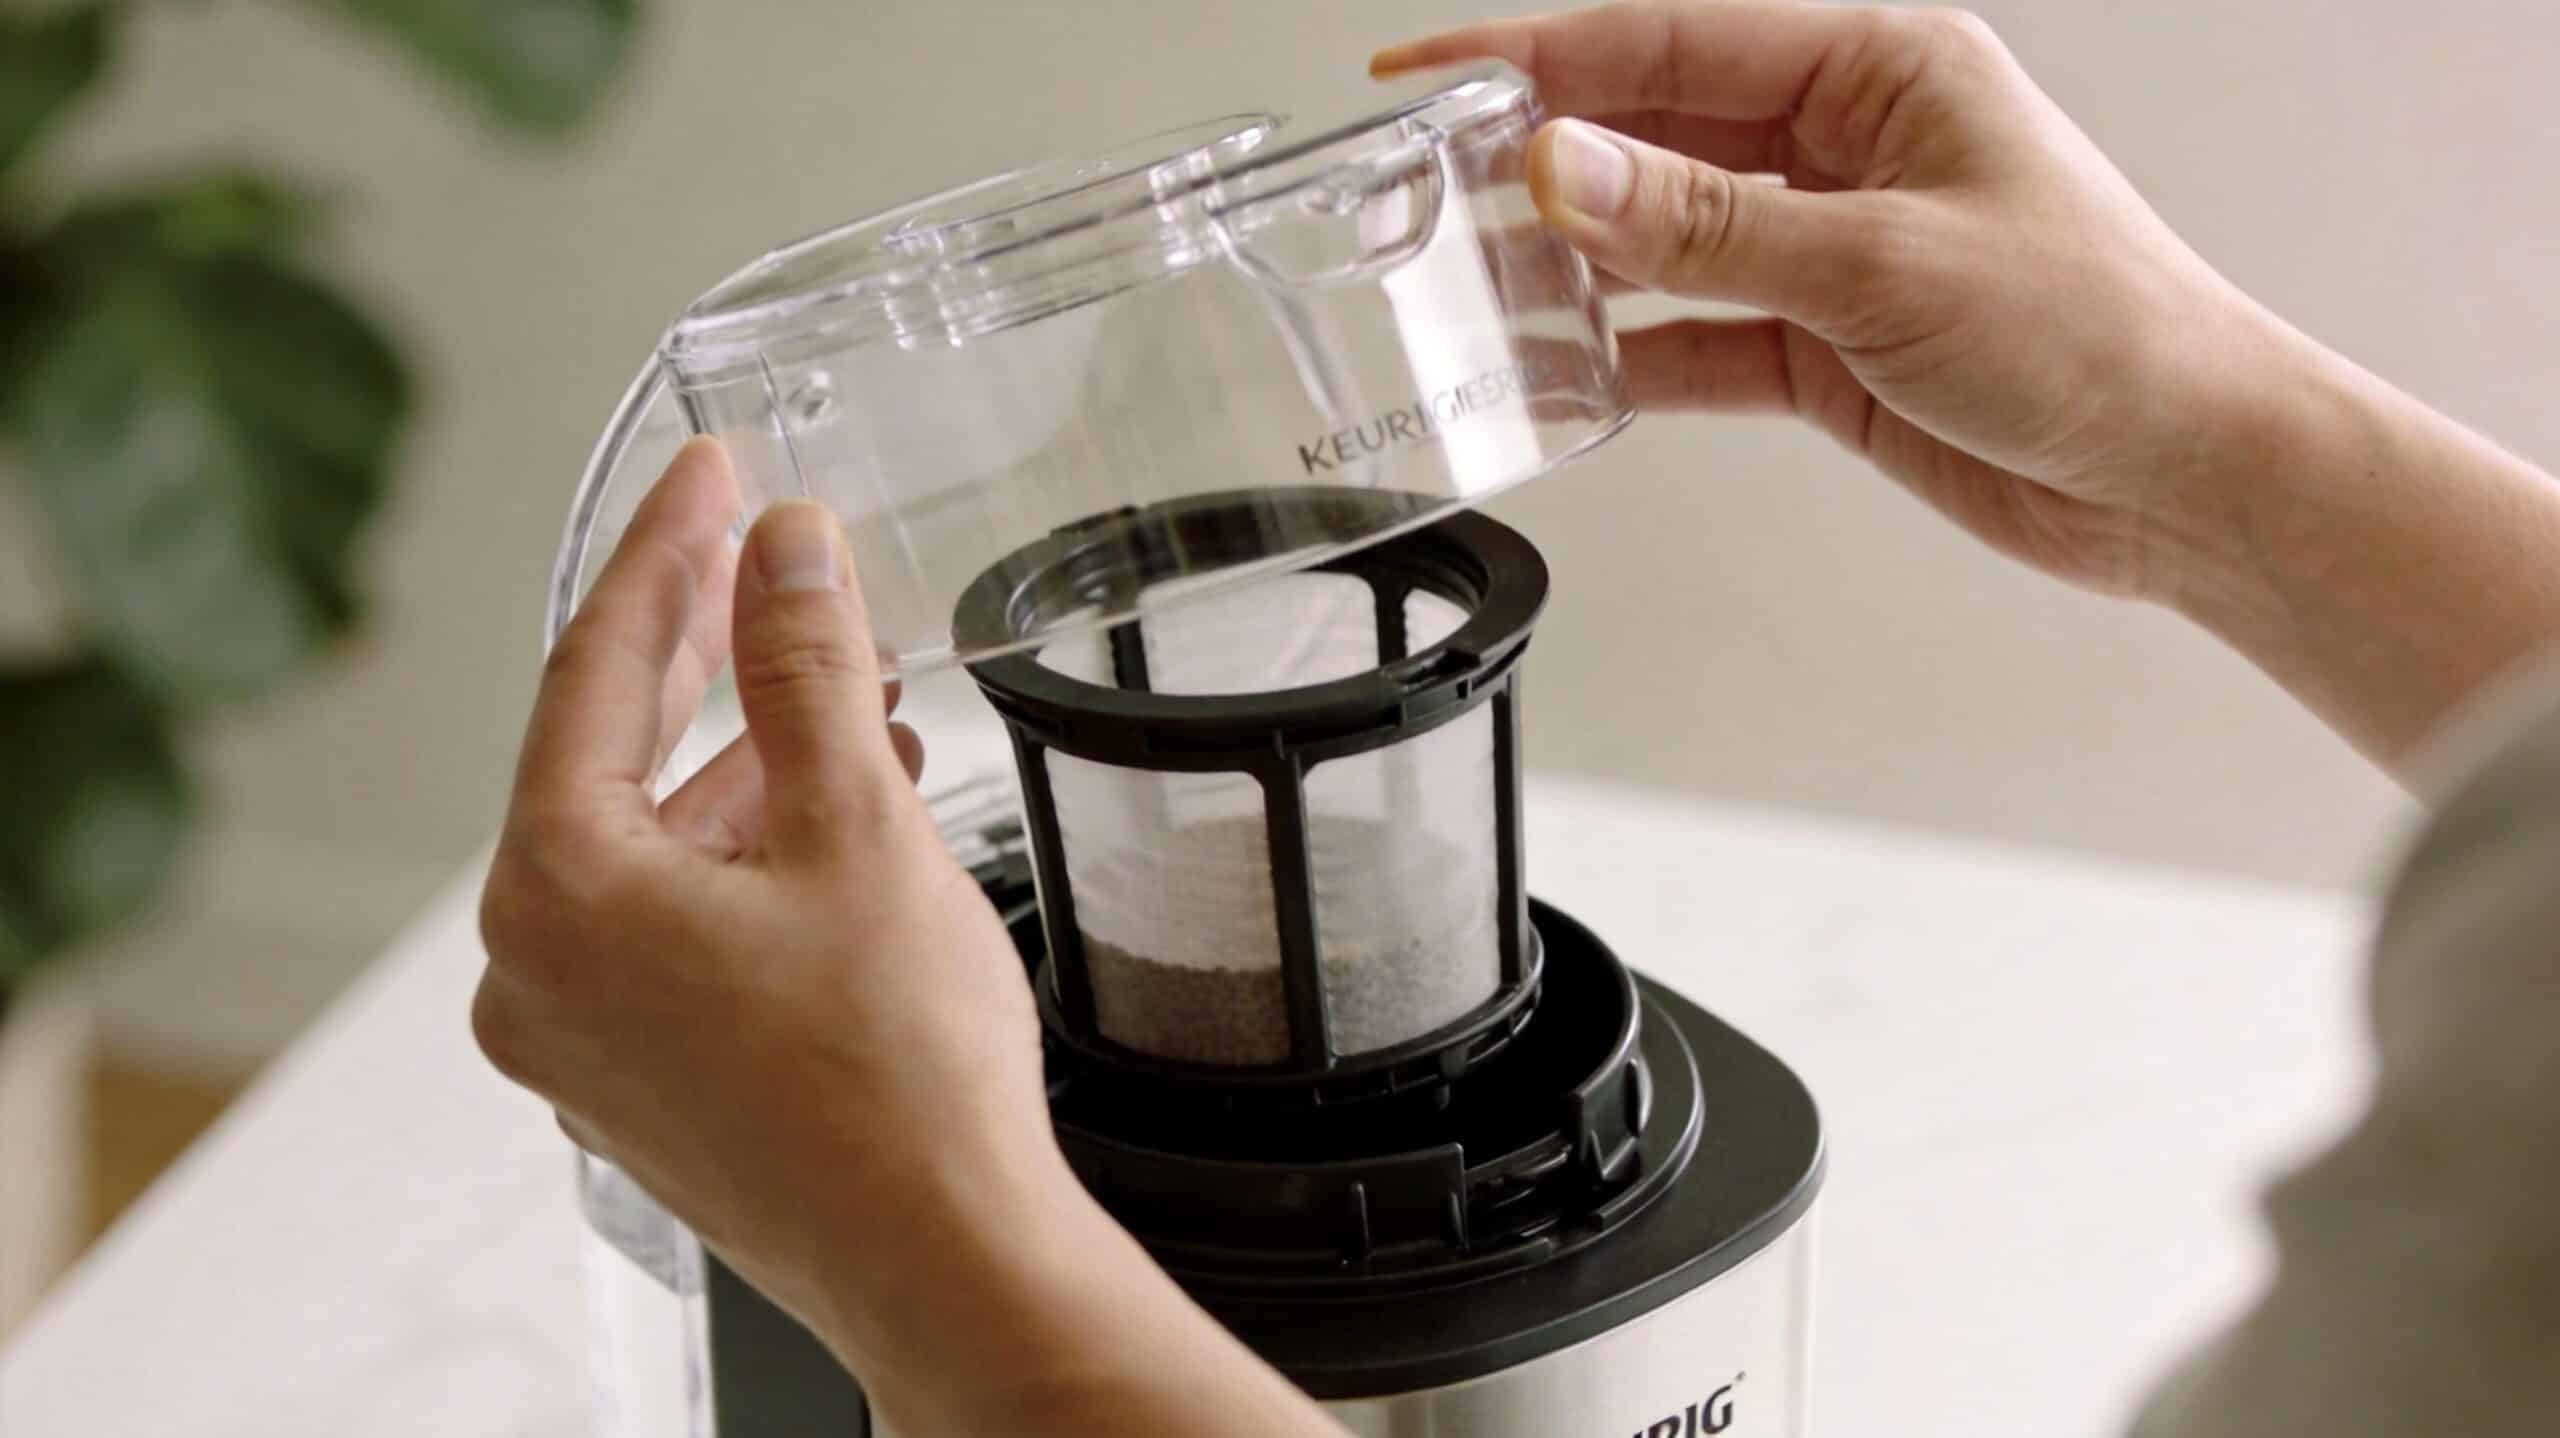
Open the holder and discard the used cartridge. If your holder feels stiff, don't twist aggressively. A straight pull and gentle tab release works better than force.
For readers who maintain multiple appliances and want a good example of replacement filter identification outside coffee gear, this resource can help you find Living Water replacement parts by matching the housing style first, not guessing from appearance alone.
The step most people skip
The new charcoal cartridge needs prep before it goes into the machine.
Soak the cartridge in fresh water for 5 minutes.
This saturates the carbon so it can work properly from the start.Rinse it under cool water for 60 seconds.
That clears away loose charcoal dust.Place it into the lower part of the holder.
Make sure it sits evenly, not tilted.Snap the holder closed.
If one side is still open, the cartridge can shift during brewing.Press the assembly back into the reservoir.
Push down until it feels seated and stable.
Skipping the soak is one of the fastest ways to create avoidable problems. A dry cartridge can trap air, slow flow, or leave you wondering why the machine suddenly sounds strained.
If your holder is cracked, loose, or missing, this guide to replacing a Keurig water filter holder helps you tell whether the cartridge is the issue or the housing is.
Here's a visual walkthrough if you want to see the basic process in motion:
What a proper fit looks like
A correctly installed holder should sit firmly in the reservoir without wobbling. The handle should remain accessible, and the assembly shouldn't drift or float when you refill the tank.
If the holder lifts easily on its own after reinstalling, it probably isn't seated at the base. Remove it and press it down again with the reservoir on a flat counter, not while holding it in the air.
PureHQ vs Standard Filters What Is the Difference
A water filter only helps if it fits the holder well and stays put during daily use. That's where the difference between a premium replacement and a generic one becomes obvious.
The biggest objection I hear about third-party filters isn't taste first. It's fit. If the cartridge sits loosely, water can move around it instead of through it. When that happens, the filter is technically installed but not doing the job you expect.
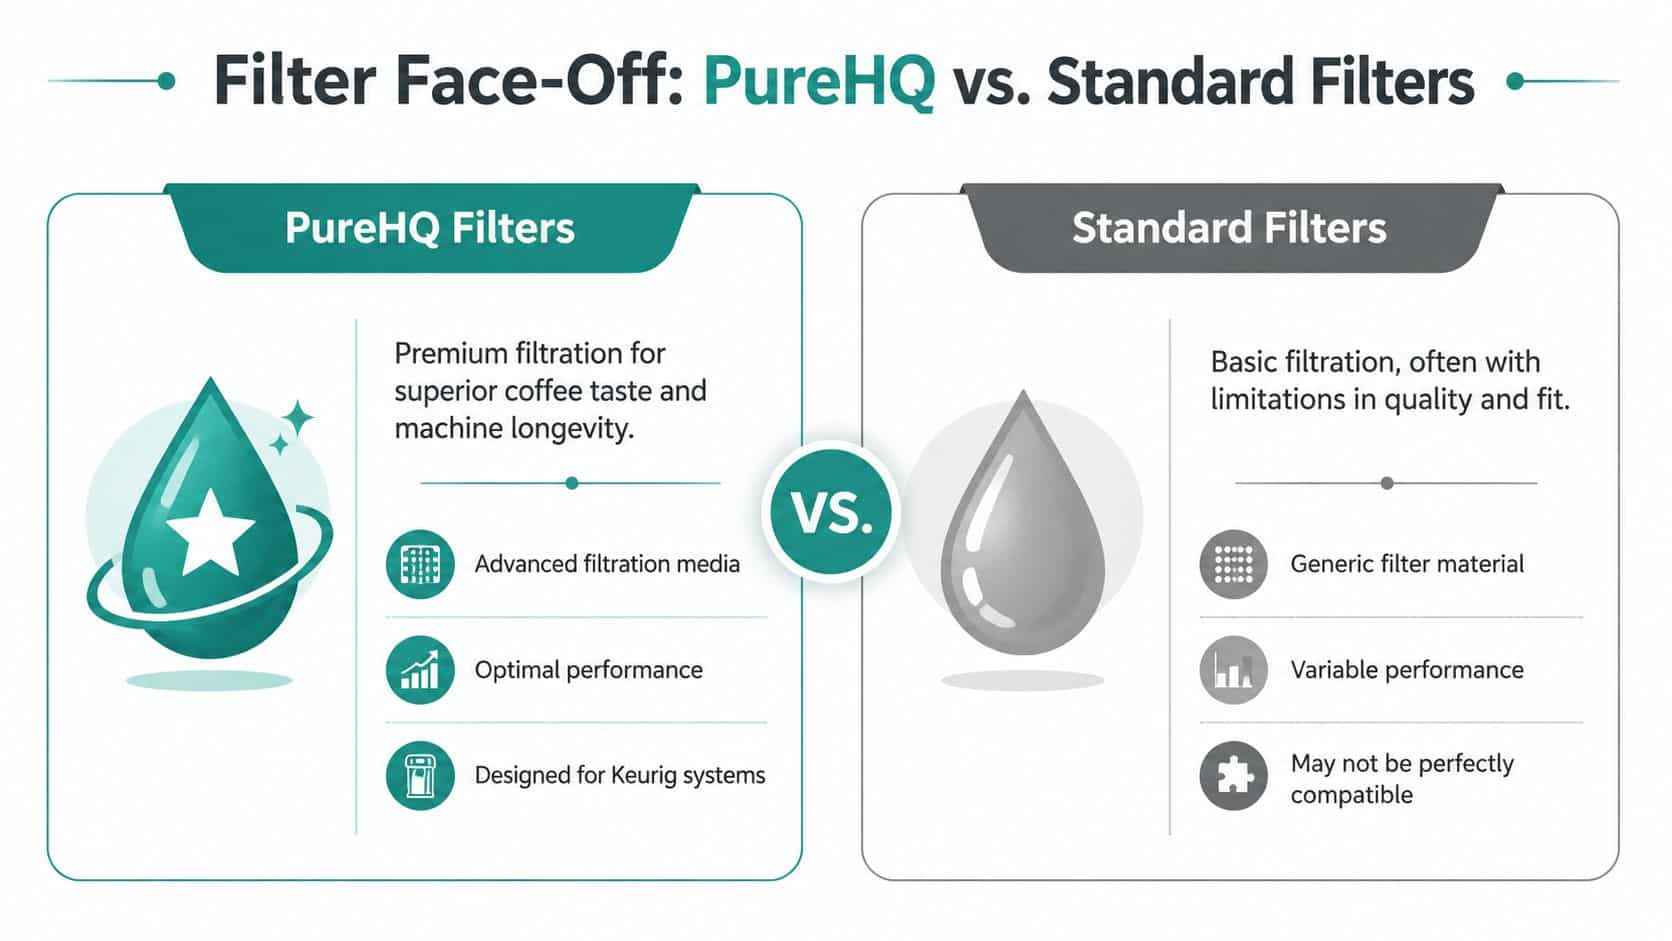
Where premium filters usually win
Premium filters are typically built with tighter attention to holder fit, sealing, and cartridge consistency. Standard generic filters can work, but the experience is less predictable. One may snap in cleanly, while the next feels undersized or sheds more dust during rinse.
That fit issue matters because Keurig filter maintenance is supposed to be routine, not a troubleshooting session every time you change a cartridge.
A good replacement filter should disappear into the process. If you have to force it, shim it, or wonder whether it sealed, it's the wrong filter.
For anyone who also manages water quality on the road, this guide to safe RV drinking water is a useful parallel. The same rule applies there. Good filtration starts with the right match between media and housing.
PureHQ vs Generic Filter Comparison
| Feature | PureHQ Premium Filters | Standard Generic Filters |
|---|---|---|
| Fit in Keurig-style holder | Designed for a snug, consistent fit | Can vary from batch to batch |
| Installation feel | Seats cleanly with less guesswork | May feel loose or require adjustment |
| Charcoal dust after rinse | Typically easier to clear with normal rinsing | More likely to need extra rinsing |
| Compatibility confidence | Built around Keurig-compatible systems | Compatibility can be broader but less precise |
| Daily use | Better for repeat, predictable maintenance | Acceptable when fit is confirmed manually |
A practical buying standard
If you're comparing filters, don't focus only on price per cartridge. Check whether the filter fits the holder cleanly, rinses without a mess, and stays seated after refill.
For complete maintenance, pairing replacement filters with a descaling product is smart. The filter helps with incoming water, while descaling handles mineral buildup that has already formed inside the machine.
Troubleshooting Common Keurig Filter Problems
Most post-install issues come down to one of three things. The fix is usually quick once you identify the cause.
The machine brews slowly after a filter change
A dry or poorly rinsed cartridge is the first suspect. Remove the filter, soak it fully, rinse it again, reinstall it, and run water-only brew cycles.
If the brewer still struggles after that, check whether the holder is seated flat in the reservoir. A crooked install can affect water flow into the machine.
You see black specks in the water tank
That's usually loose charcoal dust from the new cartridge. It's a sign the filter needs a more thorough rinse before use.
Take the cartridge out, rinse it longer under cool water, then refill the reservoir with fresh water before brewing again.
The filter won't stay in place
This is usually a holder seating problem or a poor cartridge fit. Make sure the housing clicks or presses securely into the reservoir base and that the cartridge is sitting evenly inside the holder.
When the holder feels stable but the cartridge still shifts, I stop blaming the machine. That's usually a filter fit issue.
For ongoing maintenance, Consumer Reports' coffee maker buying guide notes that Keurig recommends replacement every 2 months or 60 tank refills, and a 2020 Consumer Reports analysis of 1,200 users found this practice could result in a 25% extension in machine lifespan. That's a small habit that protects both taste and the brewer itself.
Enjoy a Perfect Brew Every Time
Finding the keurig water filter location is easier once you know the visual cue. Look inside the removable reservoir, check the left side, and identify the small handled holder before you do anything else.
After that, the job is simple. Remove the old cartridge, soak the new one, rinse it well, and seat the holder firmly. If you want better-tasting coffee and fewer maintenance headaches, this is one of the highest-value steps you can take. Pairing fresh filters with occasional descaling keeps the machine cleaner than either step alone.
Shop compatible water filters, reusable coffee accessories, and brewer maintenance supplies from PureHQ Inc. to keep your Keurig brewing clean, consistent coffee every day.
