Coffee Machine Care
Making Cold Brew Coffee With a French Press A Guide
Apr
Cold brew gets expensive fast when it becomes part of your daily routine. You buy one on the way to work, another on a warm afternoon, and before long you’re paying café prices for something that’s mostly time, water, and decent coffee.
Then you try making it at home and hit the usual problems. It comes out thin, bitter, murky, or strangely weak. The recipe looked simple, but the batch still missed.
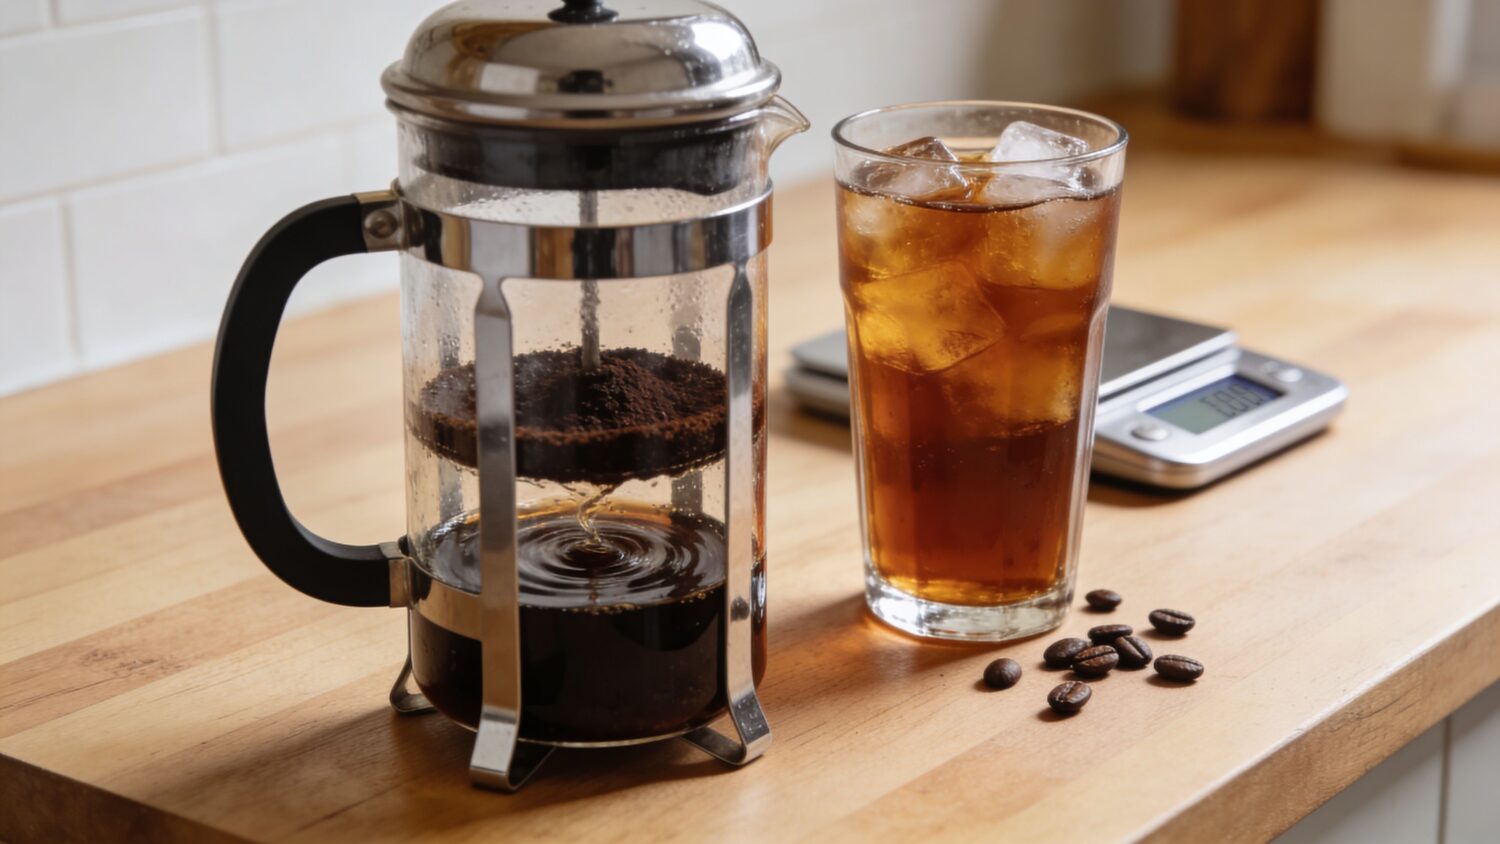
Making cold brew coffee with a french press fixes that because the tool already does the hard part well. It holds the grounds in full immersion, gives you easy control over steeping, and filters the brew without any extra machine. The trick isn’t buying more gear. The trick is controlling a few variables that most quick guides skip.
The Secret to Better Cold Brew Is Already in Your Kitchen
Most failed cold brew has the same root cause. The recipe was treated like a shortcut instead of a brewing method.
A French press works so well for cold brew because immersion is forgiving. The coffee and water stay in contact for hours, which gives you time to extract flavor gently instead of forcing it quickly with heat. If your hot coffee routine already includes a press, you don’t need a cold brew tower, a brewer with a custom valve, or a pile of disposable filters to make a smooth concentrate at home.
That matters if you’ve been chasing café-style cold brew and getting random results. One batch tastes hollow. The next tastes muddy. Another gives you barely enough liquid for a single glass. None of those problems mean cold brew is hard. They usually mean the ratio, grind, press size, or filtration step wasn’t matched to how a French press brews.
A lot of home brewers also underestimate how versatile the press is. It isn’t only a hot coffee tool. Its simple mesh-and-carafe design is built for steeping, which is exactly what cold brew needs. If you want a quick refresher on how the device itself works, this overview of what a French press coffee maker is is useful background.
Practical rule: If your homemade cold brew feels inconsistent, don’t start by changing beans. Start by tightening the method.
The payoff is simple. Once the process is dialed in, your French press becomes the easiest way to make a steady supply of smooth concentrate at home, without turning your kitchen into a lab.
Gathering Your Essential Tools and Ingredients
A French press can make excellent cold brew with very little gear, but this is the stage that decides whether the batch comes out clean and sweet or dull and gritty. The difference usually comes down to four variables you can control at home: bean choice, grind size, ratio, and water.
Choose coffee that suits cold extraction
Medium and dark roasts are the easiest place to start. They usually produce rounder chocolate, nut, and caramel notes in cold brew, and they stay balanced even if your steep time drifts a little long.
Light roasts can still make a very good cold brew. They just ask for more precision. If the grind is inconsistent or the water is too hard, their sharper citrus and floral notes can turn thin or woody fast.
Buy whole beans if possible. Pre-ground coffee is often too fine for a French press, which means more sludge in the cup and a higher chance of over-extracting during a long steep.
Aim for a coarse grind, about the texture of coarse sea salt.
Use a scale and match the recipe to your press size
Cold brew gets more repeatable the moment you stop measuring by scoops. Grounds settle differently from bag to bag, so volume measurements drift more than most home brewers realize.
A reliable starting point is a 1:8 coffee-to-water ratio by weight for concentrate. If you want help converting that into different batch sizes, this French press coffee-to-water ratio guide makes the math easier.
The press size matters too. This is one of the details many guides skip. A "34-ounce" press does not give you 34 ounces of finished cold brew once the grounds take up space and absorb water. If you fill the carafe too aggressively, you get poor mixing at the top and a weaker yield at the end.
Use this as a practical planning guide:
| French press size | Best use | Practical approach |
|---|---|---|
| Small press | One or two drinks | Brew a tighter batch so the grounds do not crowd the carafe |
| Mid-size press | Most home use | The easiest size for testing ratios and repeatable daily batches |
| Large press | Weekly prep | Gives better yield, but only if you leave enough headroom to stir fully |
If you want one habit that improves consistency fast, make a note of your press capacity in grams of water, not just the number printed on the box.
Water is an ingredient, not a footnote
Cold brew is mostly water, so water quality shows up clearly in the cup. Chlorine can flatten sweetness. Very hard water can make the brew taste chalky or blunt. Very soft water can leave it tasting empty.
Filtered water is the safe default for most kitchens. If your tap water tastes clean and balanced on its own, use it. If it smells off, fix the water before changing beans or steep time.
For home cold brew, I get the best results with water that tastes neutral and leaves no strong mineral aftertaste. Fancy water recipes are generally unnecessary. Clean, pleasant-tasting water is enough to make your coffee taste more defined.
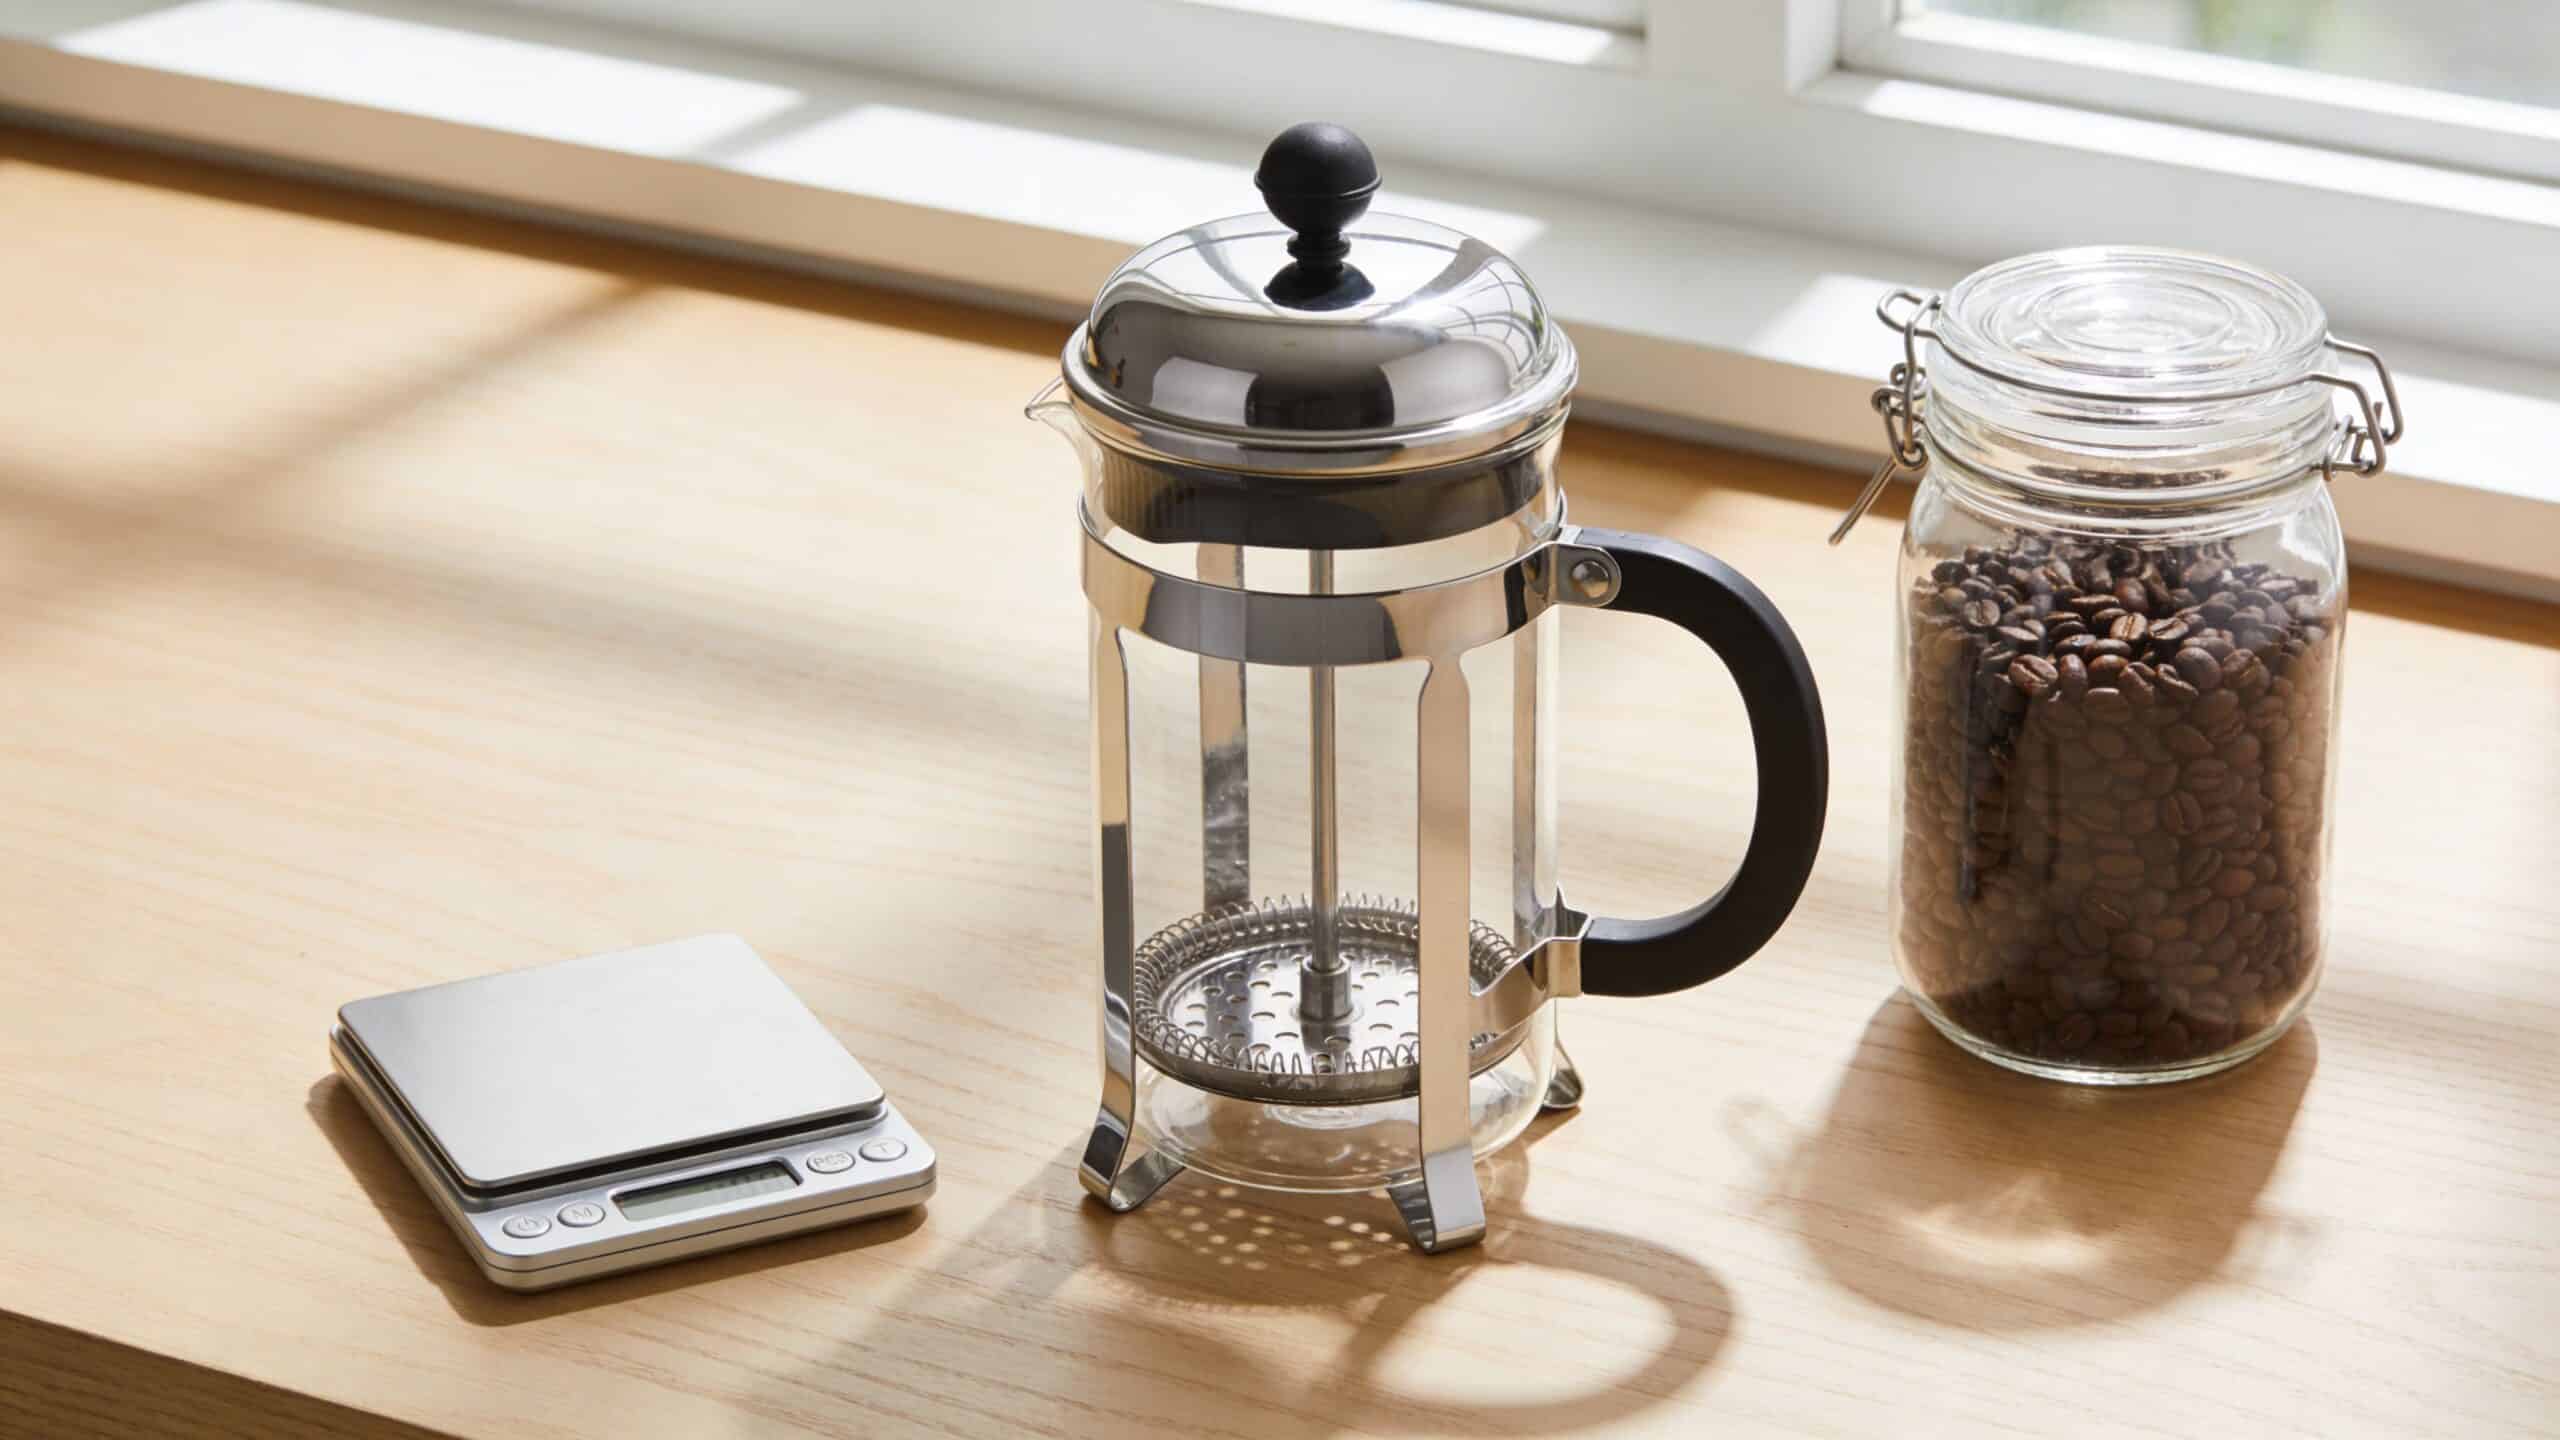
Keep the setup simple
You do not need much:
- French press: Clean, with a filter screen that still fits snugly
- Digital scale: For repeatable coffee and water measurements
- Burr grinder or store-ground coarse coffee: Burr grinders give more even extraction
- Good water: Filtered if your tap water has chlorine or heavy mineral flavor
- Airtight jar or bottle: For storing the finished concentrate in the fridge
Tea brewers already know how much small changes in water and steeping affect flavor. The One with Tea brewing guide is a useful reminder that extraction rewards precision, even with simple equipment.
Good cold brew comes from controlled variables, not guesswork.
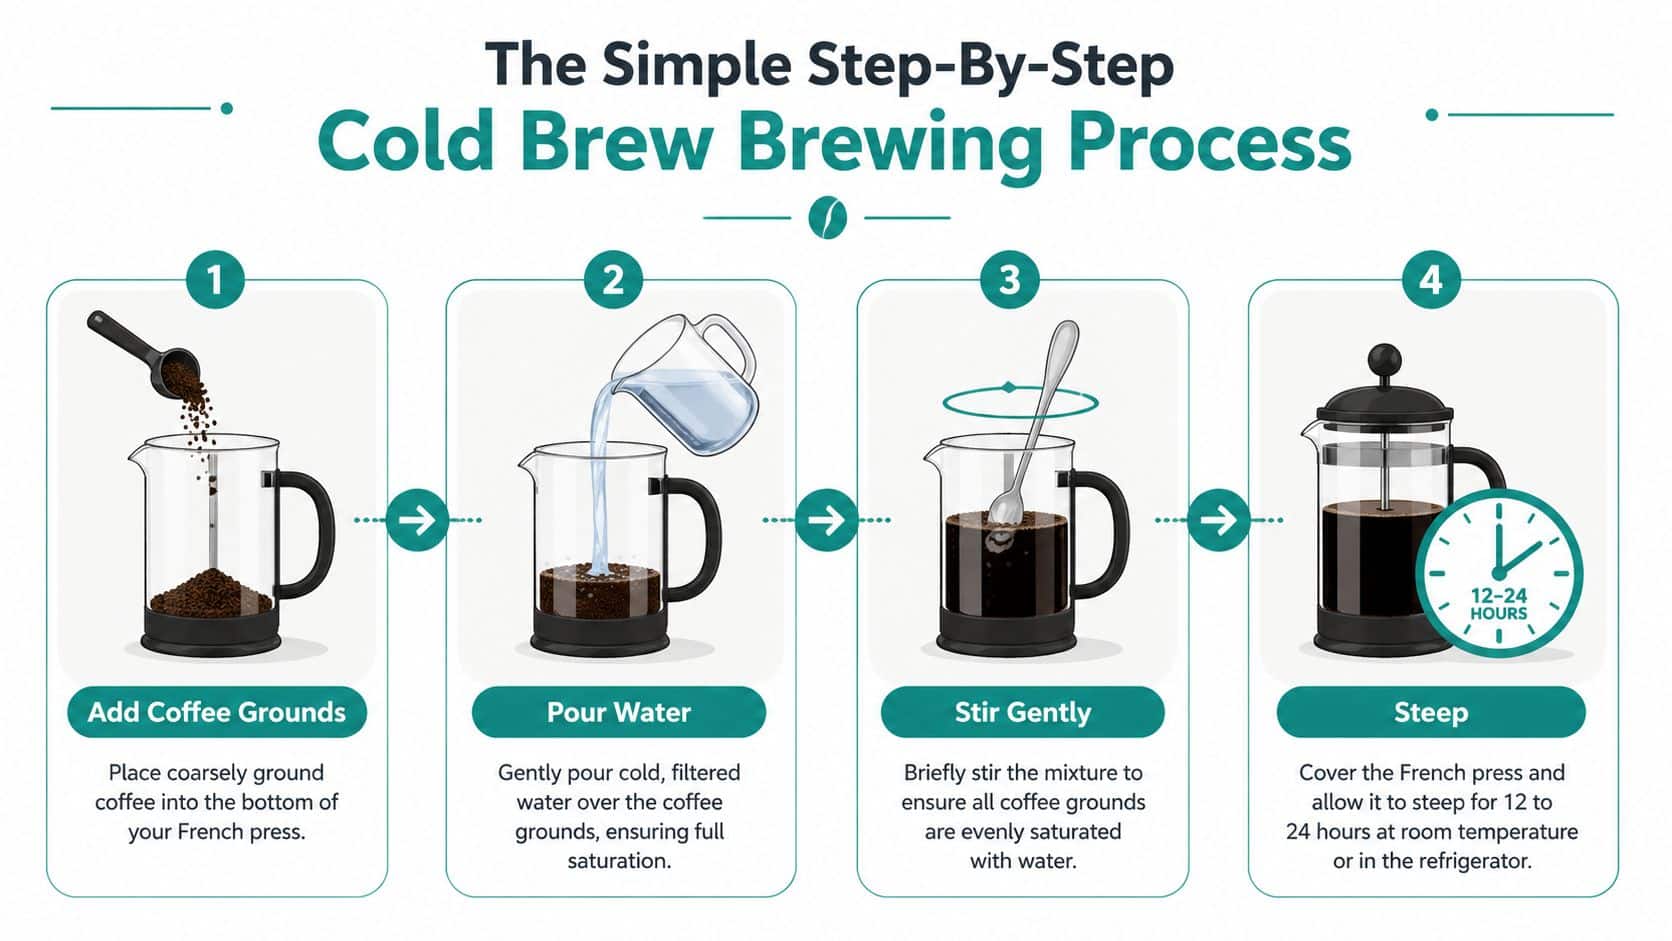
The Simple Step-By-Step Cold Brew Brewing Process
You measure the coffee, add water, and leave the press alone overnight. The next morning decides whether you made a clean, sweet concentrate or a muddy batch you need to hide under milk. The difference usually comes down to a few controllable variables: ratio, saturation, steep time, and where the press sits while it brews.
Start with a ratio that fits your press
French press cold brew works best when the recipe matches the actual usable volume of your press, not the label on the box. A 34-ounce press does not give you 34 ounces of brewing room once the grounds are in there.
For a concentrate, use a ratio in the strong range and leave headspace so you can stir without spilling. For a ready-to-drink batch, use less coffee and keep the same process. If you want help adjusting the numbers for a 3-cup, 8-cup, or 12-cup press, this guide to the French press coffee-to-water ratio is useful once you start scaling recipes instead of guessing.
I get the most repeatable results by writing the exact dose and water weight on my phone after each batch. That habit matters more than people expect.
Wet the grounds thoroughly at the start
Add the coarse grounds to a clean, dry press first. Pour in roughly a third of the water, just enough to soak all the coffee, then stir until no dry pockets remain. Add the rest of the water and set the lid on top with the plunger still fully raised.
Cold water extracts slowly, so the opening minute matters. If the grounds clump and stay dry in the center, those pockets never catch up later. One deliberate stir at the beginning fixes that.
Do not keep coming back to stir it again. Extra agitation tends to pull out more fines and can make the finished brew taste harsher than it needs to.
Steep with a purpose
A good starting window is 12 to 18 hours. That range gives enough extraction for most medium and dark roasts without pushing too far into woody or stale flavors.
Use the shorter end if your grinder produces a lot of fines, your kitchen is warm, or you want a lighter concentrate. Use the longer end if the coffee is very coarse, the roast is dense, or you plan to dilute heavily over ice. This is the part many guides gloss over. Time is not a fixed rule. It works together with grind size, roast level, and water chemistry.
If your water is on the hard side, extraction can taste a little flatter and heavier, so a slightly shorter steep often helps. With softer, cleaner-tasting water, the same coffee may need a bit more time to build body. Change one variable at a time and the pattern becomes obvious after two or three batches.
Choose the steep location based on flavor and room temperature
Counter steeping works well in a cool kitchen. It usually produces a bolder, faster extraction.
Refrigerator steeping is slower and a little more forgiving. I recommend it if your kitchen gets warm, you want a cleaner flavor, or you are still dialing in a new bean. It removes one variable from the process, which makes troubleshooting easier later.
Tea brewers use the same mindset. Small changes in water temperature and contact time change the cup. The One with Tea brewing guide shows that precision matters even with simple equipment.
Avoid the mistakes that throw off an otherwise good batch
A few errors show up constantly in home cold brew:
- Plunging before the steep is finished: this cuts extraction short and leaves the brew thin
- Using a medium or fine grind: this increases bitterness and gives the filter more silt to catch later
- Filling the press to the rim: this makes proper stirring difficult and leads to uneven extraction
- Changing ratio, grind, and steep time all at once: this makes it impossible to know what improved the batch
The method itself is simple. Consistency is the skill. Get the saturation right, scale the recipe to your press, and treat time and water as real ingredients. That is how you turn French press cold brew from an occasional win into a repeatable house recipe.
Perfecting the Press for a Silt-Free Finish
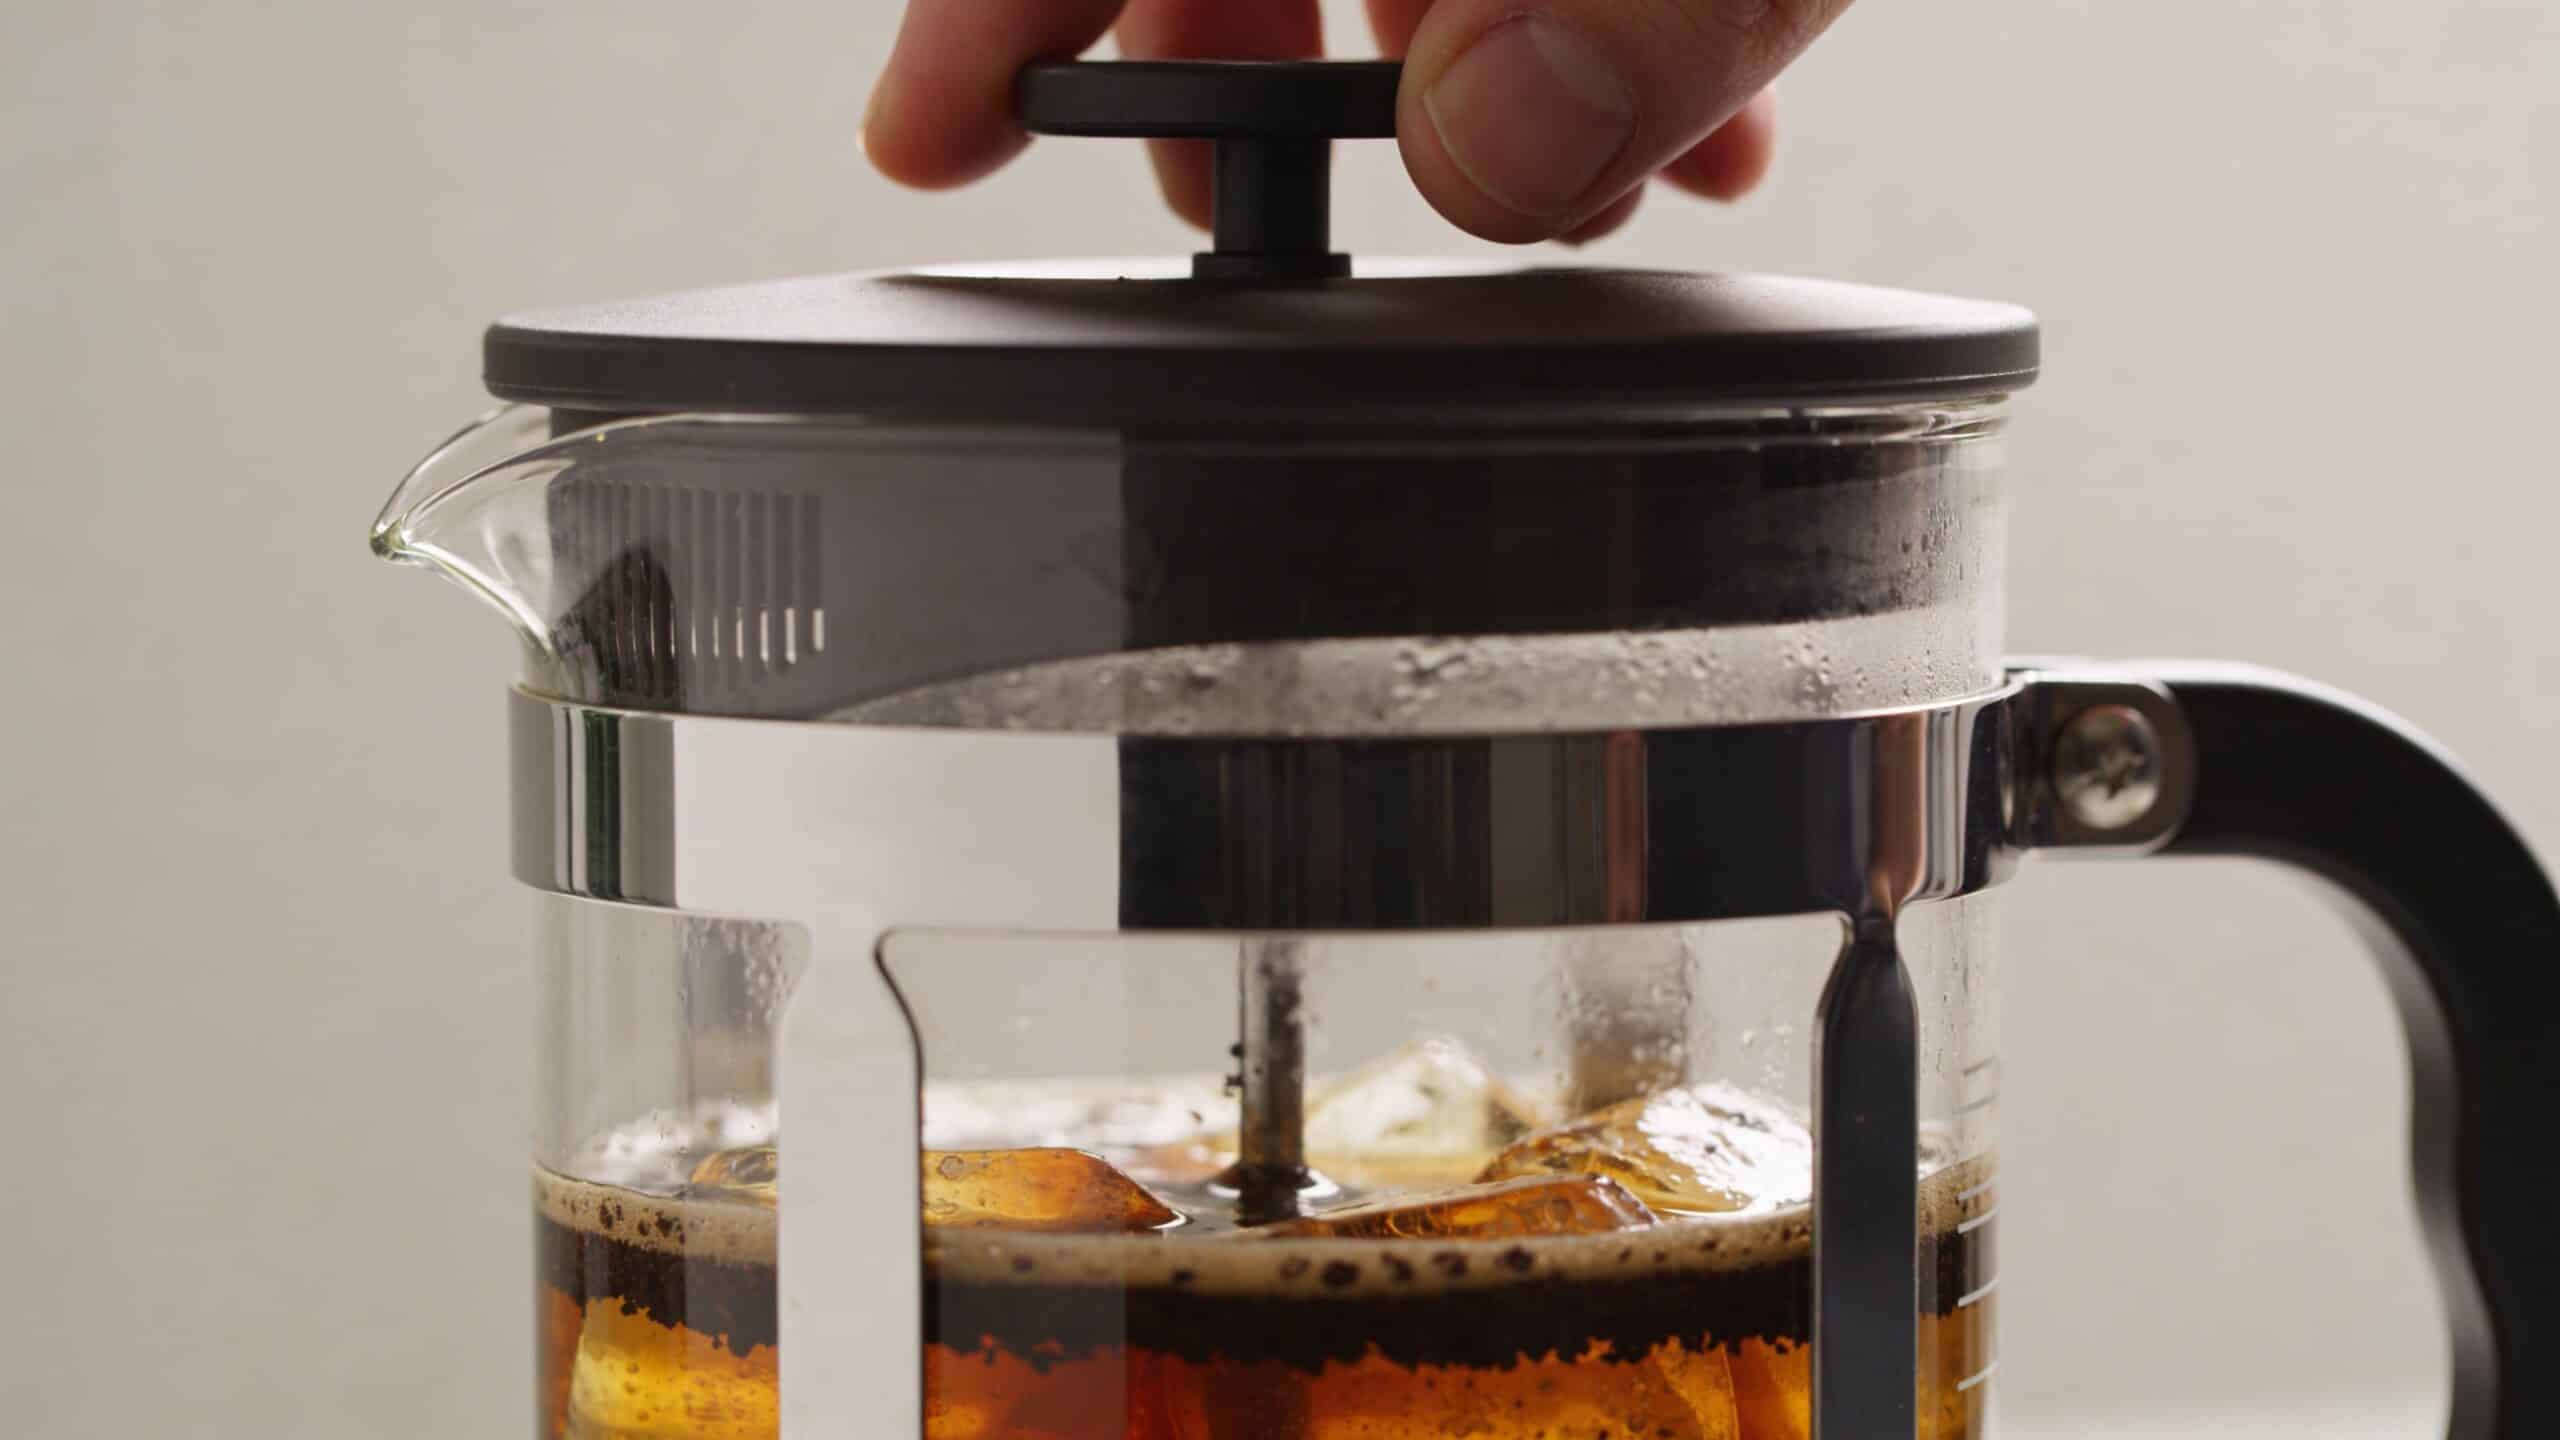
The last step decides whether your cold brew tastes polished or homemade in the wrong way. A lot of people do everything right, then ruin the texture by plunging too fast and pouring cloudy concentrate into the fridge.
The standard press method
A French press mesh is better than many people think, but it has limits. Daniel Norris notes that the mesh typically retains 85% to 95% of grounds, while pressing too quickly can increase sediment by over 15%.
That means your plunge speed matters. Press slowly and steadily. Let the filter settle the bed of grounds instead of forcing fines through the mesh.
If your grind has been inconsistent, that problem shows up here. The finer particles are the ones most likely to sneak through and leave grit at the bottom of the cup. A more detailed guide on how to grind coffee for a French press is worth checking if silt keeps showing up even when your recipe is sound.
The premium move versus the standard move
Many individuals stop at plunge and pour. That’s the standard option. It’s quick, easy, and good enough for many drinkers.
If you want a cleaner finish, add a second filtration step after plunging. Pour the brew through a paper filter set inside a fine sieve or dripper over your storage jar. It takes a little longer, but the texture difference is obvious.
Here’s the practical trade-off:
| Method | What you get | Best for | Drawback |
|---|---|---|---|
| Standard plunge only | Fuller body and more oils | Fast daily brewing | More silt in the final container |
| Plunge plus paper filter | Cleaner, smoother concentrate | Make-ahead batches and iced drinks | Slower, and you need an extra filter |
The same Daniel Norris guidance says a slow plunge of 1 to 2 cm per second and a second filtration can reach 99% clarity. If you’ve ever said French press cold brew is always gritty, this is the fix.
Barista habit: I never store the first-pass brew if it looks visibly hazy. A second filter saves the whole batch.
For a visual walkthrough, this quick demo helps show what a controlled plunge should look like before the final pour.
One common objection and the real answer
A fair objection is that French presses aren’t ideal because they let too much sediment through. That’s partly true if you treat the press as the only filter and rush the plunge.
It’s much less true when you grind coarse, plunge gently, and decant through a second filter for storage. At that point, the press becomes a steeping vessel and first-stage separator. That’s a strong setup for home cold brew.
If you like a heavier body, stop after the plunge. If you want café-style clarity over ice, filter again. Both methods work. They just produce different cups.
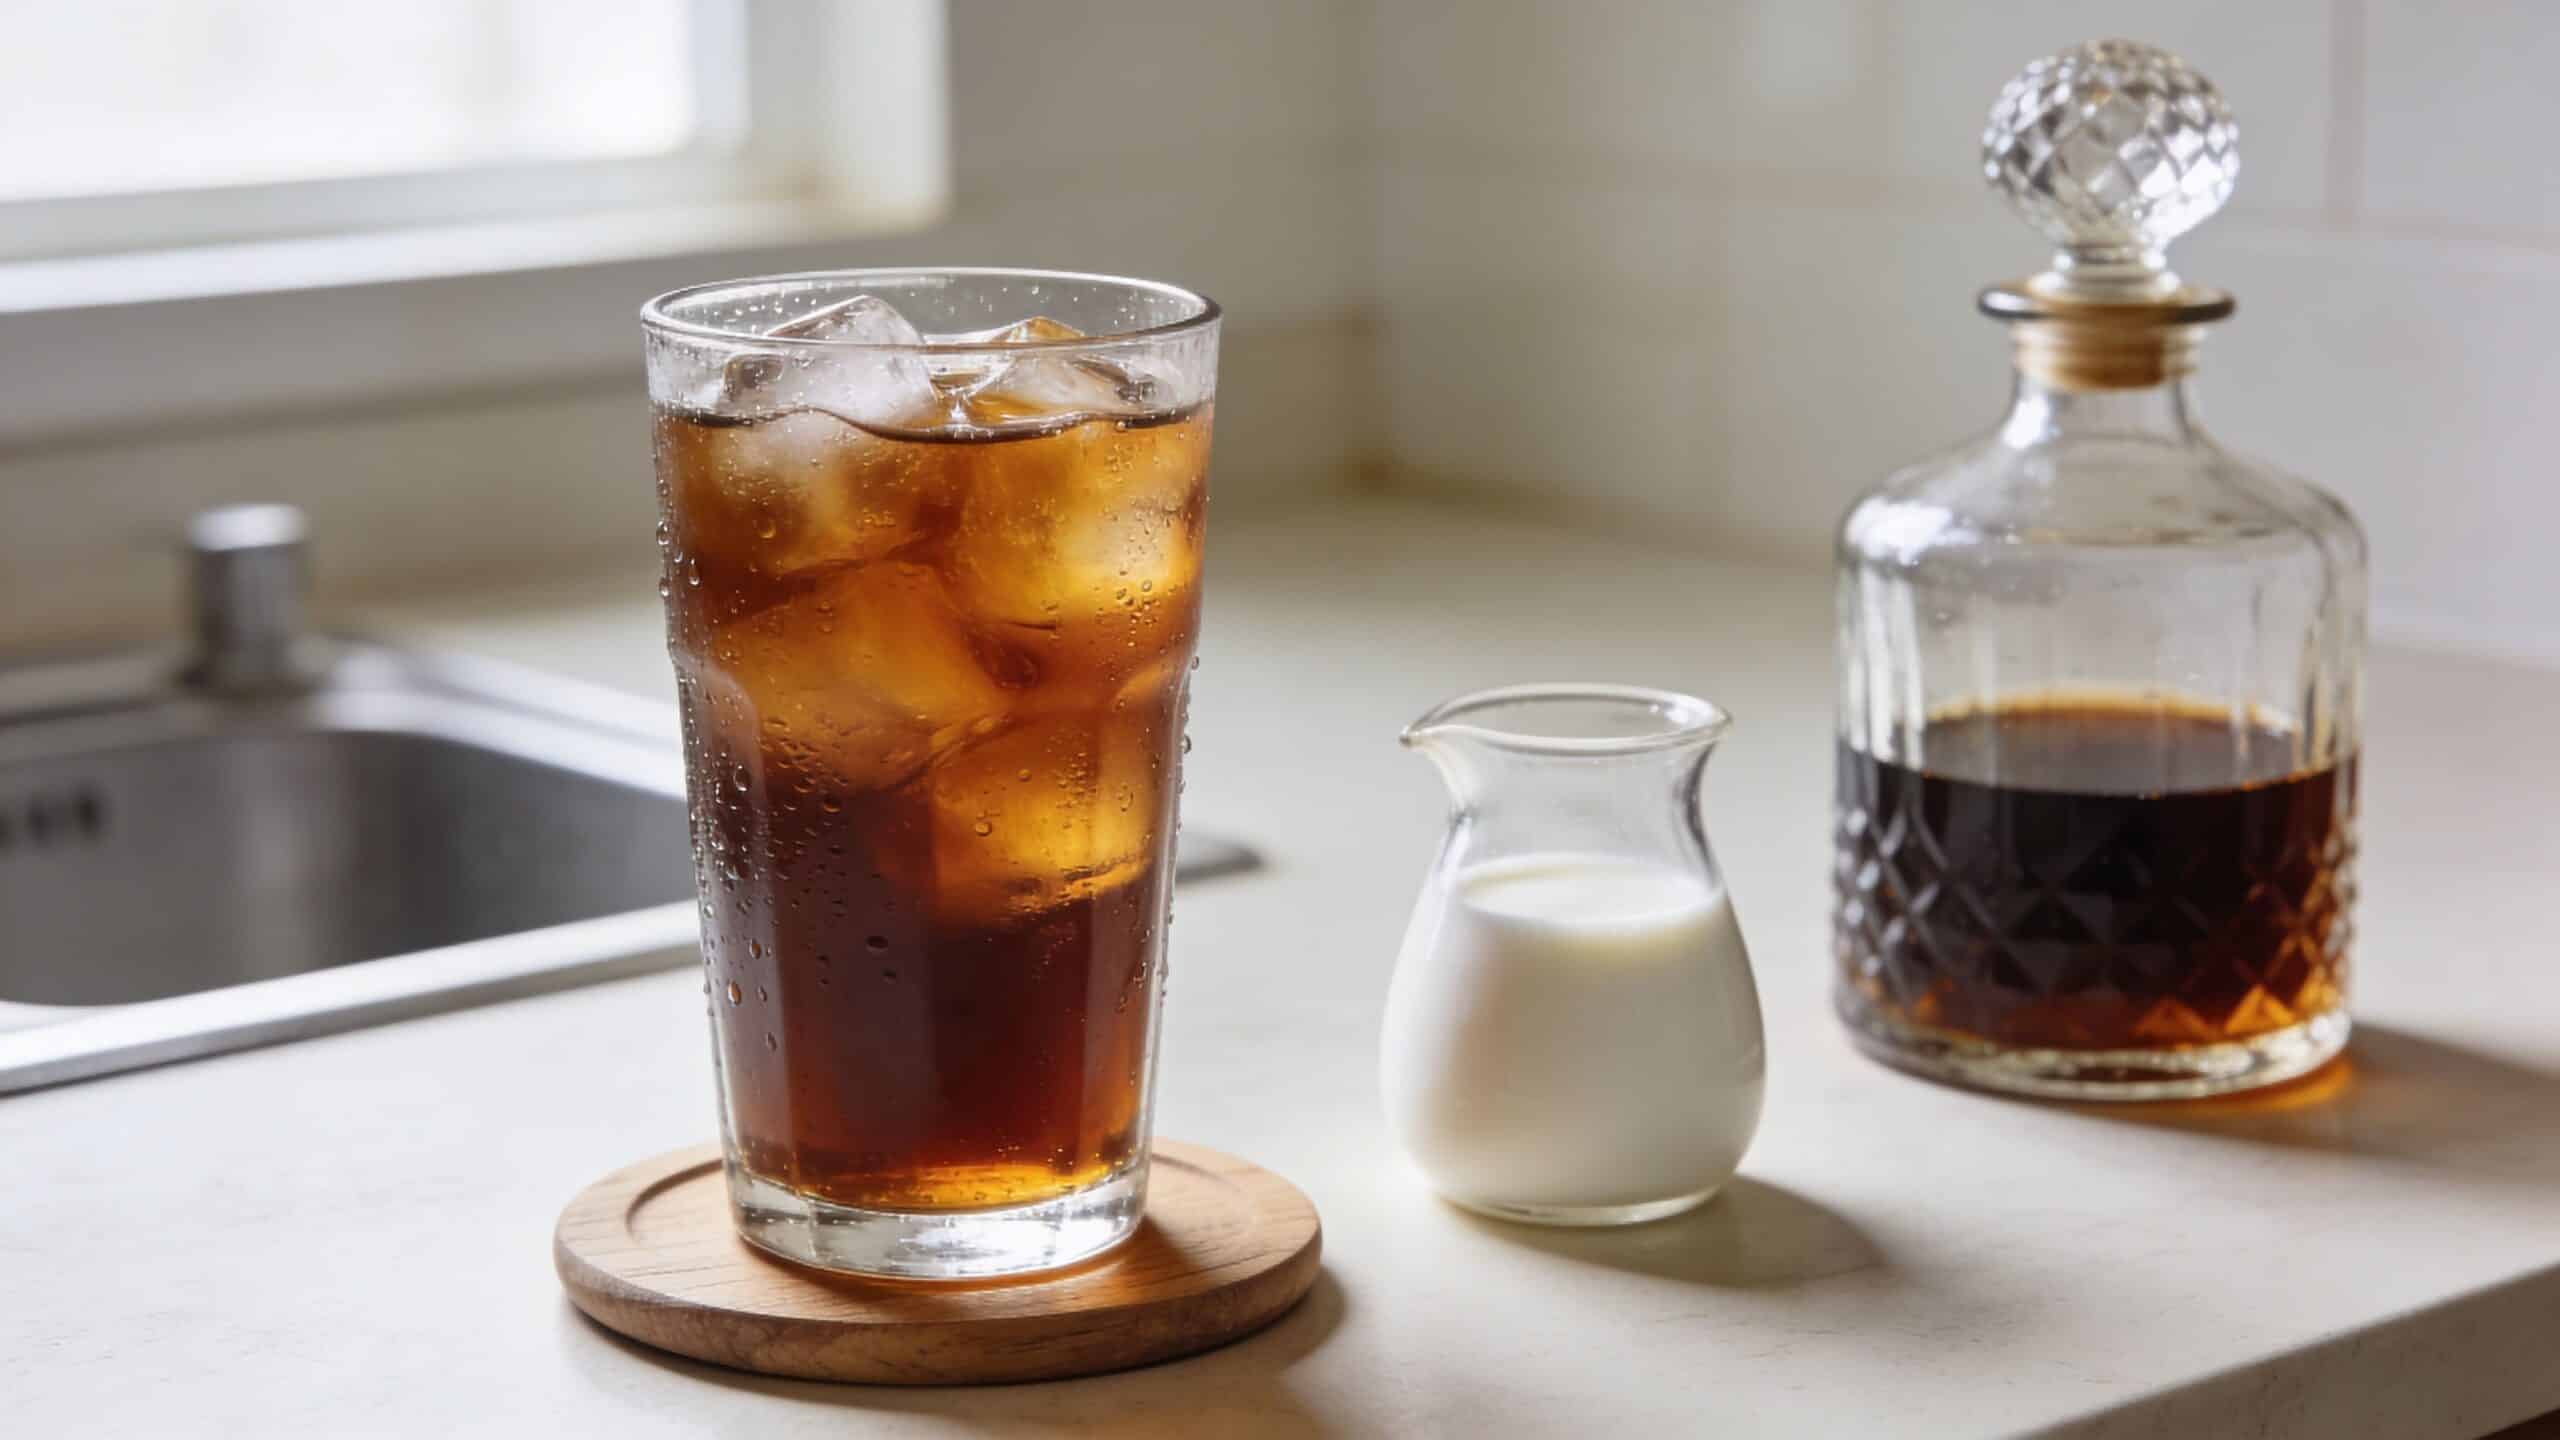
Serving Storing and Customizing Your Cold Brew
Monday’s glass should taste as good as Saturday’s batch. That only happens if you treat serving and storage as part of the brew, not an afterthought.
Start with a repeatable serving ratio
If you brewed a concentrate, begin with a 1:1 mix of cold brew and water, milk, or a mix of both. That gives you a reliable baseline before you start adjusting for roast level, ice melt, or glass size.
I build the glass in this order because it keeps the strength easier to read:
- Ice first
- Concentrate second
- Water or milk last
That last step matters more than it sounds. A dark roast concentrate often tastes best with a little more dilution, while a lighter roast can handle a stronger pour without turning muddy. If your batch came from a smaller press and you had to scale the recipe tightly, taste before adding a full splash of anything. Small batches can swing stronger or weaker than expected.
Adjust the drink, not the base
The cleanest way to customize cold brew is after brewing. Keep the stored batch plain, then change the cup in front of you.
A few dependable options:
- Classic iced coffee: dilute with cold water for the clearest read on the coffee
- Iced latte: use milk for more body and softness
- Sweetened café-style glass: add simple syrup, vanilla, or caramel after dilution so you do not bury the coffee
- Spiced version: add cinnamon or cardamom to the glass, not the whole batch, unless you know you want every serving that way
- Citrus finish: express a strip of orange peel over the top if the coffee has chocolate or nut notes
I avoid flavoring the full jar unless I am serving it all the same day. Spices and syrups can flatten the coffee over time, and milk turns a flexible base into a short-lived drink.
Store for stability, not just convenience
Transfer the brew to a clean, airtight bottle or jar as soon as you finish filtering. Leaving it in the French press with the grounds nearby is an easy way to pick up stale, woody notes.
Cold brew usually holds well in the refrigerator for several days if the container is clean, sealed, and kept cold. For the best flavor, use your nose and your palate instead of treating storage like a fixed deadline. If it smells flat, sour in a bad way, or oddly stale, retire it.
My standard routine is simple:
- Finish filtering
- Bottle the brew right away
- Label the date if you brew often
- Store it cold with the lid fully closed
- Clean the press before residue dries
Water chemistry even shows up here. If your water is high in minerals, the cold brew can taste heavier by day three than it did on day one. If your water is very soft, the same batch may seem brighter but a little thinner. That is another reason to lock in one serving ratio first. It gives you a consistent reference point from batch to batch.
Clean gear makes the next batch better
French press mesh holds onto oils fast. If those oils sit, the next brew picks up rancid notes no matter how good the beans are.
Rinse the carafe, disassemble the filter, and scrub the screen and spring with a soft brush. A deeper wash helps when you notice oil buildup or a dusty smell inside the lid. This is one of those home habits that separates a lucky batch from a repeatable one.
Troubleshooting Common Cold Brew Problems
A disappointing batch usually points to one variable, not a total failure. Cold brew is forgiving, which makes troubleshooting easier if you change one thing at a time.
When the brew tastes weak
Weak cold brew often comes from under-extraction, but “under-extraction” can mean different mistakes.
Sometimes the grind is too coarse even for immersion. Sometimes the steep ended too early. Sometimes the ratio didn’t leave enough coffee in the brewer to create a proper concentrate.
The most overlooked issue is recipe scaling. A brewing analysis on YouTube notes that a 1:7 ratio in a small French press can trap 20% to 30% of the water in the grounds, and that roughly 40% of user complaints on forums mention weak or low-yield batches from unscaled recipes.
If your press is small, that absorbed water matters. A concentrate recipe that looks efficient on paper can leave you with far less liquid than expected.
Try this instead:
- Use a larger press for concentrate if you want multiple servings
- Shift toward a ready-to-drink approach in a smaller press rather than forcing a heavy concentrate
- Track actual output, not just input water
If a batch feels weak and the yield is low, the problem may be sizing before it’s extraction.
When the brew tastes bitter or harsh
Bitterness in cold brew is usually mechanical. The grind ran too fine, the brew picked up too many fines during plunging, or the steep pushed beyond the sweet spot for that coffee.
The fix is usually simple:
- Go coarser on the next grind
- Keep the steep within a sane window
- Press more slowly
- Filter the finished brew a second time if sediment is contributing roughness
If the flavor is both bitter and muddy, treat it like a grind-and-filtration problem first.
When the cup looks cloudy or sludgy
This is the classic French press objection, and it’s real. Cloudiness means fines got through, or the brew was disturbed too aggressively at the end.
Check these points:
| Problem in the cup | Most likely cause | Best fix |
|---|---|---|
| Heavy sediment | Grind too fine or fast plunge | Grind coarser and press gently |
| Murky texture | No second filtration | Strain through paper after plunging |
| Flat flavor with haze | Water quality plus fines | Improve water and tighten grind consistency |
When the flavor seems flat
If the coffee isn’t weak, bitter, or silty but still tastes dull, look at the water. Cold brew doesn’t have heat to push past off-notes, so poor water can mute the whole cup.
Filtered water is often the easiest improvement because it removes obvious taste and odor problems. It also makes your brewing adjustments easier to read from batch to batch. If you’re brewing regularly, accessories that help maintain clean water and clean equipment are worth having on hand. A good water filter and a dependable descaling routine help prevent off-flavors from creeping into your coffee setup over time.
The bigger lesson is that every bad batch gives you a clue. Don’t respond by replacing everything at once. Keep the beans if they’re fresh. Keep the press if it seals and filters well. Change the variable that most likely caused the flaw, then brew again.
If you want your home coffee setup to stay consistent, PureHQ Inc. is a smart place to shop for reusable coffee accessories, water filters, and maintenance supplies that help brewing equipment perform better day after day. Browse PureHQ’s selection if you want cleaner-tasting coffee, less waste, and an easier routine for the machines you already use.
