
Coffee Machine Care
Keurig Reusable Filter Grounds in Coffee: Causes and Fixes
Nov
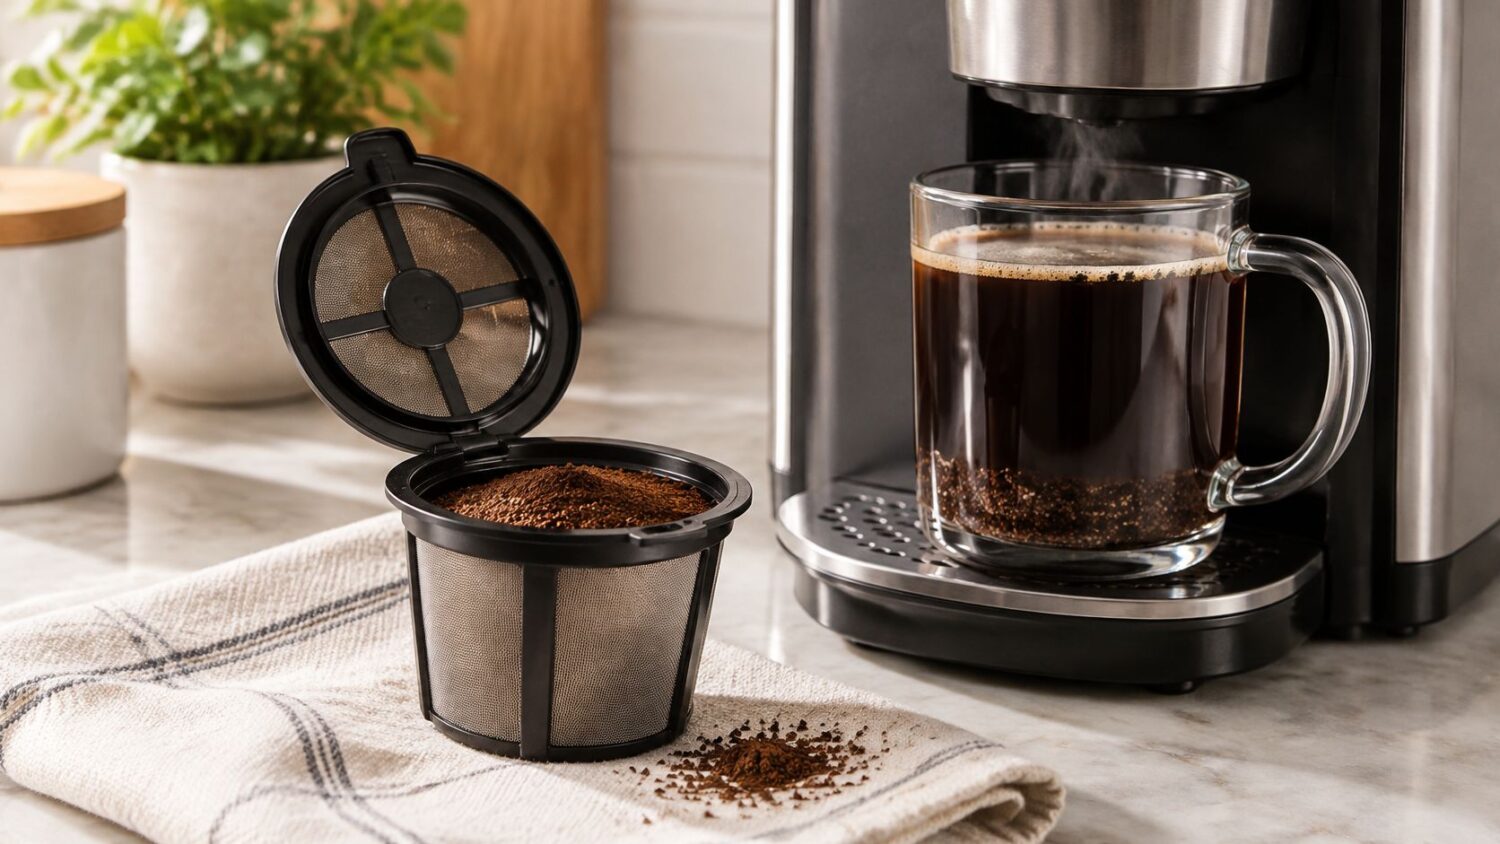
The last inch of coffee in the mug is the honest part. Tip it toward the window and you'll see silt sliding across the bottom, or a ring of grit stuck to the wall where the liquid used to sit.
Some mornings the lid won't close at all, because the basket is heaped above the rim, and the brew that follows sputters, overflows, and leaves a wet mound of grounds under the pod. The first few sips taste fine. The rest crunch.
The Keurig reusable filter grounds in coffee problem is almost never a broken machine or a defective filter. It's a packing and flow problem, and it usually costs you more in wasted coffee and cleanup than any replacement part would.
Why Coffee Grounds Land in Your Cup
Grounds reach the mug by three routes, and they tend to show up in a predictable order. Overfilling or tamping comes first: fill the basket above the MAX line or press the bed into a puck and the lid can't seat, so water pushes slurry past the rim instead of through the mesh. Grinding too fine comes second: powder-fine particles pack into the screen, flow slows, pressure builds, and the fines that do get through land in the cup. Old fines and oils on the basket and needle come third, and they're the sneakiest, because the filter looks clean while half the mesh is blocked.
Each cause has its own cost. Overfilling wastes a scoop of coffee and leaves a mess in the drip tray. A too-fine grind turns a short brew into a stalled cycle that stops and restarts. A blocked needle sends water around the grounds instead of through them, so the cup tastes thin and still finishes gritty.
Keurig documents these failure modes in its own My K-Cup quick-start guide, which warns that fine or espresso grinds may clog the filter and cause poor extraction, recommends a coarse, French-press-like grind, and cautions against compressing or overfilling the basket. None of that calls for a new part. It calls for a repeatable routine and a patient test.
The temptation is to change everything at once: new grind, new dose, new cup size, fresh pod. Resist it. Adjust one variable per brew, starting with fill level and grind, since those two sit behind most grit in the cup. Then work through the rest in order: the packing sequence, the dial-in for weak, bitter, clogged or overflowing cups, and a fair comparison of the mesh basket against paper liners and pre-filled pods.
Run this test today: brew one cup with a level, unpacked dose at your usual grind and cup size. If the grounds disappear, the filter was never the problem.
Grind, Fill and Packing Settings That Keep Grounds Out
Four settings decide whether the coffee stays in the basket. Lock these in before you touch anything else.
| Setting | Recommended value | Why it matters | Common mistake |
|---|---|---|---|
| Grind | Medium to coarse, similar to French press | Fine grounds slow flow and can clog the screen | Espresso or powder grind |
| Fill level | Up to the MAX line, no higher | Overfill stops the lid closing and spills grounds | Packing to the rim |
| Compression | None; level the bed with a fingertip | Compression restricts water flow | Tamping the grounds down |
| Cup size under 10 oz | Lower cup line | Matches water volume to the dose | Using the mug line on small brews |
| Cup size above 10 oz | Upper mug line | Keeps larger volume from over-diluting the dose | Using the small setting on a large mug |
| Dose and ratio | About 10 g for 150 mL, near 1:15 | Sets strength without forcing flow | Doubling the dose to fix weak coffee |
| Coffee type | Ground coffee only | Tea leaves and cocoa powder clog the filter | Tea or powdered drink mixes |
Keurig's official My K-Cup instructions spell out the fill rules: stop at the MAX line, never compress the grounds, and use the lower cup line for brews under 10 ounces or the upper mug line for brews above 10 ounces. The same page recommends a coarse, French-press-like grind and warns that fine espresso grounds may clog the filter screen, and it notes that overfilling or compressing the grounds can impair brewer performance and the taste of the drink. Those rules explain nearly every report of wet grounds, restricted flow and coffee that spills into the cup.
A weighed dose beats a scoop every time, because a level bed below the marked limit is what lets water pass through the whole basket evenly rather than channeling around a dense center. Still choosing beans? This guide to the best ground coffee for Keurig covers how roast level and grind size behave inside a reusable basket, which keeps the dose predictable from bag to bag.
Coffee is the only thing that belongs in the basket. Tea leaves, hot cocoa and powdered drink mixes are not, because they clog the mesh in ways a rinse won't clear. Get these settings right and a failed cup becomes the exception instead of the routine. When one still fails, a single variable is out of range, and the fix is to change that variable alone.
How to Pack and Brew a Reusable Filter Step by Step
Packing is where most grounds-in-cup failures start, and this sequence takes about forty seconds once you've done it twice.
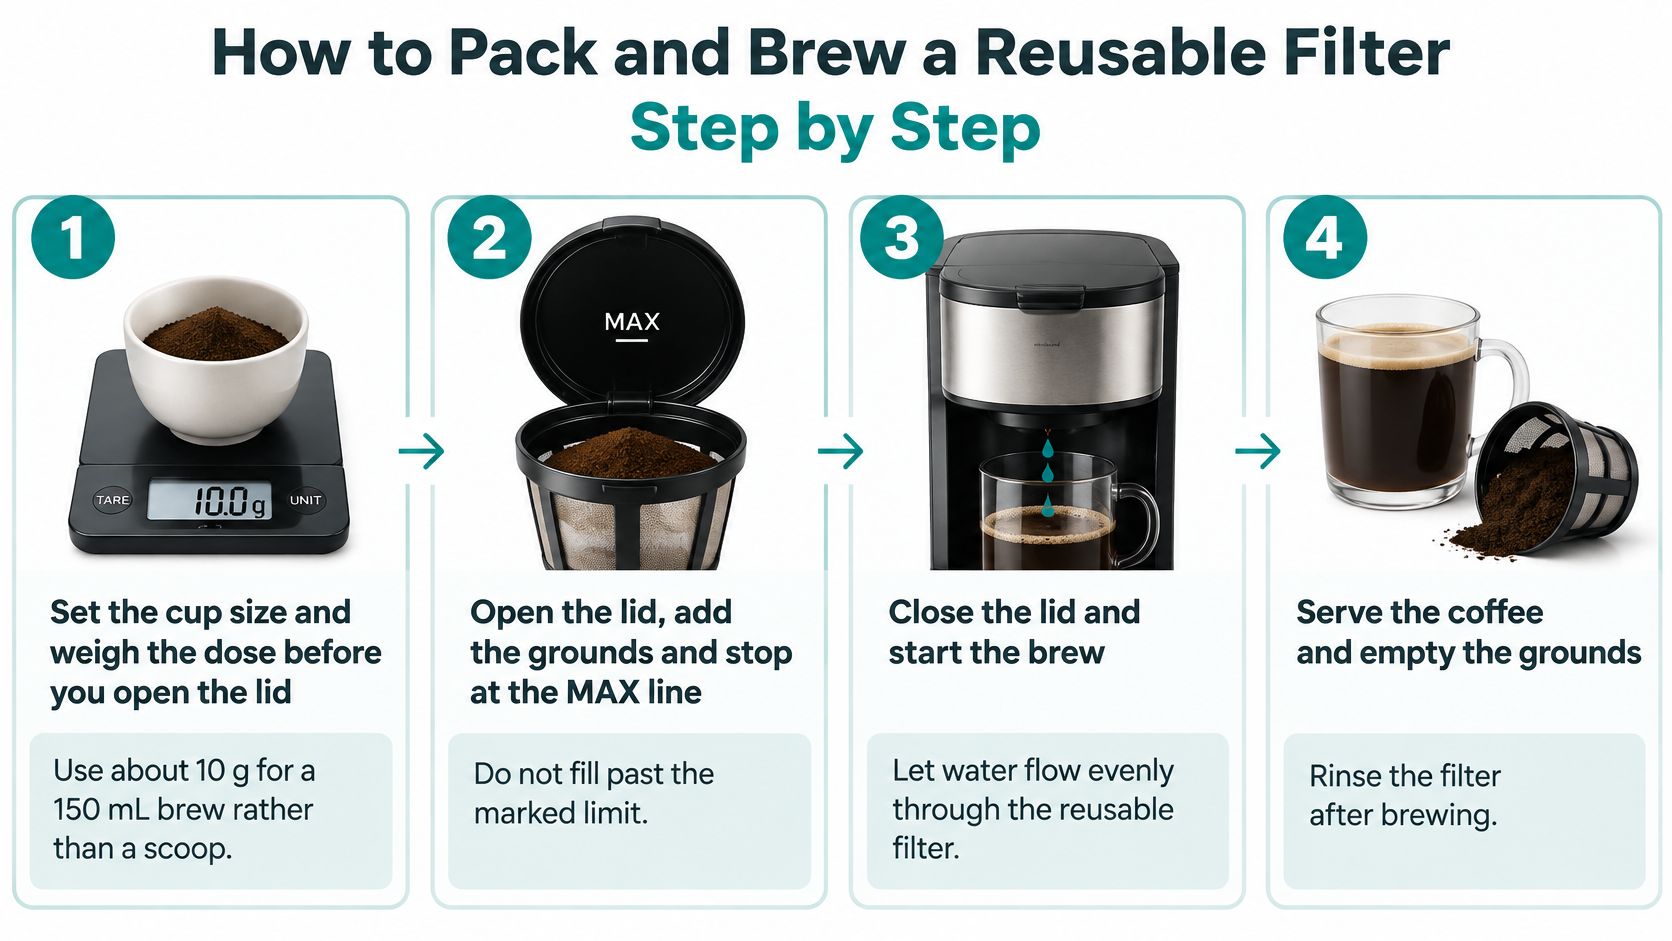
- Set the cup size and weigh the dose before you open the lid. Work from about 10 g of grounds for a 150 mL brew rather than a heaped scoop. Adjusting the volume after the basket is full is how a correct dose turns into a watery cup.
- Add the grounds and stop at the MAX line. Overfill is what stops the lid from closing and pushes coffee over the rim. Fill, tap the basket once on the counter, and check the level against the mark.
- Level the bed with a fingertip and don't press. A loose, even bed lets water pass through every part of the basket at the same rate. Press the grounds down and water finds the path of least resistance around the puck instead of through it.
- Close the lid until it clicks and check that the basket sits fully home. A lid that rides high or a basket that isn't seated lets water bypass the coffee and drive fines into the cup. Wipe stray grounds off the rim first.
- Match the cup setting to the fill. Use the lower line for brews under 10 ounces and the upper mug line for brews above 10 ounces, so the water volume suits the dose you weighed.
- Watch the first 30 seconds. A steady drip means the grind and packing are right. Sputtering, a thin fast stream, or a cycle that stops and restarts points to fines or too much coffee in the basket.
- Empty and rinse while the basket is still warm. Rinse the basket and mesh under warm water, then let both air dry completely. Fines left in the mesh are the third cause on the list, and they build up faster than expected.
If you want to see the fill and seal motion before you try it yourself, this walkthrough runs the same sequence on a working brewer.
A good result looks like this: a clean cup with no grit at the bottom, a basket that taps empty and rinses clear, and a brew that runs in the same time tomorrow as it did today.
Fixing Weak, Bitter, Clogged and Overflowing Cups
Weak, watery coffee is the most common complaint about reusable filters, and it rarely comes from the filter itself. The cause is usually a dose too small for the volume of water the machine pushes through, or a cup size selected out of habit rather than on purpose.
Change One Variable and Brew Three Cups
Record the dose, the programmed volume, the brew time and the taste for three consecutive cups, and change one thing per trial. That protocol matters because drip-brewing research published in Scientific Reports found that grind size, flow rate, dose and brew time have to be adjusted together to hold strength and extraction constant, and that tested brew temperatures of 87°C, 90°C and 93°C produced comparable results once those variables were controlled. In practice, your machine's brew temperature isn't the variable to chase. Your dose and your grind are.
Working rule: change one variable, brew three cups, write down what happened. Two changes at once tell you nothing about which one worked.
Match Each Symptom to Its First Fix
| Symptom | Likely cause | First fix |
|---|---|---|
| Watery, weak cup | Dose too low or cup size too large | Use the smaller cup setting, then add dose up to the MAX line |
| Sour, thin taste | Grind too coarse or water volume too high | Grind one step finer, then reduce the water volume |
| Bitter, dry or stalled brew | Grind too fine or basket over-packed | Grind one step coarser and lower the dose by 10-15% |
| Slow drip or sputtering | Fines blocking the mesh or needle | Clean the basket and needle, then re-test with less coffee |
| Overflow from the top | Basket overfilled or grind too fine | Fill below the MAX line and rinse after every brew |
Take a 10 oz mug that tastes sour and thin. Try one grind step finer and brew it again at the same volume before you touch the cup size, because the finer grind raises extraction without changing the ratio. If the cup is bitter or the brew stalls halfway, go the other direction: one step coarser, or a dose roughly 10 to 15 percent smaller, before you change the volume.
Treat Slow Flow as a Maintenance Problem
The worst reusable-filter pitfall is excessive fineness stacked on top of overfilling or tamping. Finer particles raise extraction potential and reduce permeability at the same time, which slows flow and can produce bypass, overflow, grounds in the cup, or an interrupted cycle. Extraction experiments reported in the Journal of Food Process Engineering found that extraction yield increases as particle size decreases and as brewing temperature rises, yet full-immersion tests reached equilibrium extraction near 21% across broad changes in grind size and temperature. Grind mostly changes how fast extraction happens and how the water moves, unless contact time and brew ratio change with it.
A slow or sputtering brew is a permeability and maintenance failure. Adding more coffee makes it worse. Weigh the grounds, skip compression, leave headspace above the bed, and keep the needle and mesh clean:
- After every brew: empty the basket, rinse the mesh and basket in warm water, and wipe the sealing rim.
- Weekly: hold the basket up to a light and inspect the mesh and the brewer needle for packed fines and oil film.
- On the machine's schedule: descale, because mineral scale slows flow in ways that look exactly like an over-packed basket.
Water choice shifts that schedule. One customer who runs spring water through their Keurig reported not needing to replace the water filter as often, with the machine still working as described.
Three questions settle most bad cups: is the basket clean, is the grind coarser than powder, and is the dose below the MAX line. When all three are true and the cup is still gritty, the problem sits on the machine side, at the needle or the exit path, not in your coffee.
Reusable Filters Compared With Paper Liners and Pods
Three formats fit the same brewer, and they fail in different ways.
| Option | Grounds control | Coffee choice | Waste per cup | Cost pattern |
|---|---|---|---|---|
| Reusable mesh filter | Good when packed to MAX and rinsed | Any ground coffee | None; basket is reused | Higher upfront, lower per cup |
| Paper liner in a reusable pod | Good; paper catches fines | Any ground coffee | One liner per brew | Low upfront, ongoing per-brew cost |
| Standard pre-filled pod | Consistent fill, no packing errors | Limited to pods sold | One pod per brew | Low setup, higher per-cup cost |
The trade-off is control against convenience. A mesh basket gives you the roast, the grind and the dose, and asks for a quick rinse in return. A pre-filled pod removes every packing decision along with every choice about what goes in the cup.
When a cup turns gritty, change one variable at a time. Keep the coffee and dose steady, then move the same grounds into a lined pod; if the lined cup runs clean and the mesh cup stays muddy, look at fill height, rim cleanup and the screen before you judge the format.
Leaks usually trace to an overfill or a lid that did not seat. Fill below the MAX line, wipe the rim, and close until it clicks, and the gasket does its job.
Fit is the other fork. Compatibility comes from brewer family and model name; the coffee inside does not change the fit, so read the badge before judging a basket that will not lock flat.
Durability comes down to the mesh. Rinse and air dry after each use, and replace the filter once the screen tears or the basket stops seating firmly.
Replace it when the mesh tears: a basket that no longer sits flush lets water bypass the bed, and no grind adjustment fixes that.
A paper liner inside a reusable pod catches fines and suits anyone who would rather skip the morning rinse, though it adds a cost to every cup. This comparison of a reusable coffee filter versus paper goes deeper on sediment, oils and cleanup. A reusable basket costs more at the start and less per cup, and it sends nothing to the trash after each brew.
Choose a Reusable Filter That Fits Your Keurig
Start with the model name printed on the front badge or the label underneath, because a basket that fits one Keurig may not seat in another. Check your exact model against the compatibility information Keurig publishes for its reusable filters before you compare prices, grind settings or anything else.
Our reusable K-Cups 4-pack is built for the Keurig K-Supreme, K-Slim and K-Duo Gen 2 machines, and we oversee our own manufacturing so the lid geometry and mesh match the brew head they're sold for. If you'd rather keep cleanup to a minimum, our disposable paper filters for reusable K-Cups come in a 100-pack, fit Keurig and Ninja DualBrew coffee makers, and cost $12.95.
A reusable basket earns its price across repeated brews because it works with any ground coffee and replaces a single-use pod every time. This guide to which reusable K-Cup fits your Keurig covers single-needle and MultiStream brewers model by model.
Confirm the machine you own, pack the basket to the line, and shop the reusable K-Cups that match it at purehqfilters.com today.
PureHQ Inc. makes reusable K-Cups, disposable paper liners, water filters and descaling supplies for Keurig, Ninja DualBrew and Breville machines, so the routine in this article has parts that fit the brewer on your counter. If you want a basket that seats properly, a liner for the mornings you'd rather not rinse, and a descaler that keeps flow steady, start with PureHQ Inc. and match the pod to your model before the next brew.

