
Coffee Machine Care
Best Filter for Keurig Mini: 2026 Guide & Tips
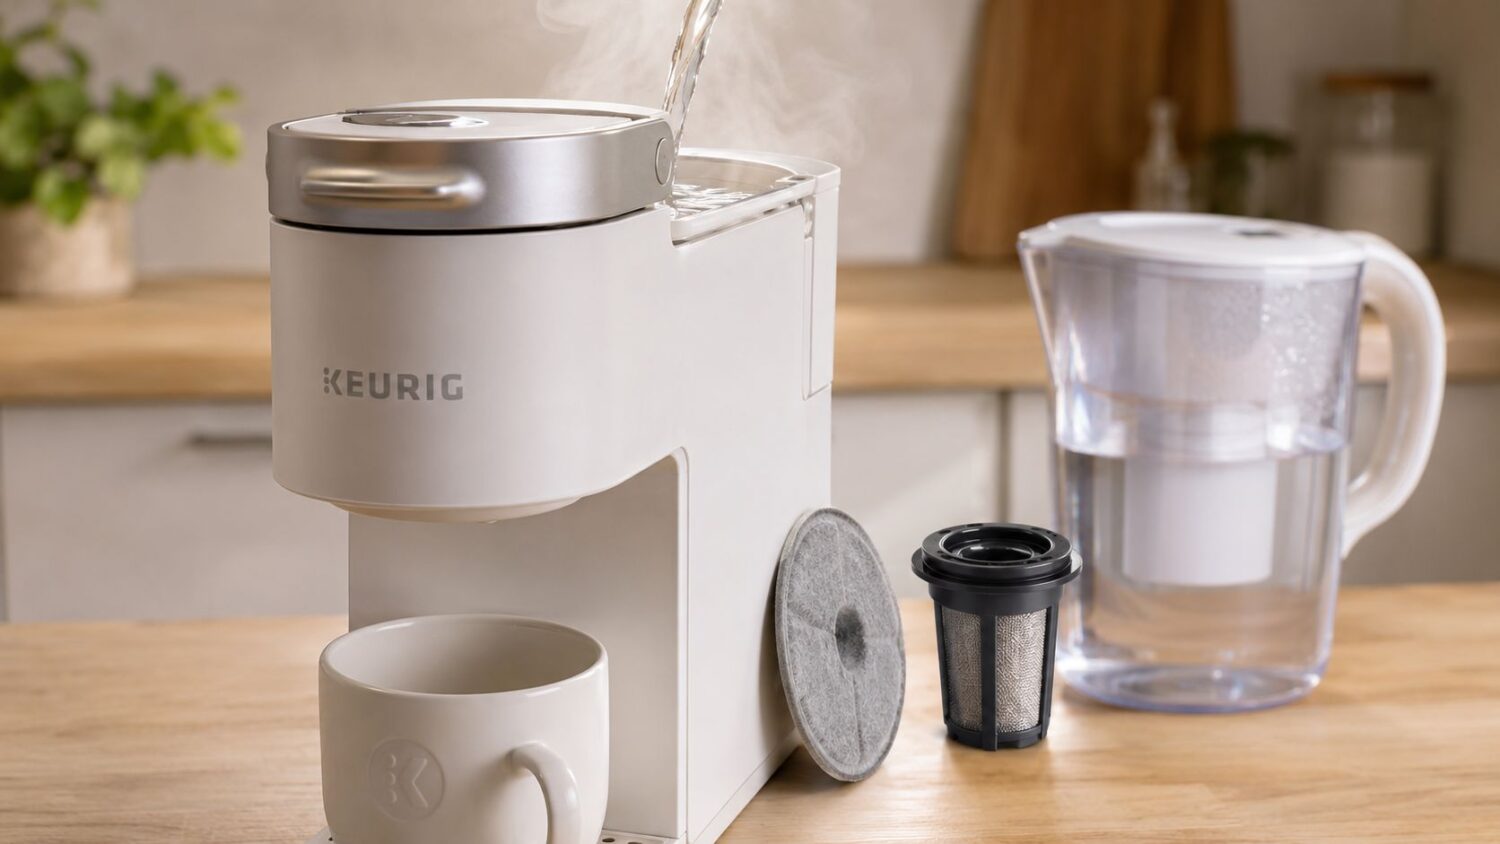
Jul
You've probably filled your Keurig Mini with tap water without thinking twice, then wondered why the coffee tastes flat or the machine seems fussier over time. That's the hidden issue with a filter for Keurig Mini setups, the brewer doesn't have a built-in reservoir filter, so whatever is in your water goes straight into the cup and through the machine. Keurig's own guide shows the K-Mini is a single-serve, reservoir-less brewer, and its descaling process relies on a measured 10 oz (296 mL) fill, which is a strong clue that you're working with a compact pour-in system, not a tank with a cartridge slot Keurig K-Mini user guide.
If your water is hard or heavily chlorinated, that matters more than most owners realize. Mineral scale can build up inside a small brewer faster than people expect, and water quality becomes an external choice instead of an internal feature. For a broader look at what hard water does to household systems, the guide on solutions for hard water problems is a useful companion read, especially if you're trying to understand why a simple cup of coffee can start tasting off before the machine shows obvious trouble.
Introduction to Water Quality and Your Keurig Mini
The Keurig Mini turns water into coffee one cup at a time, so the water you pour in matters every single morning. With many Keurig brewers, a reservoir filter can sit inside the tank and help manage taste, but the K-Mini doesn't have that built-in path. Keurig's own documentation shows the brewer is reservoir-less and lacks an integrated filter housing, so water treatment has to happen before the water enters the machine Keurig K-Mini user guide.
That changes the whole maintenance mindset. Instead of asking which cartridge goes inside the machine, you need to ask whether your tap water needs to be filtered first, whether a pitcher is enough, and how often the brewer should be descaled. Keurig's K-Mini descaling steps also include a rinse sequence and a 30-minute standing period, which shows that mineral management is part of normal use, not an emergency fix Keurig K-Mini user guide.
Practical rule: if you can't install a filter inside the brewer, treat the water at the sink, in a pitcher, or on the counter before it ever reaches the K-Mini.
A lot of owners think this is overkill until flavor changes appear. But on a small machine, scale and taste problems show up as a brewing issue, not just a water issue. For a compact brewer, the smartest fix is usually to control the water outside the machine and keep the machine itself on a steady descaling routine.
Understanding Filter Compatibility with Keurig Mini
The compatibility question is simple once you look at the brewer's design. The Keurig K-Mini is a single-serve, reservoir-less brewer without an integrated filter housing, so there's no internal slot where a standard reservoir cartridge can live Keurig K-Mini user guide. That's why water quality has to be handled externally, by filtering the fill water before it reaches the brewer.
What can work instead
The practical options are the ones that treat water before brewing, not inside the tank. A countertop pitcher filter is the easiest to understand, since you pour water into the pitcher, let it pass through the media, and then fill the Mini from the clean side. Inline cartridge setups are more hands-off, but they're usually better suited to a sink or a plumbed-in water line than a tiny countertop brewer.
For owners who want taste control without touching plumbing, the cleanest path is often a pitcher or another external treatment step, which is why guidance for the Mini keeps circling back to pre-filtered water rather than a built-in cartridge PureHQ guidance on Keurig water filters. EcoQuest's page on maintain clean water quality is another helpful reference if you're comparing carbon-based treatment approaches for water you pour into the machine.
A second point trips people up. Keurig's own K-Mini style doesn't use the same reservoir filter path found on larger brewers, so buying a “standard Keurig filter” for the tank won't solve the problem here. The brewer needs cleaner input water, not a cartridge inside a compartment it doesn't have.
Exploring External Filter Options
A good filter for Keurig Mini use is really a water-prep method, not a single part. Think of it as choosing the place where filtration happens, before the brew cycle starts. The right choice depends on whether you want convenience, portability, or the least counter clutter.
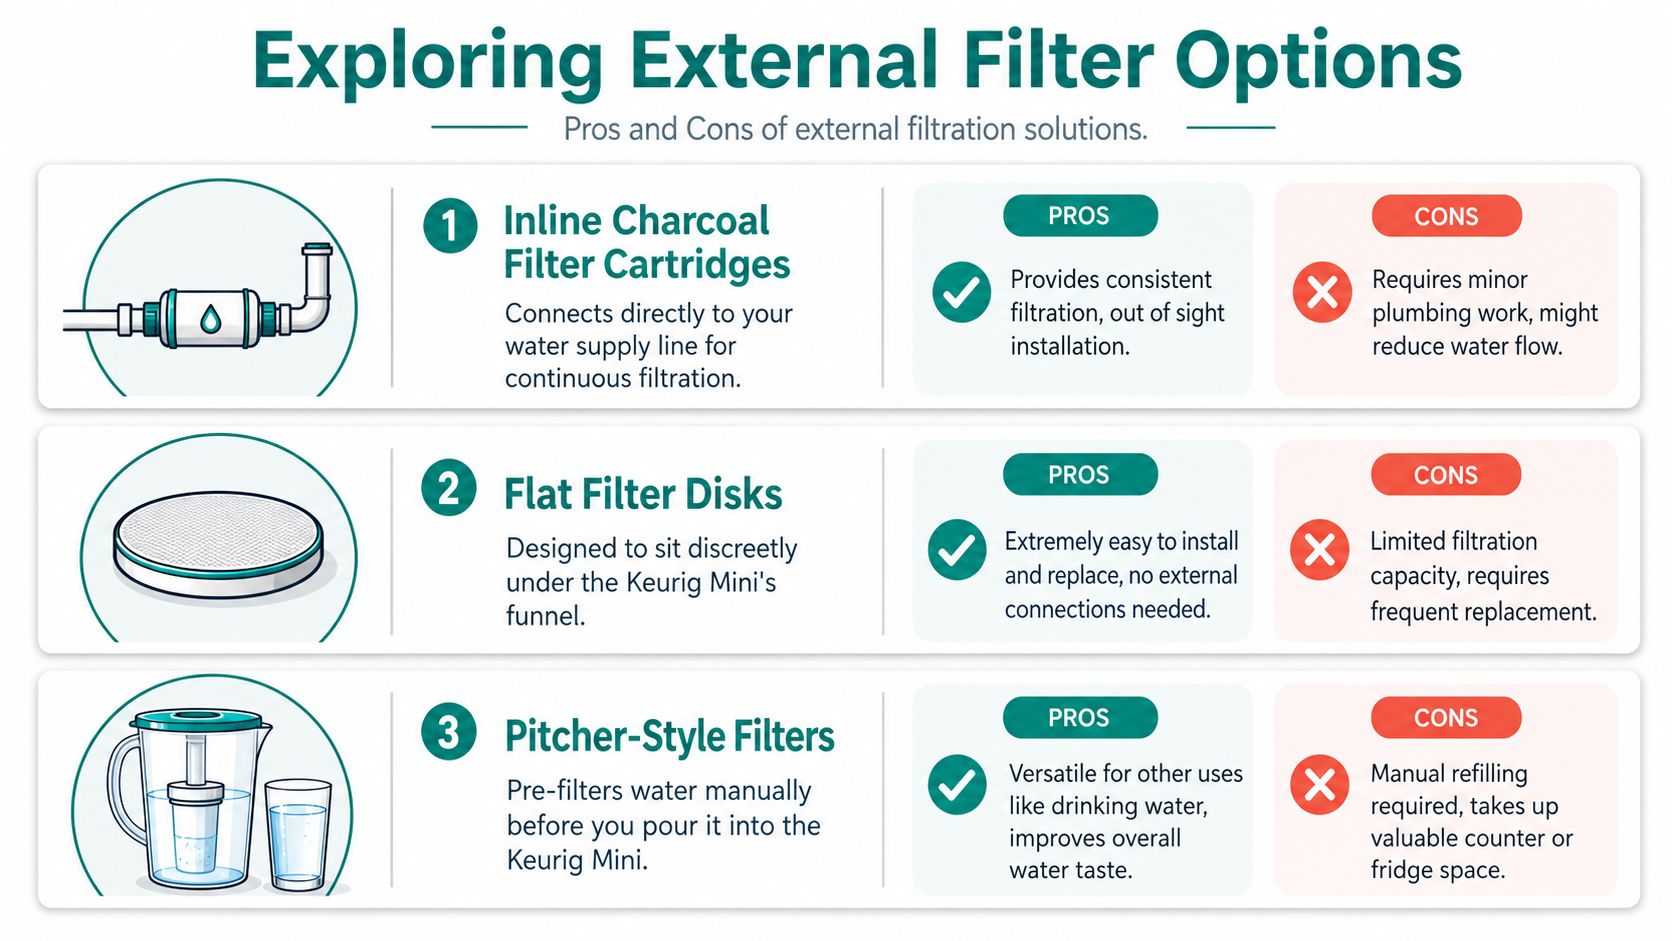
The main choices
Inline charcoal filter cartridges connect to a water supply line and treat water before it reaches the brewer. They're tidy once installed, but they make the most sense where plumbing work is acceptable and the brew station stays in one place.
Flat filter disks sit under the funnel or in a compatible adapter area, which makes them easy to handle and quick to swap. Their tradeoff is straightforward, they're small, so they tend to need more frequent replacement than larger systems.
Pitcher-style filters work like a mini treatment station on the counter or in the fridge. They're flexible and easy to understand, and they're often the friendliest choice for renters or anyone who wants cleaner-tasting water for more than just coffee.
For a brewer this small, the pitcher option often gives the cleanest balance of simplicity and usefulness. You can use the same filtered water for drinking, cooking, and coffee, which keeps the extra hardware to a minimum.
A filter doesn't have to be built into the machine to improve taste. It just has to clean the water before the water enters the brewer.
For brewers that do use charcoal filter cartridges, manufacturers advise soaking the filter for about 5 minutes, rinsing it under running water before first use, and replacing it on a regular schedule of about every 2 months or 60 tank refills Keurig filter cartridge guidance. That interval matters more for larger machines, but it's still a useful benchmark when you're comparing replacement habits across coffee equipment.
Installing Filters on Your Keurig Mini
The least frustrating installs are the ones that match your setup before you buy. If you're using a pitcher, the installation is basically zero, you rinse, fill, and pour. If you're using an inline or adapter-based solution, the key is to fit the filter where it won't interfere with the K-Mini's lid, funnel, or brew clearance.
Start with the water path
An inline cartridge belongs on the water path before the brewer, not inside the brewer itself. If you have a faucet-connected system, make sure the water flows through the cartridge cleanly and that the connector seals tightly, because a loose seal can waste water and create a mess under the sink. If you're in an apartment or rental, a pitcher filter is usually simpler because it doesn't ask for permanent changes.
If you're trying to locate the right replacement parts for a setup like this, the guide on Keurig water filter location is a useful reference point, even though the K-Mini itself doesn't have a reservoir slot to house a filter.
Flush before the first brew
For charcoal-style cartridges, rinse and soak them before use so loose carbon doesn't end up in your cup. Keurig's filter guidance says to soak the cartridge for about 5 minutes and then rinse it under running water before first use Keurig filter cartridge guidance. That step sounds small, but it helps the filter behave predictably from the first fill.
Keep the pitcher or dispenser steady
Pitcher-style filters don't need tools, but they do need a stable routine. Keep the pitcher close to the brewer, wash it regularly, and don't overfill it if the lid or spout makes pouring awkward. A clean pour matters because you're transferring that water directly into the K-Mini with no second chance for filtration inside the machine.
Maintaining and Descaling Your Mini
The K-Mini stays happiest when you treat maintenance as part of brewing, not something you do only when something smells off. PureHQ's guidance recommends descaling the compact K-Mini every 3 months with tap water or every 6 months with filtered water to minimize mineral buildup PureHQ descaling guidance. That difference reflects a simple fact, cleaner input water slows down scale, but it doesn't remove the need for descaling entirely.
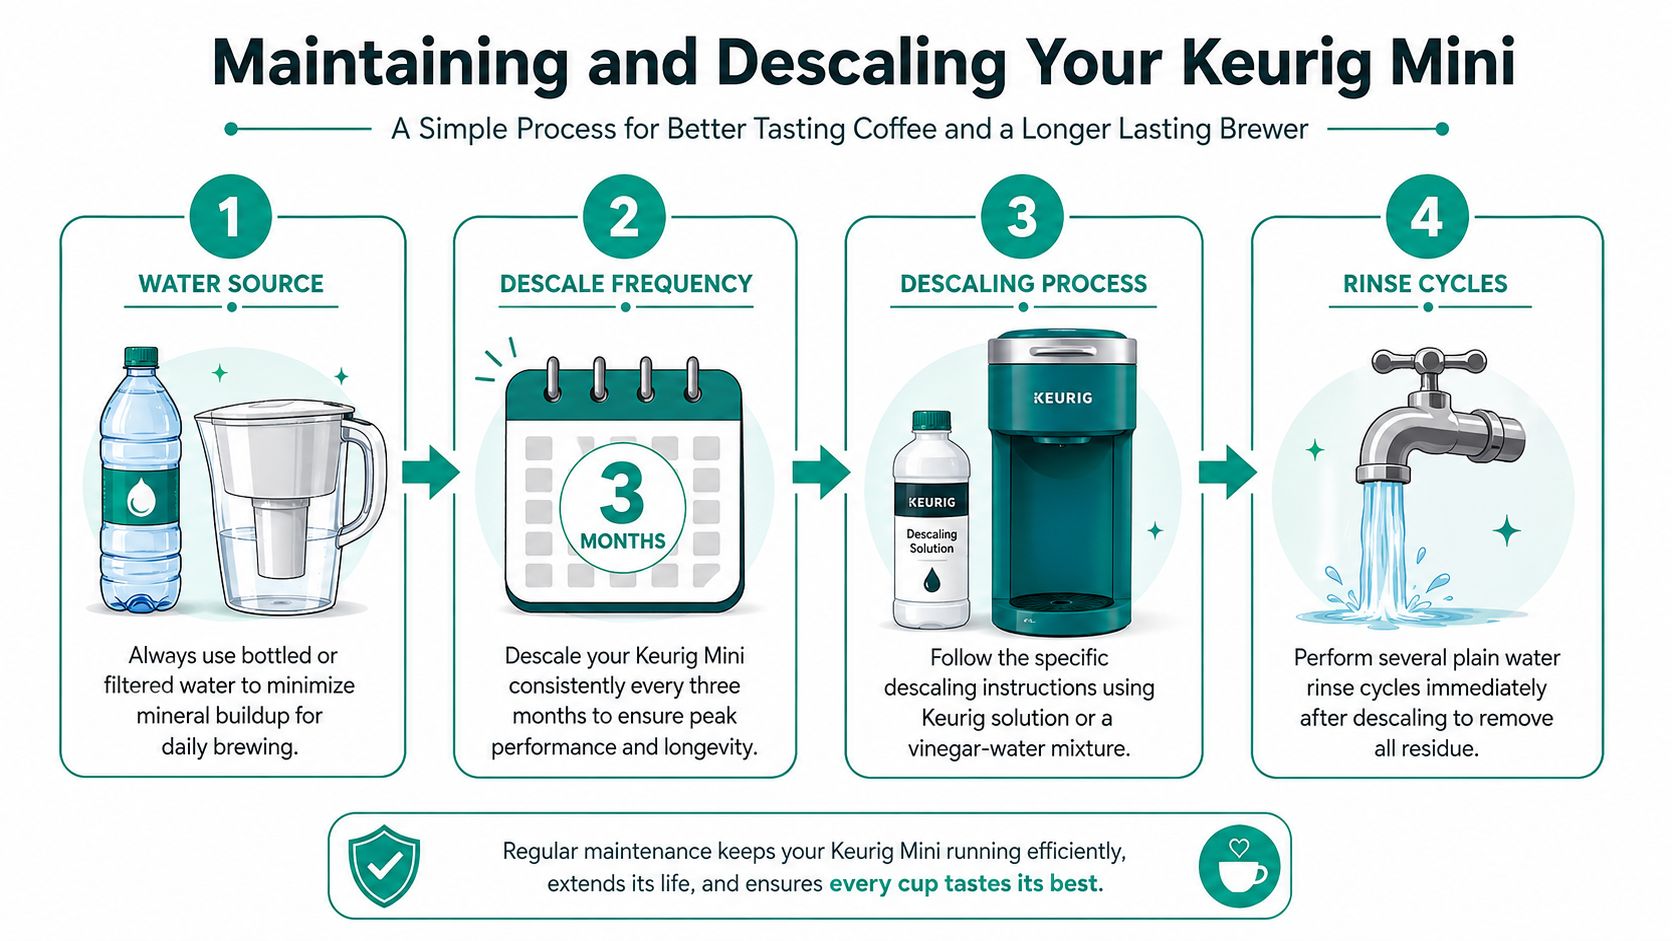
A practical upkeep rhythm
Use filtered or bottled water for daily brewing when you can. That lowers the mineral load before the cup even starts, which is especially helpful for a reservoir-less brewer. PureHQ also notes that filter replacement for systems that use cartridges usually runs on a 2-month or 60-refill cadence, but that rule applies to reservoir-based setups, not the K-Mini itself PureHQ maintenance guidance.
Keurig's own K-Mini descaling guide says the brewer should enter DESCALE MODE, the procedure takes about 10–15 minutes, and the machine needs repeated fresh-water rinse cycles plus a 30-minute resting period during the process Keurig K-Mini descaling guide. That's the routine that protects the heating path and keeps flavor more consistent over time.
Why hard water changes the schedule
Hard water leaves behind minerals that become scale, and scale is especially annoying in small brewers because there's less water volume to dilute it. If you're dealing with calcium-heavy water in a city system, the article on understanding hard water issues in LA is a useful example of how mineral-heavy water affects appliances and fixtures.
Maintenance rule: if taste changes, brew strength slips, or cycles seem slower, don't wait for the machine to complain first. Descale on schedule.
A small add-on can help here too, a countertop filter or a descaling solution keeps the machine from doing all the work. That's usually a better use of money than trying to force a built-in filter concept onto a brewer that wasn't designed for one.
Troubleshooting Filter Issues
Most filter problems on the K-Mini aren't dramatic. They're fit problems, seal problems, or maintenance problems that show up as leaks, weak coffee, or strange flow behavior. If you know what to look for, you can fix most of them without replacing the brewer.
Start with compatibility
If a reusable insert or adapter doesn't fit the brewer's geometry, the machine may not close properly. Independent testing of Keurig Mini-compatible inserts shows that using the wrong type can cause leaks, poor extraction, or machine errors when the 1-hole vs 5-hole compatibility doesn't match Coffee Gear Hub compatibility guide. That's the first thing to verify before you blame water quality.
Check the obvious failure points
A slow brew usually means one of three things happened. The filter is clogged, the insert is seated badly, or air is trapped in the water path. Leaks usually point to a poor seal at the funnel or an insert that sits too high for the lid to close cleanly. Odd taste often means the cartridge is exhausted, the water hasn't been filtered upstream, or the brewer needs descaling.
If the lid has to be forced, stop there. A K-Mini should close smoothly, not fight you.
For a quick diagnostic, remove the insert, refill with plain water, and test the brew path again. If the machine works normally without the accessory, the problem is the accessory or its seating, not the brewer itself. If the issue stays, the machine likely needs a cleaning or descale cycle instead of a new filter.
The cleanest fix is usually to match the part to the model, then keep the water quality consistent. That's the key takeaway with this brewer, the machine is compact, so small mistakes in fit or maintenance show up fast.
Comparing Premium and Generic Filters
The decision between premium and generic options usually comes down to consistency. On a K-Mini, external water treatment has to do real work because there's no internal cartridge housing to fall back on, so filter quality and replacement trade-offs matter more than the sticker price alone Kitchenseer filter overview.
Comparison of Premium vs Generic Filters
| Attribute | Premium Filters | Generic Filters |
|---|---|---|
| Build quality | More consistent materials and construction | Can vary more between batches |
| Fit and compatibility | Usually designed with clearer model matching | Compatibility can be less clear |
| Taste consistency | More predictable water treatment over time | Performance can feel uneven |
| Replacement trade-off | Often a better long-term value when filtration quality holds up | Lower upfront cost, but may need more frequent swapping |
| Best use case | Owners who want steadier results and fewer surprises | Buyers who want the lowest initial spend |
Premium options make more sense when the goal is fewer headaches, especially if you're already investing in a countertop or inline setup. Generic filters can still be fine for light use, but compatibility matters more on the Mini than on larger brewers, so a bargain that doesn't fit correctly quickly stops being a bargain. That's where the actual cost shows up, in wasted coffee, poor extraction, and extra troubleshooting.
If you brew every day, the better question isn't “What costs least today?” It's “What keeps the Mini clean, keeps the lid closing properly, and keeps the water tasting right next month?” That's the logic behind choosing a more consistent filter path, and it's why a well-matched premium accessory can be the calmer option over time.
Buying Considerations and Next Steps
Start with the water source, then choose the filter style around it. If you need portability, a pitcher filter is the easiest fit. If the brewer sits in one office or kitchen and you can support plumbing, an inline cartridge is more hands-off. If you're mainly trying to improve taste without redesigning your counter, pre-filtering water before it reaches the K-Mini is the most practical move.
A few buying checks matter before you order. Make sure the solution matches the K-Mini's reservoir-less design, confirm replacement timing is realistic for your routine, and think about whether you want a one-piece install or a simple pour-and-fill habit. If you also want to keep the brewer healthy, add a descaler to the cart so maintenance doesn't get postponed.
For a straightforward next step, shop compatible water treatment accessories and descaling supplies from PureHQ Inc. if you want options built around Keurig care and K-Mini maintenance, then pair them with a consistent cleaning routine so your coffee stays brighter and your machine stays easier to live with.
A CTA for PureHQ Inc..

