
Coffee Machine Care
Calcium Deposit Removal for Coffee Machines
Aug
Your coffee machine is probably not broken. It's clogged with calcium, and the machine is telling on itself the same way a scaled-up brewer always does, with slow flow, weak flavor, sputtering, and that awful half-hot cup that tastes like a maintenance ticket. In shoulder care, calcium deposits affect about 3% to 7% of adults and account for 7% of all shoulder-pain presentations (systematic review), so calcium is a stubborn problem in medicine and in appliances, too. On a single-serve brewer, the fix is usually much simpler than people fear, and it starts with calling scale what it is, not acting like the machine has reached the end of its life.
If your brewer has started acting moody, the first suspicion should be mineral buildup, not bad coffee. A quick read on the benefits of whole home filtration makes the larger point clearly, water quality affects everything downstream, including the coffee machine on your counter. And if you've been neglecting your filter schedule, the reminder on coffee maker water filter replacement is worth a look before you blame the pod or the pump.
Why Your Morning Brew Suddenly Tastes Like a Swimming Pool
You press the brew button, walk away, and come back to a cup that's half full, lukewarm, and weirdly flat. That's not a coffee failure, that's a flow problem. In single-serve machines, calcium narrows the hot-water path, gums up the needle, and leaves crust where water should move freely.
The symptoms are loud if you know what to look for
Slow drips usually mean the internal line is narrowing. A sputtering stream usually means the exit needle has crust around it. White film in the reservoir or a chalky ring on the lid usually means the machine is evaporating hard water and leaving the minerals behind.
Practical rule: if the machine still powers on but the brew path feels lazy, scale is the first thing to attack.
A blinking descale light is the machine's blunt way of saying the water path has changed. Weak aroma and a metallic finish in the cup are the sensory version of the same problem. Don't confuse that with stale beans or a bad pod, because a fresh capsule won't fix mineral restriction.
The annoying part is that scale feels like a disaster when it's usually a routine maintenance issue. Most brewers don't need a repair bench the moment the cup gets weak, they need a proper descaling run and a better prevention habit. If your machine is still brewing, that's good news, because scale is often the most fixable problem a coffee maker can have.
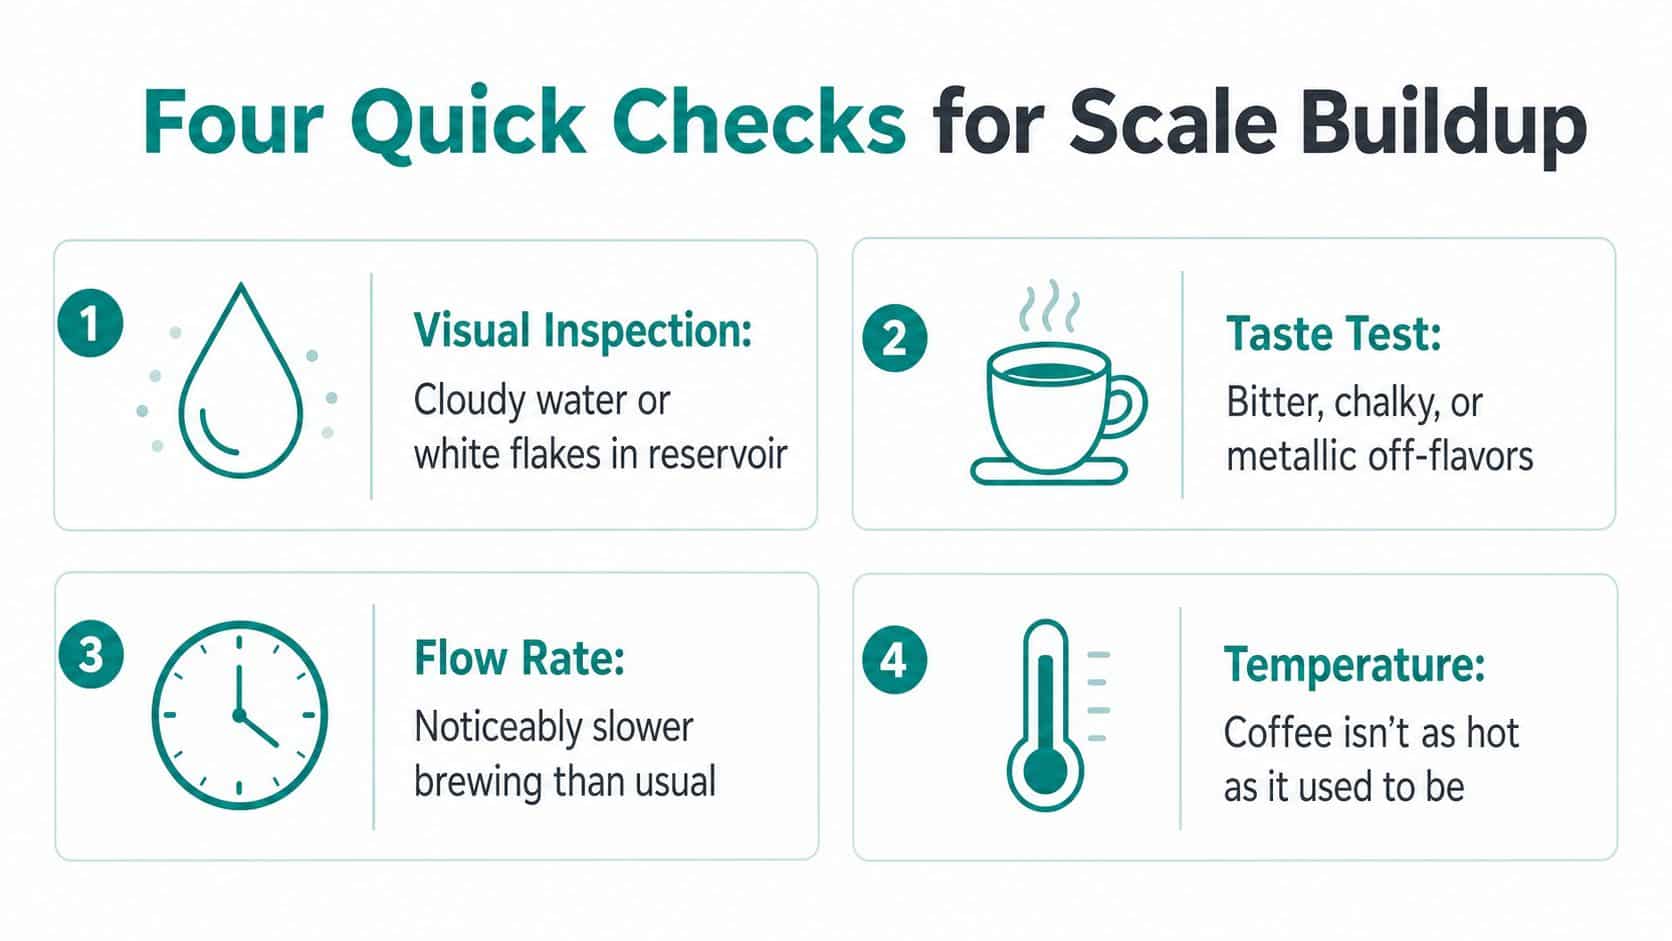
Four Quick Checks That Prove Scale Is the Problem
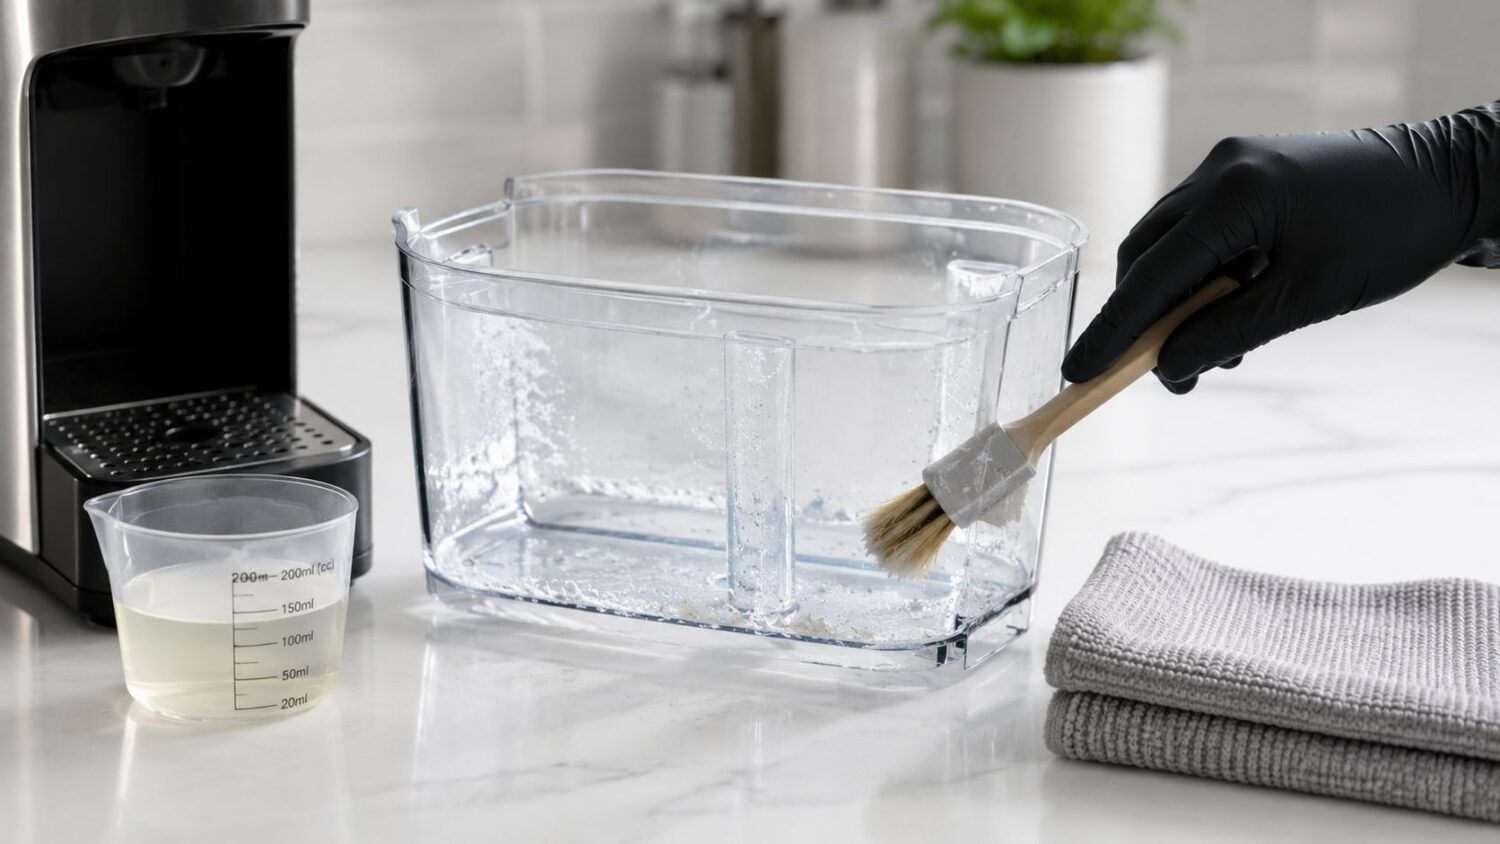
Start with the reservoir. Lift the lid and look for white, chalky film, cloudy edges, or flakes stuck to the plastic. That visual residue is the easiest sign that minerals are hanging around where clean water should be.
Check the needle, then the flow
Look under the brew head for crust around the exit needles. If you see hard white buildup there, you've found one of the most common restriction points on single-serve brewers. That spot matters because even a little crust can interrupt the stream enough to slow the whole cycle.
Now time a normal cup. A healthy single-serve machine should finish a standard 8-ounce brew in about a minute, give or take, and anything that drags much longer usually points to a narrowed water path. If the machine takes forever but still runs, that's scale until proven otherwise.
If the cup smells metallic, flat, or oddly sour even with fresh water and a fresh pod, don't chase the pod first. Clean the machine first.
Taste closes the case. Fresh water should taste like fresh water, not pennies or chalk. If the brew smells off and the machine looks clean on the outside, the buildup is probably inside the line, on the needle, or both.
The point of these checks is simple. They rule out a dead machine, a bad pod, or stale coffee so you don't waste time descaling the wrong problem. Once the visual, flow, and taste clues line up, you're not guessing anymore.
Vinegar vs Commercial Descaler Which One Actually Wins
White vinegar is cheap, easy to grab, and good enough for light cleanup if that's all you've got. I'm not going to pretend it doesn't work at all. But on a coffee machine, “works” and “works cleanly” are not the same thing.
What you're really trading off
Vinegar brings acetic acid, which can loosen some mineral buildup, but it also brings smell, lingering taste, and more rinse work. A purpose-built descaler is made for coffee equipment, so it's easier to flush out and less likely to leave your next cup tasting like a salad dressing experiment. If you've ever read a cautionary note like the one in this vinegar ultrasonic cleaning verdict, you already know the same basic lesson applies here, the cleaning chemical has to fit the job.
Here's the blunt version. Vinegar is the budget move. A commercial descaler is the cleaner move.
| Criterion | White Vinegar | Purpose-Built Descaler |
|---|---|---|
| Cost per cycle | Lower | Higher |
| Odor and aftertaste | Can linger | Usually rinses cleaner |
| Fit for coffee machines | Basic | Made for them |
| Convenience | Easy to find | Still simple, just more specific |
| Warranty comfort | Depends on maker guidance | Usually the safer choice for coffee gear |
The biggest objection I hear is, “Why pay for a descaler if vinegar is already in the cabinet?” Because a coffee machine isn't a sink drain. It has narrow lines, needles, seals, and heating parts that need a cleaner designed for that environment. If you want a one-and-done excuse to avoid vinegar, grab a compatible filter and a reusable pod bundle while you're at it, because cleaner input water slows the next round of buildup.
My take: use vinegar only if you're doing light maintenance and you're willing to rinse aggressively. For a real descale on a single-serve brewer, use a coffee-machine descaler and stop fighting the smell.
If you want a deeper brand-side look at product options, the note on the best descaler for coffee machine gets to the practical choice faster than most glossy label copy.
The Actual Descaling Run Step by Step Without the Guesswork
Start by emptying the reservoir and pulling out any pod or reusable capsule. Fill the tank with the descaling solution you've chosen, then add water if the product label calls for it. The machine needs a full path of cleaner, not a splash around the edges.
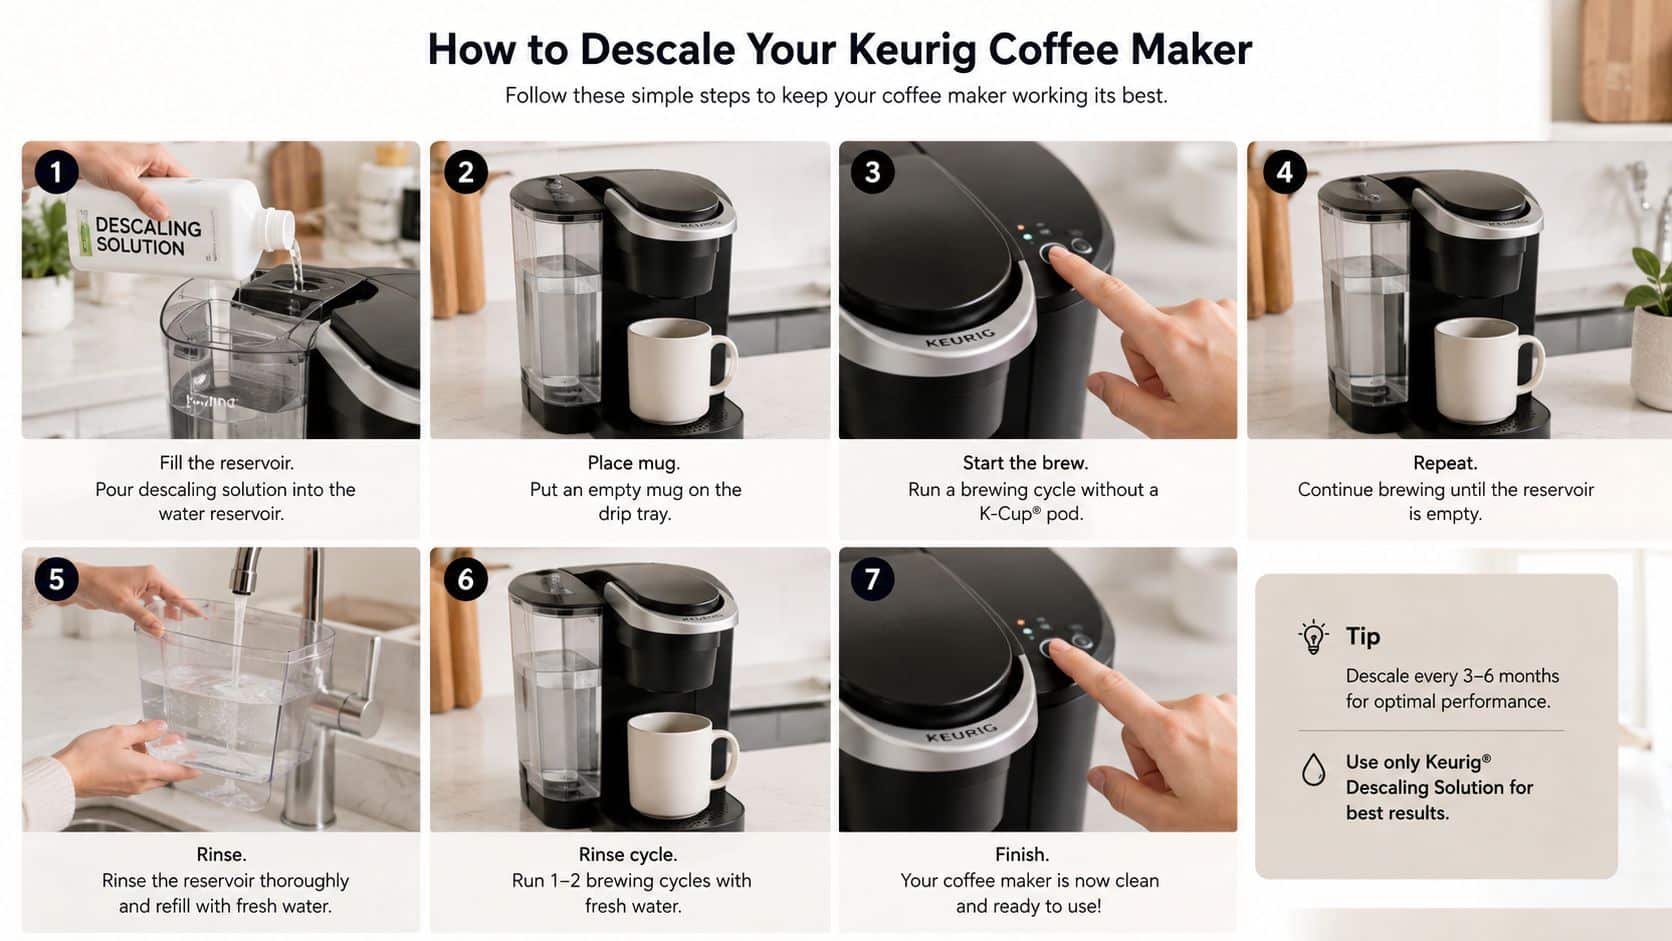
Run brew cycles without a pod so the solution moves through the same places water normally travels. Let the machine pause if your model asks for a soak, because the contact time is what gives the descaler a chance to break loose the crust inside the line and around the needle.
After that, flush the machine with fresh water. Do it more than once if the smell is still there, because the final rinse is where a lot of people get lazy and then wonder why the next coffee tastes like chemicals. That's the mistake that turns a maintenance job into a complaint.
A model like a Keurig K-Classic, K-Supreme, or K-Slim usually has its own descale-light reset sequence, so check the brewer's button combination and clear it after the rinse is complete. On some units, holding the appropriate brew-size buttons together does the trick, while others use a different pairing. The exact reset matters less than the fact that you clear the alert instead of staring at it for another week.
If the exit needle still looks crusty, wipe it after the run with a damp cloth and let the machine cool first. A lot of people treat the descale cycle like a ritual and the needle like an afterthought, which is backwards. The needle is one of the cheapest parts to clean and one of the easiest places for scale to choke the system.
Why the White Stuff Keeps Coming Back
The reservoir, the hot-water line, and the brew head are the three places scale reappears fastest. If those spots stay wet, they keep feeding new mineral buildup, which is why a machine can feel clean right after descaling and still get sluggish again later. The answer isn't more panic, it's a better routine.
Fix the inputs, not just the symptom
Use filtered or lower-mineral water if you can. That's the single biggest prevention lever because the machine can't build much of what never enters it. A compatible filter is worth the drawer space if you're trying to stretch the time between descales.
Leave the reservoir empty and dry when the machine sits unused. Standing water evaporates and leaves a mineral ring behind, and those rings become the next round of buildup. Wiping the tank and the seal once in a while is boring, but boring is what keeps the brewer flowing.
A quick weekly wipe around the needles and pod holder keeps crust from getting a foothold. That simple habit matters more than people want to admit, especially if the machine gets used daily and then neglected on weekends.
For a broader plumbing parallel, the maintenance advice from Bear Valley Plumbing & Heating lines up with the same principle, scale gets worse where water sits and heat cycles repeat. The same pattern shows up in coffee gear, just on a smaller scale and with more annoying flavor consequences.
If you use a machine only occasionally, run a plain water rinse before the next brew instead of letting it sit dusty and half-full. That small habit matters more than people think. The goal is to keep new minerals from settling in before they harden into another problem.
When Descaling Is Not Enough and the Machine Needs a Pro
If water is leaking from the base, the problem is past routine descaling. If the machine won't brew at all with a full reservoir, or the descale light comes right back after a proper clean, you're probably looking at a pump, boiler, or control issue instead of normal buildup. At that point, more cleaner won't fix a broken part.
A machine that throws error codes even after a full rinse is also waving a flag. So is one that still has heavy internal crust when you can safely inspect the inside and see that the scale is caked onto components, not just sitting in the water path. Those are technician problems, not “try vinegar again” problems.
For older brewers, the math matters too. If the unit is past the point where multiple parts are failing, replacement can make more sense than paying for a service visit on a machine that's already tired. Nobody should spend premium repair money on a bargain brewer unless the machine has real sentimental value or better build quality.
A good technician can test the pump, inspect the boiler, and tell you whether the machine has one repairable fault or a string of them. That diagnosis is what separates a fix from a money pit. DIY stops being smart when the machine has moved beyond surface scale.
Your 30-Second Maintenance Routine and Where to Get the Right Gear
Soft water needs less aggressive care, medium water needs a regular schedule, and hard water needs disciplined maintenance. For soft water, descale about every 9 months, wipe the needle weekly, and rinse the reservoir monthly. For medium water, move to about every 6 months with the same weekly wipe. For hard water, which is common in many U.S. households, descale about every 3 months and swap a compatible water filter every couple of months.
Keep the routine stupidly simple
Use a calendar reminder for the descale cycle. Keep a microfiber cloth near the machine so the needle and seal get wiped during your normal cleanup. If the machine sits unused for a week or more, run a quick rinse with plain water before brewing again.
If you want the whole kit in one place, the maintenance guide at Keurig maintenance kit pairs well with the routine above and makes the repeat tasks harder to forget. A reusable pod, a filter, and a proper descaler are the three items most owners end up needing anyway.
PureHQ Inc. sells coffee machine descaler tablets and a universal descaling solution for brewer maintenance, along with reusable K-Cups and water filtration options for Keurig and Ninja setups. If you're stocking your drawer, buy the cleaning gear before the descale light comes back and you're stuck doing it on a Sunday night.
PureHQ Inc. keeps the maintenance parts simple, with descaler tablets, universal descaling solution, reusable pods, and water filters that fit the coffee machines you likely use. If you want cleaner brews and fewer surprise descale alerts, visit PureHQ Inc. and stock up before the next maintenance cycle catches you off guard.

