
Coffee Machine Care
Zero Waste Coffee at Home: Swaps That Cut Packaging
Nov
One kilogram of coffee sold in capsules or pads arrives with 0.64 to 1.11 kg of packaging wrapped around it, while the same kilogram bought as a 250 g bag needs 0.12 kg (Coffearium's packaging review). That ratio is the part of the waste story you don't see on the box.
The pod is only the first decision. What happens to the wet grounds inside it, how far they travel, and whether the machine lasts long enough to justify its own manufacturing decide the final outcome. Get those three right and a home setup beats a capsule machine on waste by a wide margin. Get them wrong and a reusable pod buys you very little.
Packaging and Emissions by Coffee Format
Packaging is a small share of coffee's carbon footprint, which is exactly why it slips past most buyers. A 2024 review summarized by Coffearium found that packaging contributes a median 9 to 18% of coffee's overall footprint, with the higher figure tied to single-serve pods and capsules (Coffearium's capsule review). The same review puts a polypropylene capsule at about 41 g CO2e per cup against 8.2 g for bagged coffee. Nine percent sounds minor until you multiply it by four cups a day for a year.
The disposal side is worse, because it depends on infrastructure you may not have. Without convenient recycling receptacles most pods go to landfill, and a U.S. university life-cycle assessment of compostable coffee pods cites an estimate that about 9 billion pods entered landfills in 2014; the same assessment notes that only 6 to 9% of plastics are recycled (U.S. Department of Energy OSTI). A refillable pod changes that arithmetic because one durable object stands in for hundreds of single-use units.
Packaging and emissions by coffee format
| Format | Packaging per kg of coffee | CO2e per cup | Zero waste verdict |
|---|---|---|---|
| Capsules and pads | 0.64 to 1.11 kg | 41 g (polypropylene capsule) | Switch first |
| Coffee sold in a 250 g bag | 0.12 kg | 8.2 g | Baseline to match with a reusable pod |
| Refillable pod | 0.12 kg, the bag only, since the pod is durable | 8.2 g is the bagged figure to aim for; no published per-cup number exists for a steel pod | Removes pod packaging, so measure the grounds yourself |
The refillable row is the honest one. Nobody has published a per-cup CO2e figure for a stainless pod used in a home kitchen, so the best available benchmark is the bagged number you'd hit anyway. What the refillable pod removes is certain: the capsule, its lid, and the outer box, brewed and binned hundreds of times a year.
Judging coffee formats by a single number repeats a mistake gardeners avoid when they compare recycled mulch and pavers: how long a material lasts, how far it travels, and where it ends up all change the answer. Weight alone doesn't settle it.
The first swap is the easy one. Move from capsules to a refillable pod and keep buying whole-bean or bulk coffee, so the only packaging left in your routine is the bag. If you're unsure what survives the trip after the bin, our guide to K-Cup recycling walks through which components get recovered.
Reusable Pods Compared With Standard Options
The pod is only one part of a coffee routine's waste. Grounds, local collection rules, and how long the brewer lasts also shape the outcome. Compare the options by what gets discarded and what your local system can handle.
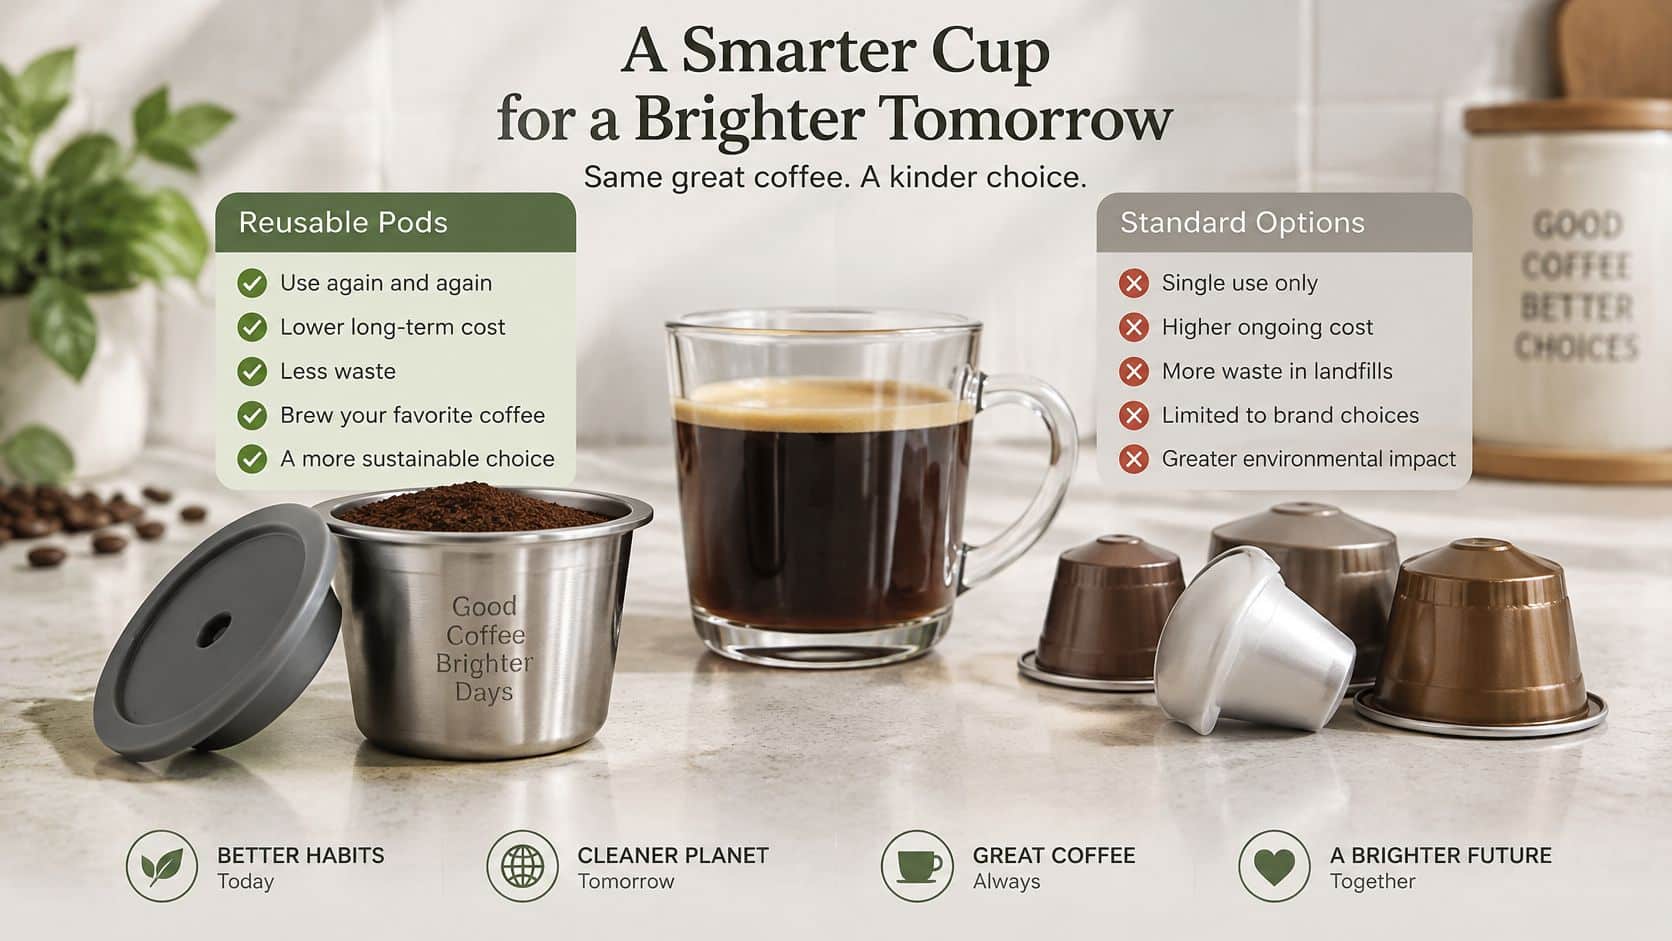
Pod options compared on waste and buying checks
| Option | What You Throw Away | Check Before Buying | Main Objection |
|---|---|---|---|
| Stainless reusable pod | Grounds; replace the pod only if it wears out | Brewer compatibility and lid fit | Overfilling can cause leaks; follow the marked fill line |
| Plastic reusable pod | Grounds, then the pod if it wears out | Material and heat rating | A worn or warped pod may need replacement |
| Compostable single-serve pod | Pod and grounds | Whether local collection accepts it | A compostable label does not guarantee home composting |
| Disposable plastic capsule | Capsule and grounds | Whether a suitable local collection route exists | Without one, it goes in general waste |
A reusable pod avoids a disposable pod with each brew, but its benefit depends on regular use and a good fit. Single-needle and multistream brewers use different pod designs; a pod made for one may not seal correctly in another. PureHQ oversees its own manufacturing of reusable coffee pods, and sells a reusable filter pod listed as compatible with the Ninja DualBrew Coffee Maker. Check the exact brewer model before buying.
Compostable pods still need a suitable destination. Industrial compostability does not mean a pod belongs in a home compost bin, and local collection rules determine whether it gets processed or discarded. Check with your municipality or compost hauler before choosing this format.
A customer who prefers using their own coffee put the practical appeal this way:
"Love This Product, I do not especially like prepackaged coffee pods, I like using the coffee that I buy and these are perfect."
For less waste across the whole brewing system, choose a pod that fits, use it repeatedly, and keep the grounds out of general waste when a suitable local route is available. The brewer's lifespan matters too: a reusable pod offers little benefit if poor fit or neglected maintenance leads to replacing the machine sooner.
How to Set Up a Zero Waste Coffee Routine
A working routine is six steps long, and each one exists to prevent a specific mess. Skip the storage step and you get a mouldy container on the counter; skip the rinse and the mesh clogs within a week. Here's the order I'd set up, and why each piece matters.
- Match the pod to the brewer before you buy. Single-needle Keurig brewers and multistream models like the K-Supreme, K-Slim and K-Crema take different pod geometry. Check the model name in your brewer's manual or on the water tank label, because a pod that fits one style sits loose or seals badly in the other, and that's the most common source of returns.
- Buy coffee in packaging you can reuse or recycle. Whole bean or bulk keeps the bag as your only packaging, so it never becomes the biggest item in the bin. A bag you refill at a bulk counter beats a stack of foil-lined pouches.
- Fill to the marked line and stop there. Overfilling is the usual cause of leaks, weak extraction, and grounds in the cup. The line is a volume limit, not a suggestion, and a level scoop that settles below it brews better than a heaped one.
- Tip the grounds out while they're still warm. Keep a lidded container beside the machine so the grounds leave the pod immediately rather than sitting in the basket. Separating at the moment of brewing keeps the kitchen clean and stops wet grounds from spreading into the general trash.
- Rinse the pod under running water and let it air-dry. Residue left on the mesh blocks flow and taints the next cup. A quick rinse and ten minutes on a rack keeps the pod ready for the next brew and stretches the time before a deeper clean.
- Empty the container on a schedule. Once or twice a week is enough if the container is sealed and ventilated; leaving grounds wet for weeks turns a useful material into a smell problem. Deliver them to a composter or organics drop-off while they're still fresh.
A customer named Suzie C said she likes using her own coffee and that our reusable pods suit that habit, which is the whole appeal of the routine. You're not buying a brand of coffee, you're buying the ability to brew whatever you already like.
Done properly, the routine looks boring. A dry pod sits on the rack, a sealed container holds this week's grounds, and nothing caffeinated is in the trash.
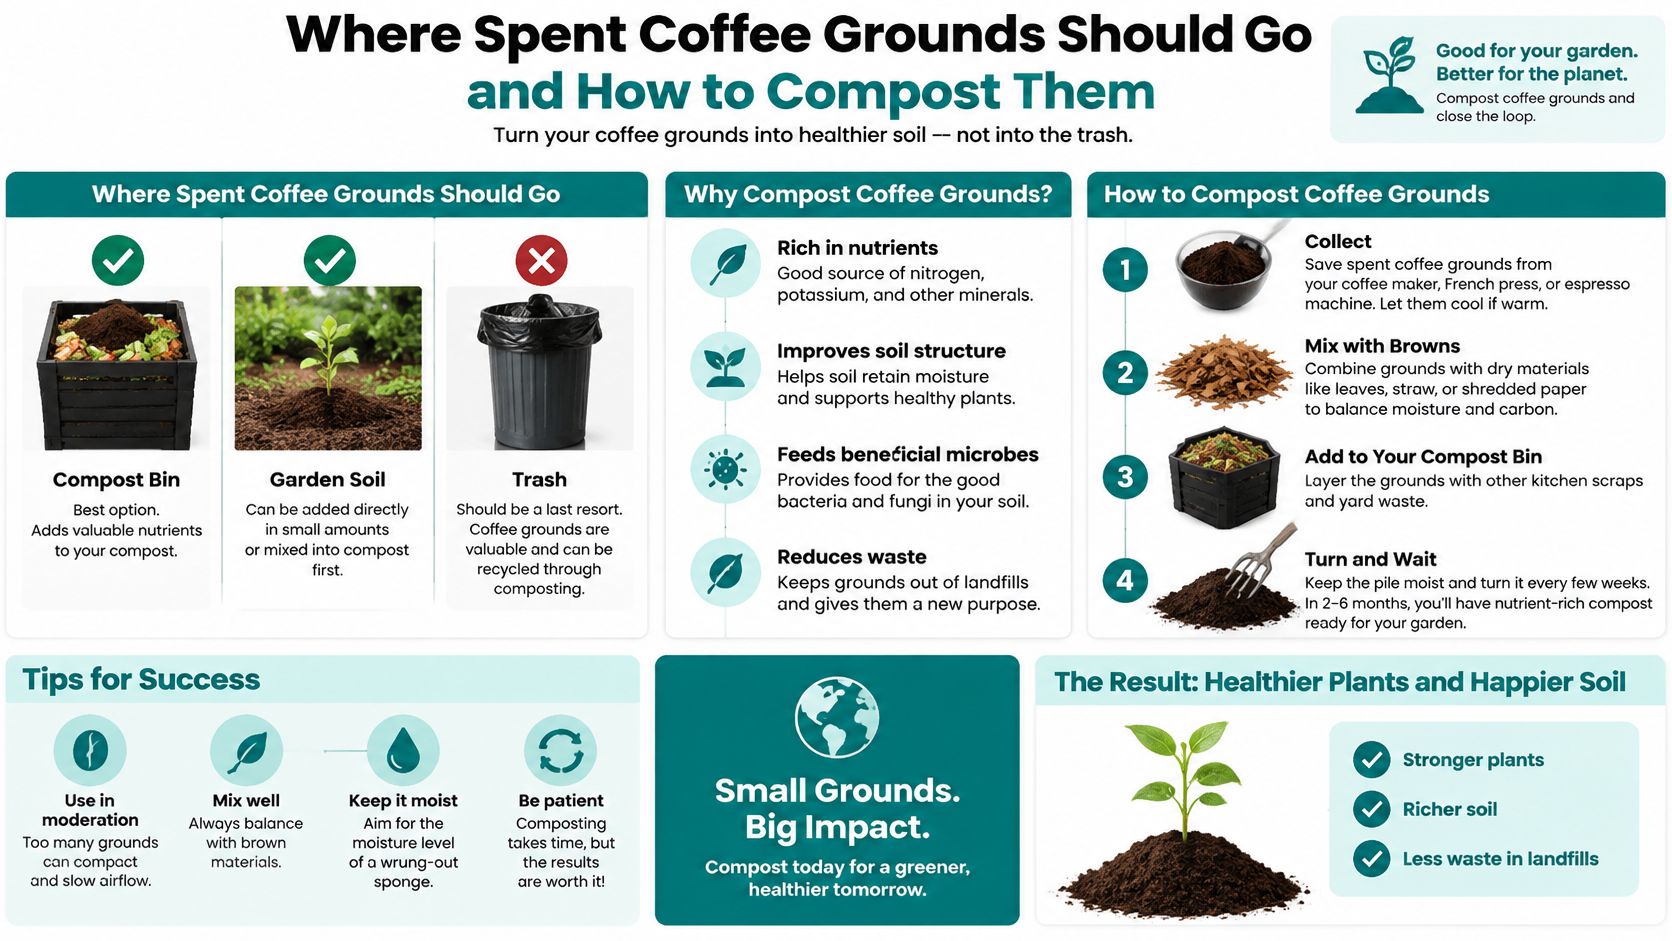
Where Spent Coffee Grounds Should Go and How to Compost Them
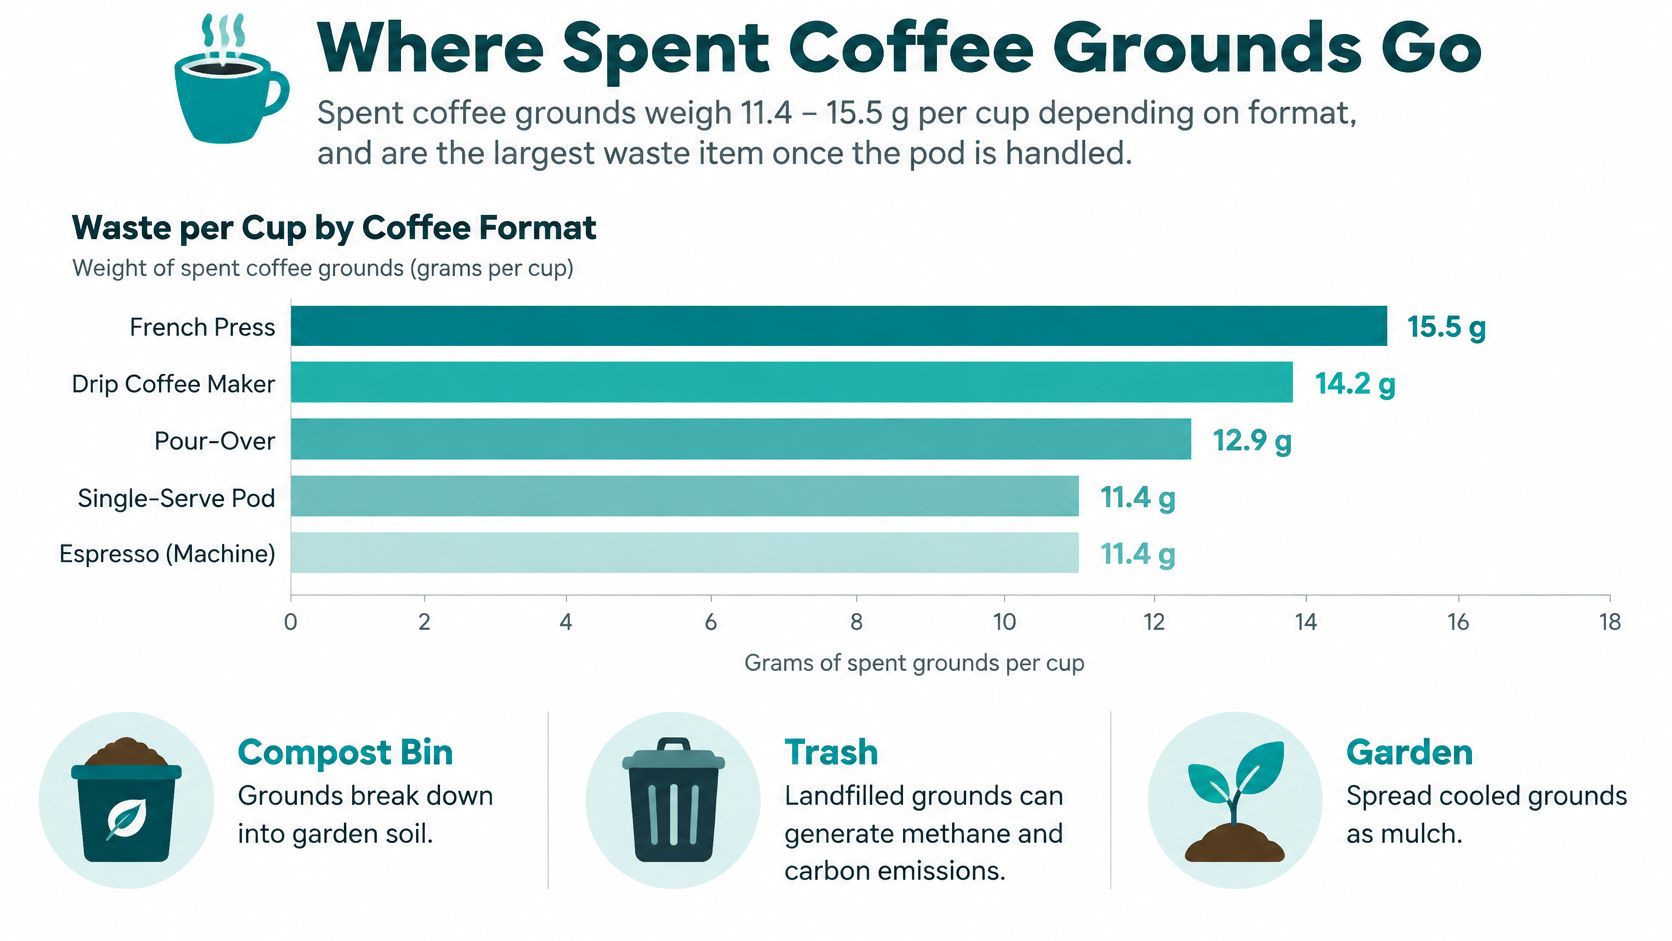
A reusable pod cuts packaging waste, but the grounds still need a good destination. In a packaging-waste life-cycle assessment, spent coffee grounds were consistently the largest waste component across the coffee formats and brewing methods evaluated. The study measured 11.4 g per cup for one multilayer-bag and Moka-pot configuration and 15.5 g per cup for coffee pads (U.S. National Library of Medicine). What happens after brewing matters: landfill disposal, local collection, and composting each affect the overall result.
A comparative life-cycle assessment in the Journal of Cleaner Production estimated that global spent coffee ground generation is roughly 60 million metric tons per year. It compared landfill disposal with composting, biodiesel production, and brick manufacturing (Journal of Cleaner Production). The study reported lower air emissions than landfill for all three reuse routes, with results varying by route.
Grounds disposal routes compared with landfill
| Route | Air emission reduction vs landfill |
|---|---|
| Composting | 18% |
| Biodiesel production | 1% |
| Brick manufacturing | 76% |
Choose a local route
The table compares emissions, not the full impact of collection. Transport adds to a route's footprint, so a nearby organics program or composting site is usually a practical choice for household quantities. A distant specialty processor may have a useful process, but hauling a small amount of grounds far away can undermine the benefit.
Check what your local service accepts before putting grounds out for collection. Municipal rules and hauler requirements differ. If no local program takes them, a home compost pile is an option when you can balance the wet grounds with dry, carbon-rich material.
Store grounds like the wet material they are
Fresh grounds are damp and can sour in a warm kitchen. Collect them in a leak-resistant container, then empty it regularly rather than letting a large wet stockpile build up. Keep the container easy to clean and store it where it will not spill.
Build a pile that stays aerobic
A dense mass of wet grounds can produce methane. Peer-reviewed research on coffee by-products measured emissions as high as 3.1 g/m²/h in one compost pile, while other piles recorded 0.006 to 0.007 g/m²/h. The researchers reported that emissions could be avoided when operators built proper windrows and mixed coffee material with additional carbon-rich material (U.S. National Library of Medicine study of coffee by-products). Airflow and a balanced mix matter.
A 2025 review indexed in the U.S. National Library of Medicine describes a practical mix of three parts leaves, one part fresh grass, and one part spent coffee grounds, and recommends keeping grounds below 20% of the pile by volume. It also warns that grounds can be toxic to plants when applied improperly (U.S. National Library of Medicine review of spent coffee grounds). Treat them as one compost ingredient, not as a direct fertilizer.
Keep grounds out of sinks, storm drains, and thick layers on garden beds. A review of coffee waste describes potential effects from dumped residues, including nitrogen compounds and carbon dioxide emissions, increased acidity and chemical loading in water, and conditions that can encourage algae, bacteria, and pests (U.S. National Library of Medicine review of coffee waste).
Five mistakes and how to fix each
- Adding wet grounds without bulking material. Mix in dry leaves, shredded paper, or yard waste at roughly three times the grounds' volume to help air move through the pile.
- Spreading thick layers directly on garden soil. Add grounds to compost, or use only a thin, cooled layer worked into the soil.
- Letting grounds exceed 20% of the pile by volume. Measure with a bucket. Wet grounds can compress, making a pile look more balanced than it is.
- Treating a compostable pod as a compost ingredient. Check whether your local facility accepts the pod itself; the grounds and pod may need different disposal routes.
- Leaving grounds in a wet container for weeks. Empty the container regularly and rinse it before residue builds up.
If your city offers curbside organics collection, check its rules before adding grounds. The composting advice from Litter Caterpillars can help you understand what a local collection stream accepts.
For household composting, this guide to composting coffee grounds covers bin size, turning, and how long to wait before using finished compost.
The video below shows a practical approach to layering a compost pile.
Choose the route your household can sustain: use a local organics program that accepts grounds, compost them in a balanced pile, or find a nearby reuse option. The best destination is one that handles the grounds properly without adding unnecessary transport.
Keeping Your Brewer Running Longer
Switching pods doesn't automatically make your routine the lowest-impact version of itself. A reusable pod's advantage can be erased by extra rinsing, discarded failed brews, weaker extraction that pushes you to use more coffee per cup, or a machine replaced two years early (Coffearium's review of capsules and the environment). Packaging is a real share of the footprint, and it's still the smaller half of the ledger.
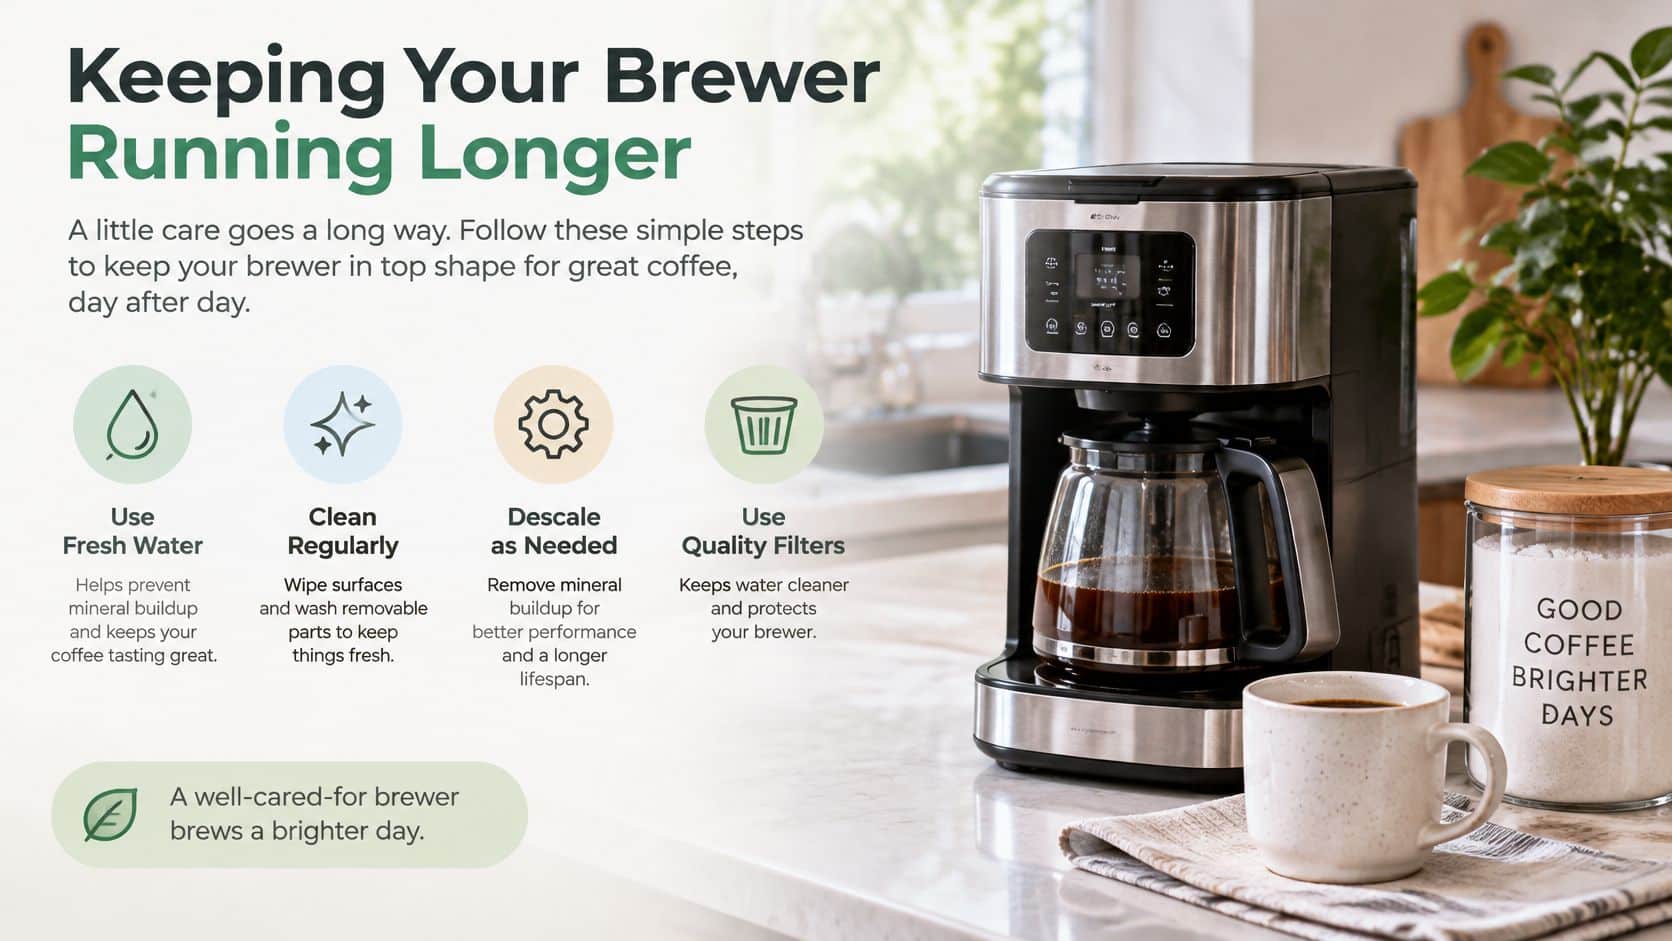
Track five numbers instead of one claim. Note the pod material, grams of grounds per cup, water and cleaning consumption, your leak or failure rate, and how often you descale. A pod that saves 300 capsules a year but wastes 4 scoops a week in failed brews isn't ahead by as much as the box suggests.
A short checklist keeps the system honest. Rinse after every brew so residue doesn't bake onto the mesh. Respect the fill line rather than tamping in an extra half scoop. Descale on the machine's schedule, not when the flow drops to a trickle. Write down failed brews for a fortnight, because the pattern usually points at grind size or overfilling rather than the pod.
Water quality belongs in this routine, not outside it. Hard water leaves scale in the boiler faster, so a filter on the water side cuts both descaling frequency and the chance of a mineral-tainted cup. A customer named Joun Gaudioso, who uses spring water in his Keurig, said he doesn't need to replace the filter as often and that it works as described. A water filter and a descaler are the two accessories that keep the hardware side of the routine alive.
Practical rule: if the flow is uneven or the coffee tastes flat, clean the machine before you blame the pod.
Our coffee machine maintenance checklist sets out the order to do it in. The signs a system is working are unglamorous: no leaks, steady flow, and descaling that happens less often than it used to.
Buy the Reusable Pod That Fits Your Brewer
Everything else follows the pod, so settle that purchase first. Check the brewer model, then buy once for that machine. For single-needle Keurig brewers, our Reusable K Cups 2-pack is $19.95; for K-Supreme, K-Slim and K-Duo Gen 2, the universal 4-pack of refillable K-Cups is also $19.95.
Add the Coffee Machine Descaler as the one maintenance item tied directly to machine life: 10 uses, compatible with Keurig, Nespresso, Breville and espresso machines, made in the USA, $23.95. A pod with no grounds route is half a solution, and a clean machine is what keeps the routine running past the first month.
Read the model name on the brewer, pick the pack that matches it, and start brewing your own coffee the same week. Shop the reusable pods at https://www.purehqfilters.com today and start with the pack that fits your machine.
PureHQ Inc. makes reusable K-Cups, water filters, and descalers for people who would rather spend money on coffee than on capsules, and we oversee the manufacturing of our pods and filters so the fill line and the seal hold up to daily brewing. Pairing a reusable pod with a descaler and a filtered water supply is the cheapest way to cut packaging, keep grounds out of the trash, and get more years out of the machine you already own. Visit PureHQ Inc. to find the reusable pods, filters, and descaling supplies that match your brewer.

