
Coffee Machine Care
Cup for Keurig: Sizes, Travel Mugs, and What Fits
Sep
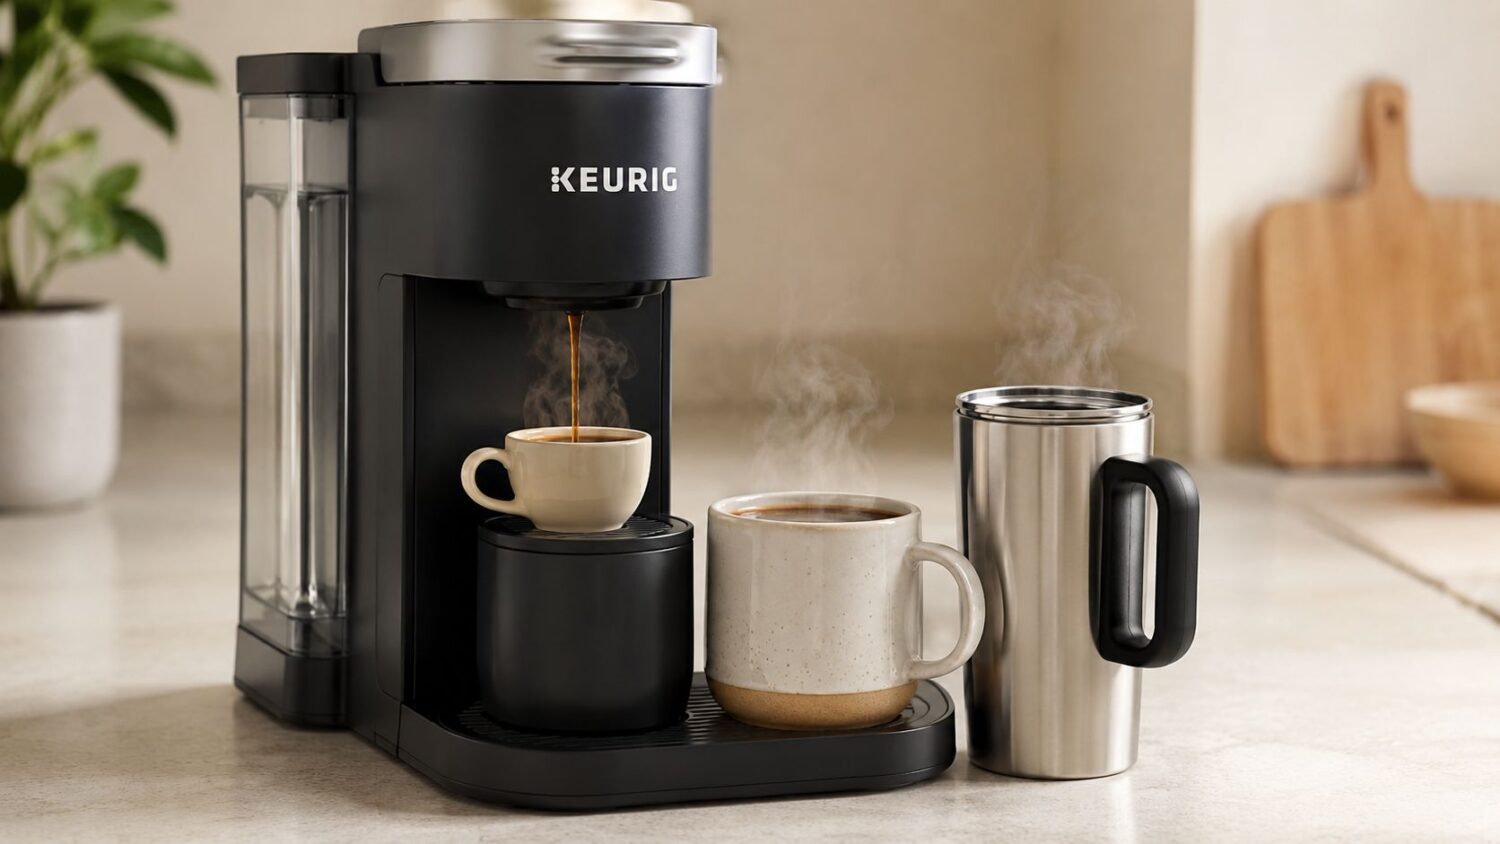
You set a mug beneath your Keurig, press brew, and expect coffee. Instead, the stream hits the rim, splashes across the drip tray, and leaves you with a weak, lukewarm cup. The problem often isn't the brewer or the pod. It's the cup for Keurig sitting beneath the spout.
A mug can be too tall, too wide, too narrow at the base, or unstable on a removable tray. Those details change where the stream lands, how much coffee contacts the cup wall, and whether the machine can complete its brew cleanly. Water quality matters, too. BRITA's coffee filtration white paper explains that filtration changes the interaction between water chemistry and coffee extraction, which can affect perceived sourness and flavor.
I've owned enough Keurigs to learn that mug selection is part of the brewing setup. The right cup prevents spills, protects temperature, and gives a reusable pod enough room to work properly. Here's how to choose one that fits your machine instead of fighting it.
The Morning Your Keurig Made a Mess
It's a rushed weekday morning. You grab the large ceramic mug you use at your desk, slide it beneath the Keurig, and tap the brew button. The mug looks close enough, but its thick rim sits high and its narrow base leaves it slightly off-center. Coffee arcs over the edge, strikes the drip tray, and runs beneath the machine.
That small mistake creates several problems at once. A narrow base can make the cup wobble. An oversized diameter can prevent the mug from sitting fully beneath the spout. A missing travel-mug lid leaves hot steam and liquid free to escape. If the stream strikes the wall instead of the center of the cup, splashing becomes more likely, and the pod may not drain as cleanly.
The machine doesn't magically know that your mug is badly positioned. It continues pumping water through the pod while the cup catches only part of the flow. The result can taste thin because the brew is diluted by a larger volume, or harsh if the pod receives uneven flow and the cup collects sediment around the rim.
Practical rule: A cup should sit level, centered, and low enough that the brew stream reaches the coffee without touching the rim.
That's why cup choice belongs at the start of your routine, not after the spill. A well-fitted mug gives the stream a clear landing zone, while the correct volume keeps the coffee from overflowing or tasting diluted. You can also reduce residue and buildup by following a consistent cleaning routine, such as the steps in this guide to cleaning a Keurig with vinegar.
The best cup for Keurig use isn't necessarily the biggest mug in your cabinet. It's the one that matches your brewer's clearance, your brew setting, and the way you drink coffee. Once those three pieces line up, the machine becomes much easier to use and the morning mess largely disappears.
What Actually Makes a Cup Fit a Keurig
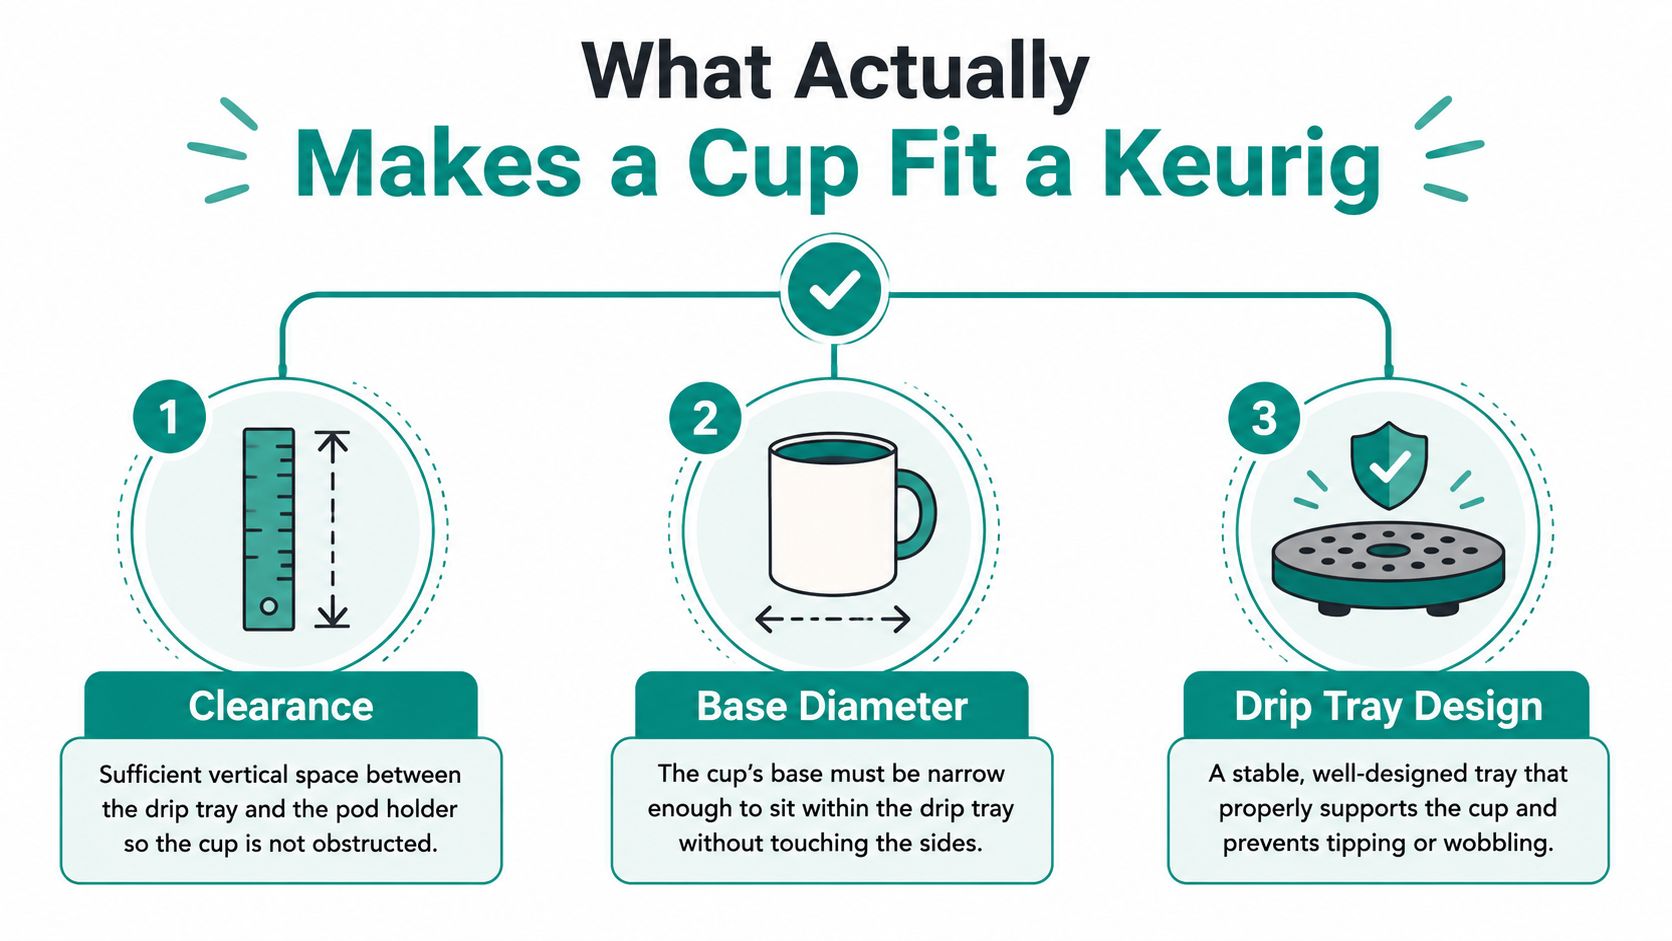
A Keurig cup has to pass three physical tests before it can brew reliably: clearance, drip-tray position, and base diameter. Measure those points before buying a mug, especially if you use a travel cup or a reusable pod.
Clearance comes first
Clearance is the vertical distance between the brewing head and the drip tray. Classic home models often provide roughly 5.5 to 6 inches of usable clearance, but the exact space depends on the model and the tray design. A mug can measure below the opening and still fail if its rim flares outward or its handle pushes the cup forward.
Measure from the tray surface to the lowest point around the pod holder. Then measure the mug from its bottom to the highest part of its rim. Don't measure only the body if the mug has a thick lip, raised decoration, or a lid collar.
Clearance also affects reusable K-Cup operation. The pod has to sit correctly beneath the brewer needle, and the lid has to close without forcing the head upward. Because reusable K-Cup compatibility depends on the specific Keurig model, check both the cup space and the pod head before assuming a universal accessory will work.
Tray height changes the usable space
Many Keurigs use a removable drip tray. Removing it can create room for a taller travel mug, but it also removes the platform that keeps a short cup stable. If the mug sits directly on the counter, check that its base remains centered under the nozzle and that the cup doesn't lean toward the machine.
A low tray can also change the stream angle. When the cup sits too far below the spout, the falling coffee has more opportunity to splash, particularly into a narrow opening. A cup that fits physically may still brew messily if its mouth is too small.
Base diameter controls stability
The base should sit fully on the tray or counter. A wide mug may collide with the tray edges or block tray removal. A narrow base may leave the cup unstable, especially when the handle shifts its center of gravity.
Center the mug under the nozzle before pressing brew. If the cup cannot remain centered without holding it in place, it isn't a dependable cup for Keurig use. Poor positioning can produce sputtering, weak crema, and grounds in the cup, particularly when a reusable filter or pod doesn't sit squarely.
Keurig Brew Sizes and the Mugs That Catch Them
The cleanest pairing starts with volume. A 6-ounce brew belongs in a small cup, while a 12-ounce or larger setting needs enough headroom to absorb the full pour without forcing coffee against the rim. The cup should hold more than the selected brew size, because foam, splashing, and a small amount of headroom all matter.
A compact espresso-style cup works well for 6 ounces if its opening sits comfortably below the spout. For 8 ounces, I prefer a standard small mug with a broad mouth. The wider opening gives the stream more room to land and makes alignment less fussy.
At 10 ounces, a medium mug becomes the safer choice. Tall, narrow cups can work, but they need a stable base and enough clearance around the rim. The 12-ounce setting needs a larger mug with visible headroom. A short cup may catch the volume, but its low rim gives you less protection against turbulence and splash.
The largest setting on many models is better suited to a 16-ounce travel mug or a carafe than to a small desk cup. Don't select a larger brew size merely because your mug has extra capacity. A small volume in a very large mug cools faster and can taste weak because the coffee spreads across a larger, cooler surface.
Clearance changes with cup shape
The brew setting doesn't physically raise the spout, but cup shape changes how much usable clearance you have. A tall mug with a narrow mouth may fit beneath the head, while a shorter mug with a broad, raised rim may not. Measure the highest point of the cup, not just its advertised capacity.
| Brew Size | Recommended Cup Volume | Min Clearance |
|---|---|---|
| 6 oz | Small cup with room above the coffee | Measure below the brewer head |
| 8 oz | Standard mug with a broad opening | Measure the mug rim and handle |
| 10 oz | Medium mug or compact travel cup | Confirm the cup stays centered |
| 12 oz | Larger mug with clear headroom | Check the rim, lid collar, and tray |
| 14+ oz | 16 oz travel mug or carafe | Remove the tray only if the cup stays stable |
Capacity labels aren't enough. Two cups with the same stated volume can have different heights, rims, and bases. The cup that catches coffee cleanly is the one whose shape matches the machine, not the one with the largest number printed on its packaging.
Ceramic, Stainless Steel, Glass, or Double-Wall
Cup material changes more than appearance. It affects how quickly the drink loses heat, how heavy the filled cup feels, how much space the base occupies, and whether the coffee develops an unwanted flavor note.
Ceramic remains the easiest desk choice. It feels comfortable in the hand, sits securely on most trays, and doesn't introduce a metallic character. Its weakness is thermal behavior. A room-temperature ceramic cup can pull heat from a short brew before you take the first sip, and thick walls can make the coffee feel cooler sooner.
Stainless steel is the practical commuter option when the cup has a well-designed seal. It resists breakage and usually preserves warmth better than single-wall ceramic or glass. Some drinkers notice a faint metallic or tinny note, especially if the interior is poorly finished or the cup hasn't been cleaned thoroughly. For material and construction considerations, shop smart at SoccerWares offers useful background on stainless-steel cups.
Glass makes the coffee visible and shows the color and crema clearly. It also cools quickly and can become awkward on a Keurig when the drip tray is removed, because a tall glass vessel may sit less securely on the counter. I use glass for presentation, not for a hurried commute.
Double-wall construction provides the best balance for most travel routines. It reduces heat transfer without requiring a bulky exterior, and many models fit a Keurig tray once the lid is removed. A double-wall cup still needs careful height and base measurements, because insulation doesn't correct a poor fit.
The weight difference between materials depends on wall thickness, shape, and lid design. A filled 12-ounce ceramic cup can feel heavier than a thin double-wall steel cup, while a steel travel mug with a substantial lid can outweigh both. Treat advertised capacity and construction as separate questions.
| Material | Heat Retention (12 oz, 15 min) | Filled Weight | Drip-Tray Fit | Taste Impact |
|---|---|---|---|---|
| Ceramic | Depends on wall thickness and preheating | Often substantial | Usually stable | Neutral when clean |
| Stainless steel | Generally strong with insulated walls | Varies with lid and insulation | Good if the base is compact | Interior finish can affect perception |
| Glass | Usually the quickest to cool | Often moderate | Can be unstable without the tray | Neutral and visually clear |
| Double-wall | Strong balance for travel use | Moderate to substantial | Often good without the lid | Usually neutral when the interior is clean |
Water chemistry can overpower small material differences. Mineral deposits build up inside brewing systems, and BRITA's guidance on tap-water types connects water type with sensory results and the need for maintenance. If your coffee tastes dull or sour, inspect the water and brewer before blaming the mug.
Travel Mugs and Carafes That Work Every Time
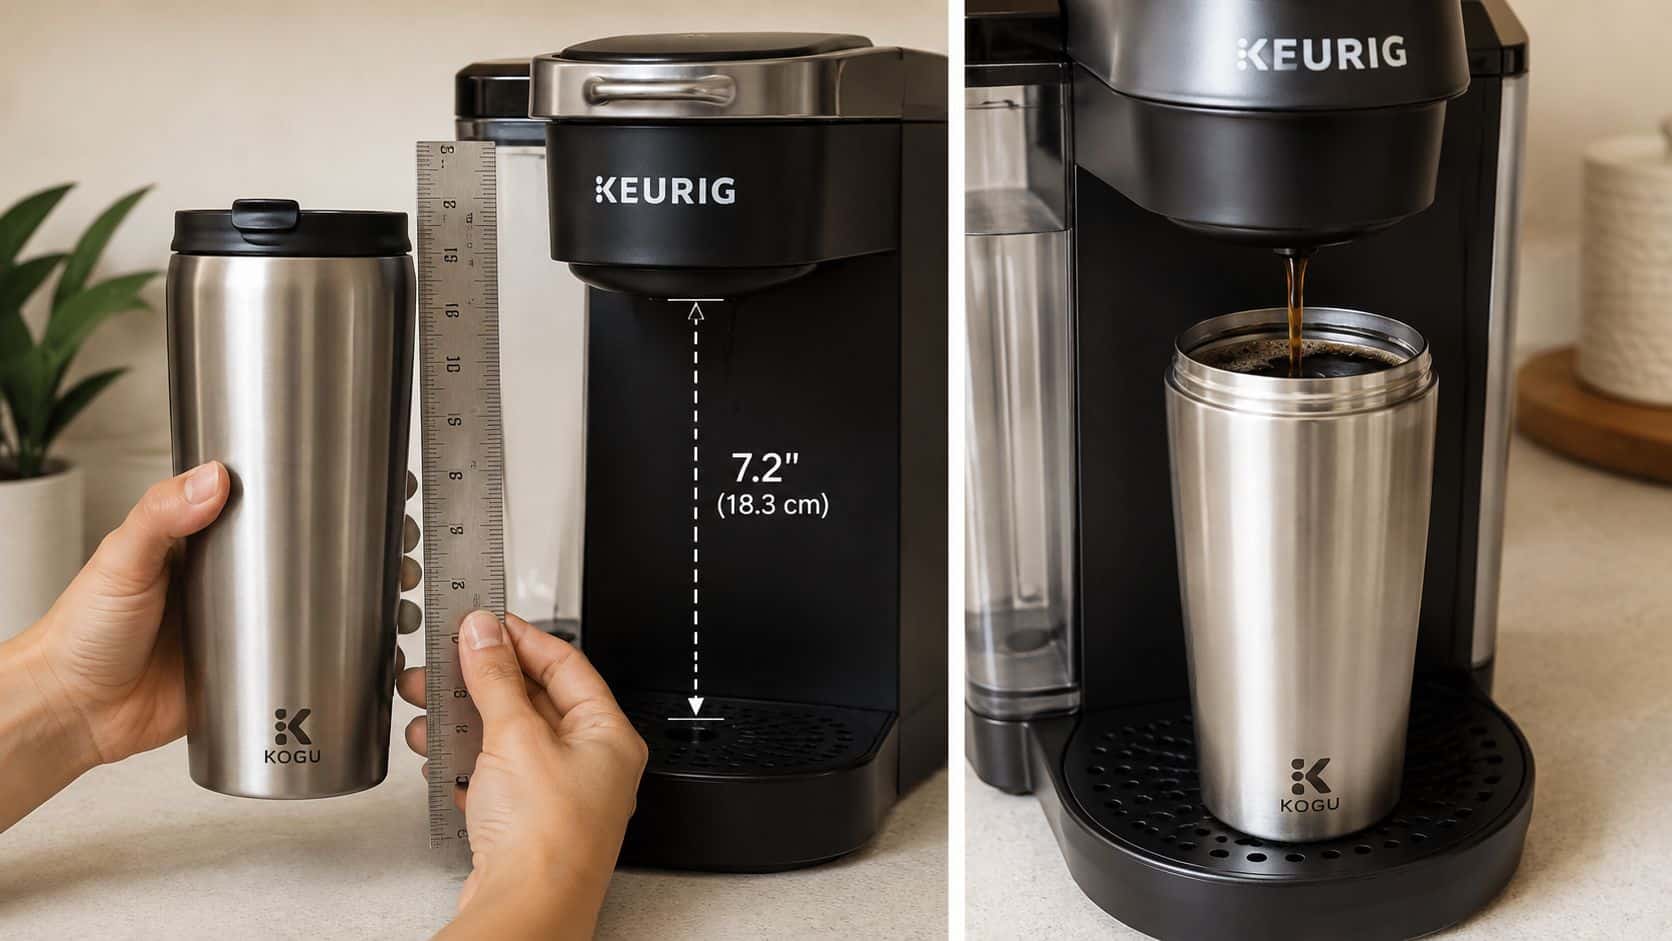
Travel mugs fail for predictable reasons. The body is too tall, the base is too wide, the lid crowds the brewing head, or the opening is too narrow for the falling stream. Test the cup in the machine before filling it with coffee.
Use this fit test
Measure height. Many Keurigs allow approximately 6.5 to 7.5 inches of clearance, depending on the model and tray position. Measure the mug with its lid removed, then check the highest part of the rim.
Brew with the lid off. The lid belongs on after brewing, not underneath the nozzle. It can interfere with clearance, restrict the opening, and redirect liquid toward the rim. A closed lid also gives you no useful way to see whether the stream is centered.
Check the base. Match the bottom of the travel mug to the drip tray. The base should sit flat without touching the tray walls or forcing the mug forward.
Choose a moderate setting. Tall, narrow mugs are easier to manage at 8 or 10 ounces than at the largest setting. The smaller pour reduces the chance that coffee will rise into the lid channel.
Use insulation for longer commutes. A double-wall vacuum mug makes more sense when you won't drink immediately, but it still needs a secure seal and a cup opening that accepts the brew stream cleanly.
K-Duo and Keurig 2.0 owners should treat carafes as platform-specific accessories. Carafe guidance for Keurig 2.0 identifies supported platforms and reinforces the main rule: confirm the brewer series before buying the vessel or reusable carafe pod.
A reusable carafe pod can suit users who want ground coffee rather than a limited pod format, but it doesn't make every carafe compatible. Guidance identifies the K200, K300, K400, and K500 series, plus K-Duo and K-Duo Plus, as supported examples for carafe-style reusable pods, so the machine model remains the deciding factor.
For travelers who also need compact hydration gear, this folding bottle guide for travelers is a useful comparison point. Collapsible bottles aren't coffee mugs, but the same packing principle applies: convenience matters only when the object remains stable and functional during use.
A carafe is the better choice when several people will drink coffee or when you need a larger batch. A travel mug is better when one person needs a sealed drink. Don't force one vessel to serve both jobs.
Myths, Premium vs Generic, and the Real Objections
The assumption that any mug works in any Keurig causes more trouble than the mug itself. A K-Supreme Plus needs 3.5 inches of clearance, while a K-Compact needs under 2.5 inches, according to the model-specific fit information supplied for this comparison. A mismatched tray can overflow before the brew cycle finishes.
Three myths worth dropping
Myth one, taller mugs always overflow. Total height isn't the only issue. The rim height, opening diameter, and position beneath the spout matter more. A tall cup with a low, wide opening can behave better than a shorter cup with a raised lip.
Myth two, paper K-Cups are always cheaper per ounce. The cost depends on the coffee, fill level, brew size, and whether you already own a reusable filter. Compare the actual amount of coffee in the cup rather than assuming the disposable format wins.
Myth three, ceramic glaze never affects taste. A clean, food-safe glaze should be neutral in normal use, but residue, staining, and poor cleaning can affect aroma and flavor perception. Color alone isn't the deciding factor, yet surface condition still matters.
Premium versus generic travel mugs
Premium mugs often provide better seal design, clearer care instructions, and more consistent fit information. Generic mugs can work perfectly well when their dimensions match the brewer, but packaging may not explain whether the lid should be removed during brewing or whether the base fits a particular tray.
| Consideration | Premium Mug | Generic Mug |
|---|---|---|
| Seal integrity | Often more deliberate and tested | Varies by design |
| BPA status | Usually stated clearly on product information | Check the material statement |
| Dishwasher safety | Care instructions are commonly detailed | Confirm before using the dishwasher |
| Compatibility | May identify intended brewer formats | May use broad compatibility language |
| Value | Higher cost can reflect construction | Lower cost can be sensible when fit is exact |
The main objection is usually leaks, not branding. If a generic mug sits flat, clears the brewer head, seals securely after brewing, and survives the cleaning routine you'll consistently follow, it can be the right purchase. If the dimensions are vague, spend your money on a product with clear measurements instead.
Your Cup Checklist and Where to Shop Next
A good cup for Keurig use should pass a quick test before it reaches your morning routine. Measure the mug, inspect the tray, and match the capacity to the brew button you use most.

- Check clearance: Keep most home-model mugs under 5.5 inches, unless your specific brewer provides more room. Keurig K-Duo carafes should remain under 7 inches where that platform requires it.
- Match the base: Keep the base diameter around 3.25 inches or less when possible, then confirm that the mug sits fully on the drip tray.
- Match the brew: Use a small cup for 6 ounces, a standard mug for 8 ounces, a medium cup for 10 ounces, and a larger mug for 12 ounces.
- Test the lid off: Brew into a travel mug without its lid, then seal it after the stream stops.
- Check the pod head: Confirm that a reusable K-Cup closes properly and leaves enough room for the brewer needle.
- Choose insulation intentionally: Pick double-wall stainless steel for commuting, ceramic for desk use, and avoid relying on glass when removing the drip tray makes the vessel unstable.
- Maintain the brewer: Mineral scale can restrict flow and affect consistency, so keep a compatible descaler and filter routine nearby. Keurig's official descaling guidance calls for a full bottle of descaling solution followed by multiple rinse cycles.
The final choice is simple. Match volume to brew size, use double-wall stainless steel when heat retention matters, and don't trust a glass mug on a removed tray unless it remains stable. A correctly sized cup solves more spill problems than a larger brew setting ever will.
PureHQ Inc. offers reusable K-Cups, refillable stainless-steel pods, filters, carafe baskets, paper liners, descaling solutions, and cleaning tablets for compatible Keurig systems. Visit PureHQ Inc. to choose the pod and maintenance accessories that match your brewer and make your properly fitted cup work harder.

