Coffee Machine Care
Mr Coffee Filter Replacement: A Complete How-To Guide
Apr
You fill the reservoir, add good beans, hit brew, and the first sip still tastes flat, sharp, or oddly dusty. Owners often blame the coffee. Often, the problem sits inside the machine, hidden in a small filter that hasn’t been changed, rinsed, or matched correctly.
That’s why mr coffee filter replacement matters more than most owners think. A worn water filter can drag down flavor. The wrong replacement can leak, float, or fit loosely enough that water slips past it. And if you buy the wrong style entirely, you waste money and still end up with a bad pot.
The fix is usually simple. Identify the filter type, install it the right way, and replace it on a schedule you will follow.
Why Your Morning Coffee Suddenly Tastes Wrong
The usual pattern is easy to recognize. Your coffee tasted fine last month. Then it started tasting a little dull. Then bitter. Then strangely hollow, even when you didn’t change beans or grind size.
That slow decline is why filter problems get missed.

The small part that changes the whole pot
Mr. Coffee became a fixture in American kitchens fast. According to the Mr. Coffee replacement parts and accessories FAQ, the brand reached 40% market share in the U.S. automatic drip coffee maker segment by 1972, sold over 1 million units in its first two years, and reached 10 million units sold by the mid-1980s. That scale also meant enormous filter use, including an estimated over 500 million paper filters annually during the brand’s peak years.
That history matters because these machines have always depended on proper filtration, first for grounds, then increasingly for water quality inside the brewer.
When the water filter is fresh, it helps keep unwanted taste out of the brew. When it’s spent, poorly seated, or skipped, the machine keeps working, but the cup starts drifting in the wrong direction.
What bad filter performance looks like
You don’t always see a dramatic failure. More often, you notice a few annoying signs:
- Flavor turns harsh: Coffee can taste more chemical, bitter, or muddy than usual.
- Brewing feels inconsistent: One pot tastes acceptable, the next tastes off.
- You notice specks or residue: That often points to a new filter that wasn’t prepared correctly.
- You start second-guessing your beans: The coffee isn’t necessarily the problem.
Practical rule: If your beans are the same and your brew suddenly tastes worse, check the filter before you change everything else.
A lot of owners also confuse the brew basket filter with the water filter. They replace paper filters faithfully, but ignore the charcoal component in the reservoir. That’s how coffee quality slides even when your routine seems correct.
Why this gets expensive fast
Bad filtration wastes more than flavor. It also leads to trial-and-error buying.
People often buy a replacement disk when their machine uses a cartridge. Or they order a generic part that sort of fits, but doesn’t seal well. Then they assume all replacements are unreliable.
That’s one reason a clear ID step matters before you buy anything. If you want a broader overview of how water filtration affects coffee flavor and maintenance, this guide on coffee maker water filter replacement is a useful companion.
What fixes it
In practice, most taste problems tied to filtration come down to three causes:
- The old filter stayed in too long
- The new filter was installed without soaking or rinsing
- The replacement didn’t match the machine
None of those problems require a new brewer. They require the right replacement and a few careful minutes at the sink.
If your coffee suddenly tastes wrong, start there. It’s the quickest fix with the biggest payoff.
Identifying Your Mr Coffee Filter Type
Before you buy anything, open the machine and look. Don’t order based on memory, cup size, or a product title that says “fits most.”
Mr. Coffee brewers commonly involve two separate filter jobs. One holds the coffee grounds. The other treats the water before brewing. People mix them up all the time, and that’s where a lot of replacement mistakes begin.
First separate brew filters from water filters
This is the cleanest way to identify what you need.
Brew filters for coffee grounds
These sit in the brew basket and hold the grounds.
You’ll usually see one of these:
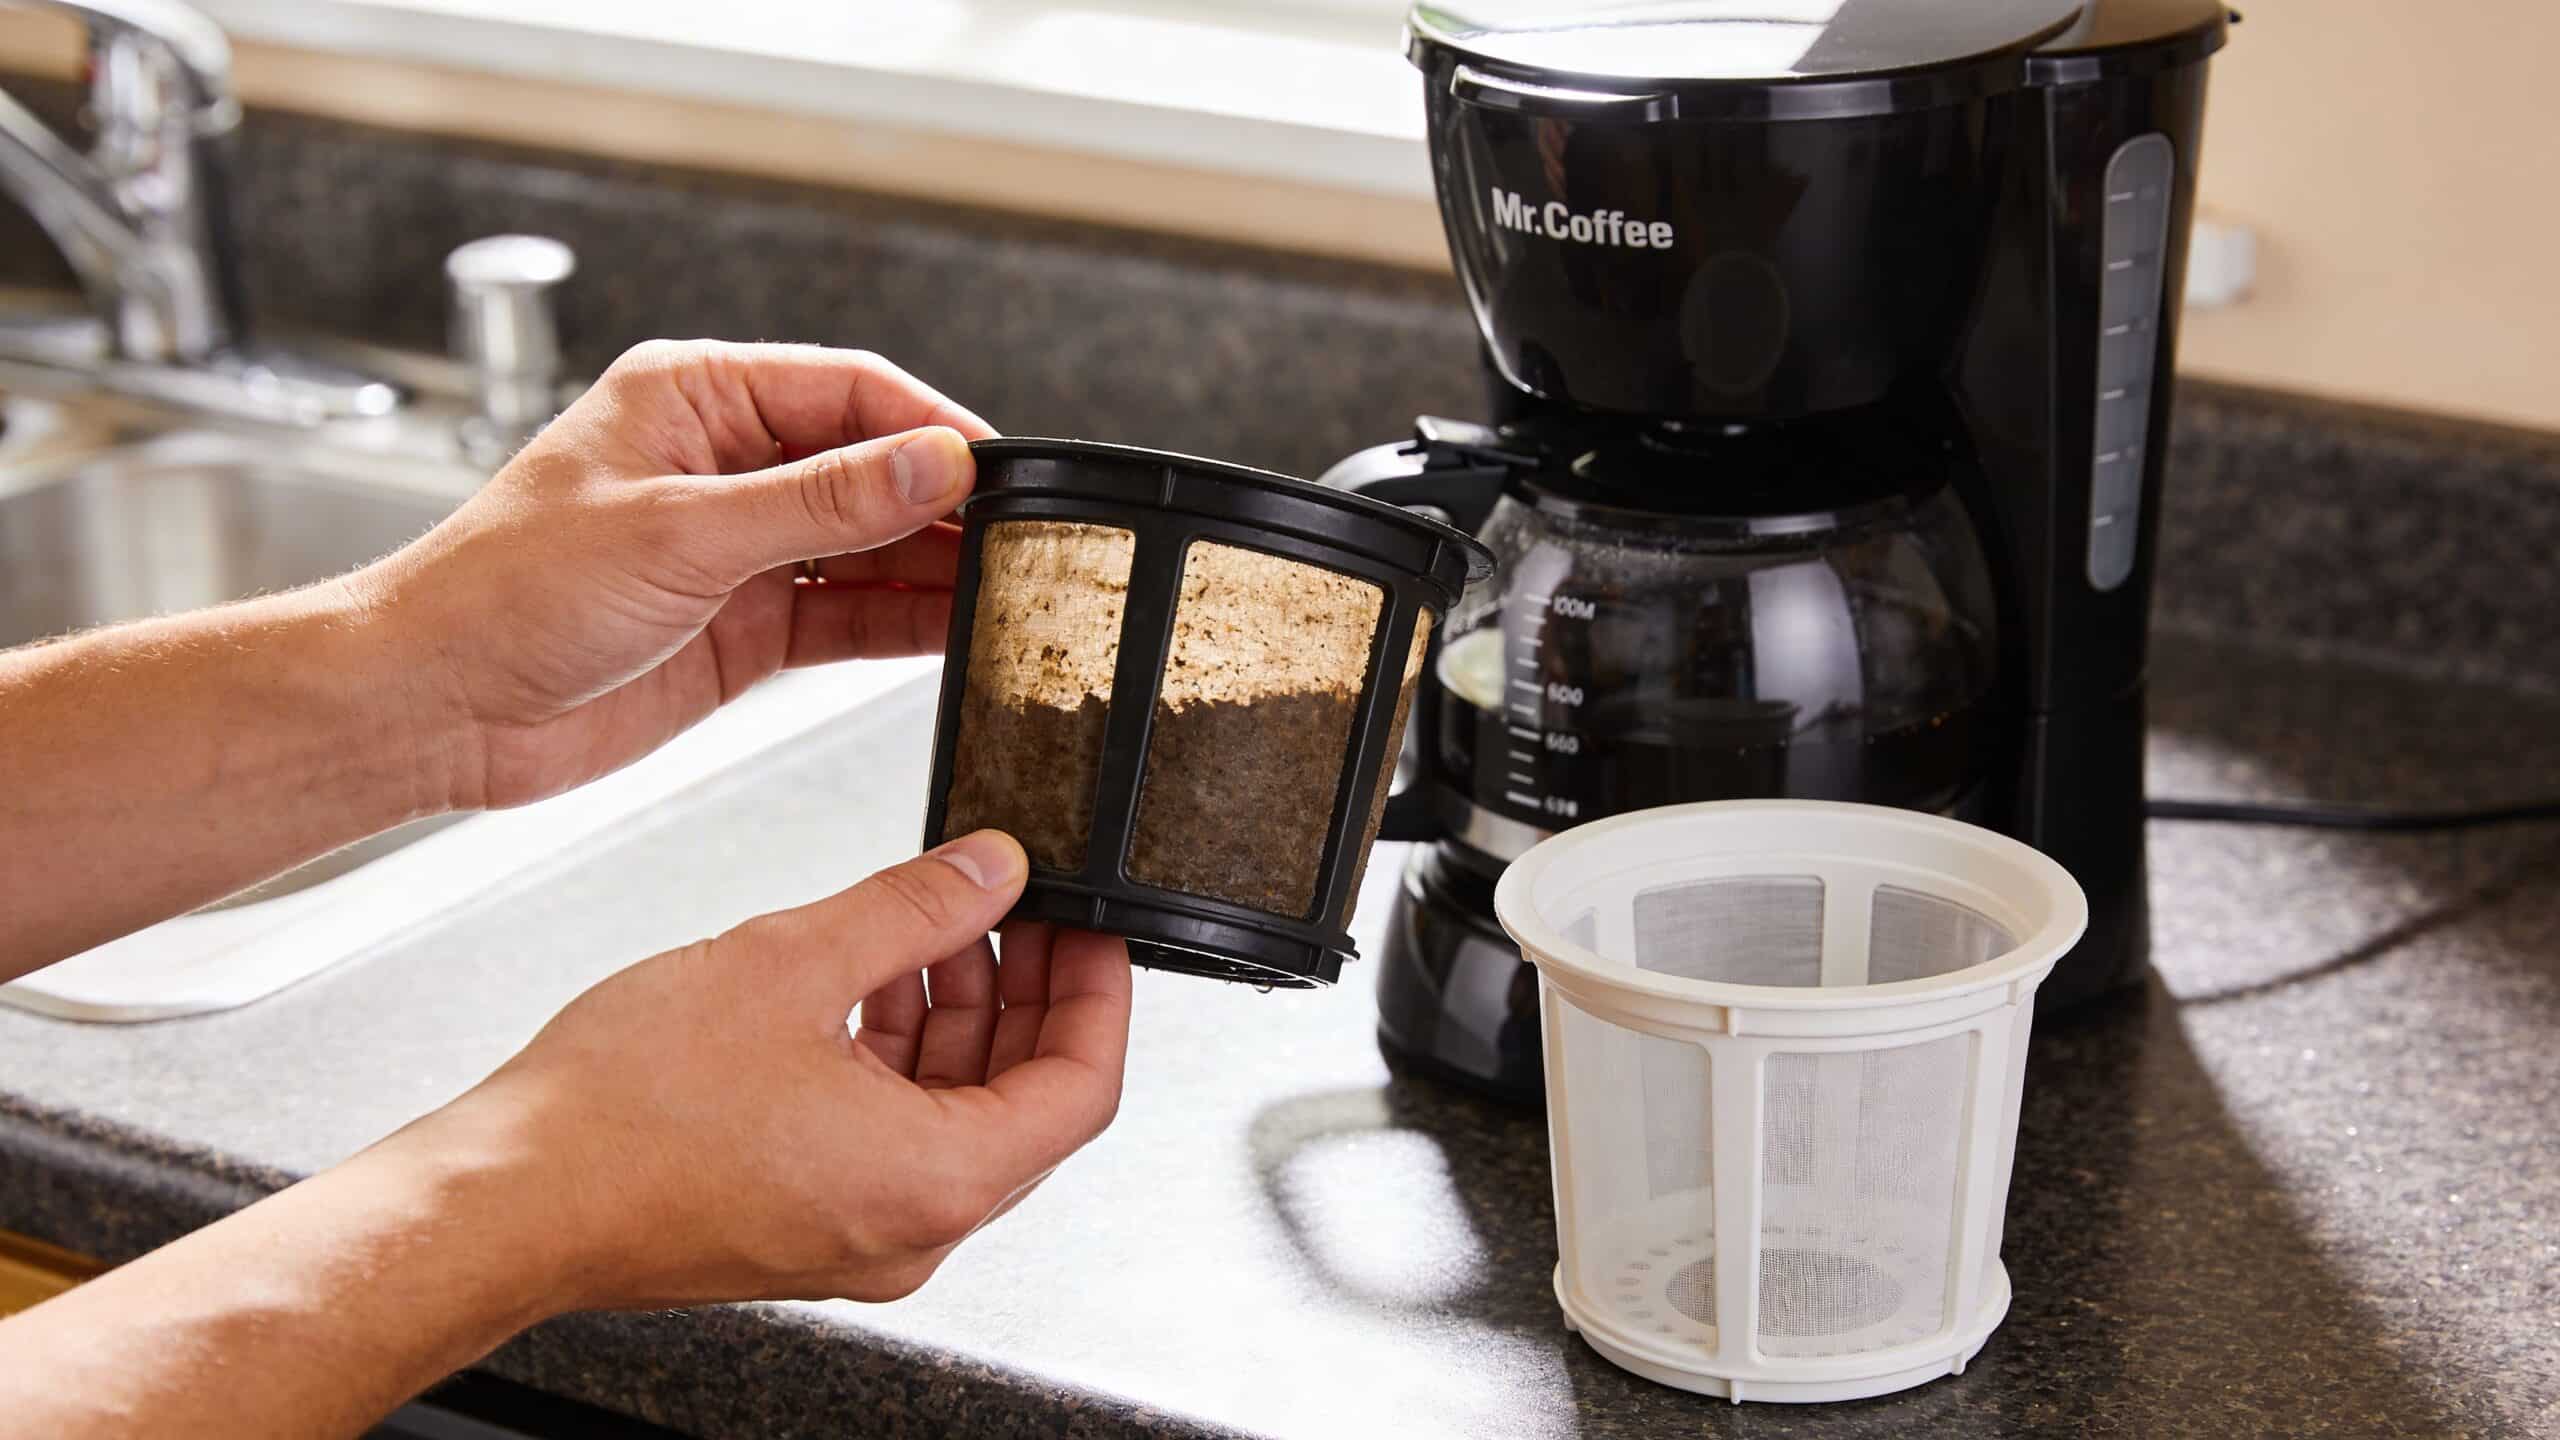
Disposable paper basket filters
These are the classic fluted paper filters. You use them once, then toss them.Reusable gold-tone or mesh filters
These replace paper and let more coffee oils through. They need regular rinsing and occasional deep cleaning.
These parts affect sediment and body in the cup, but they are not the same as the machine’s water filter.
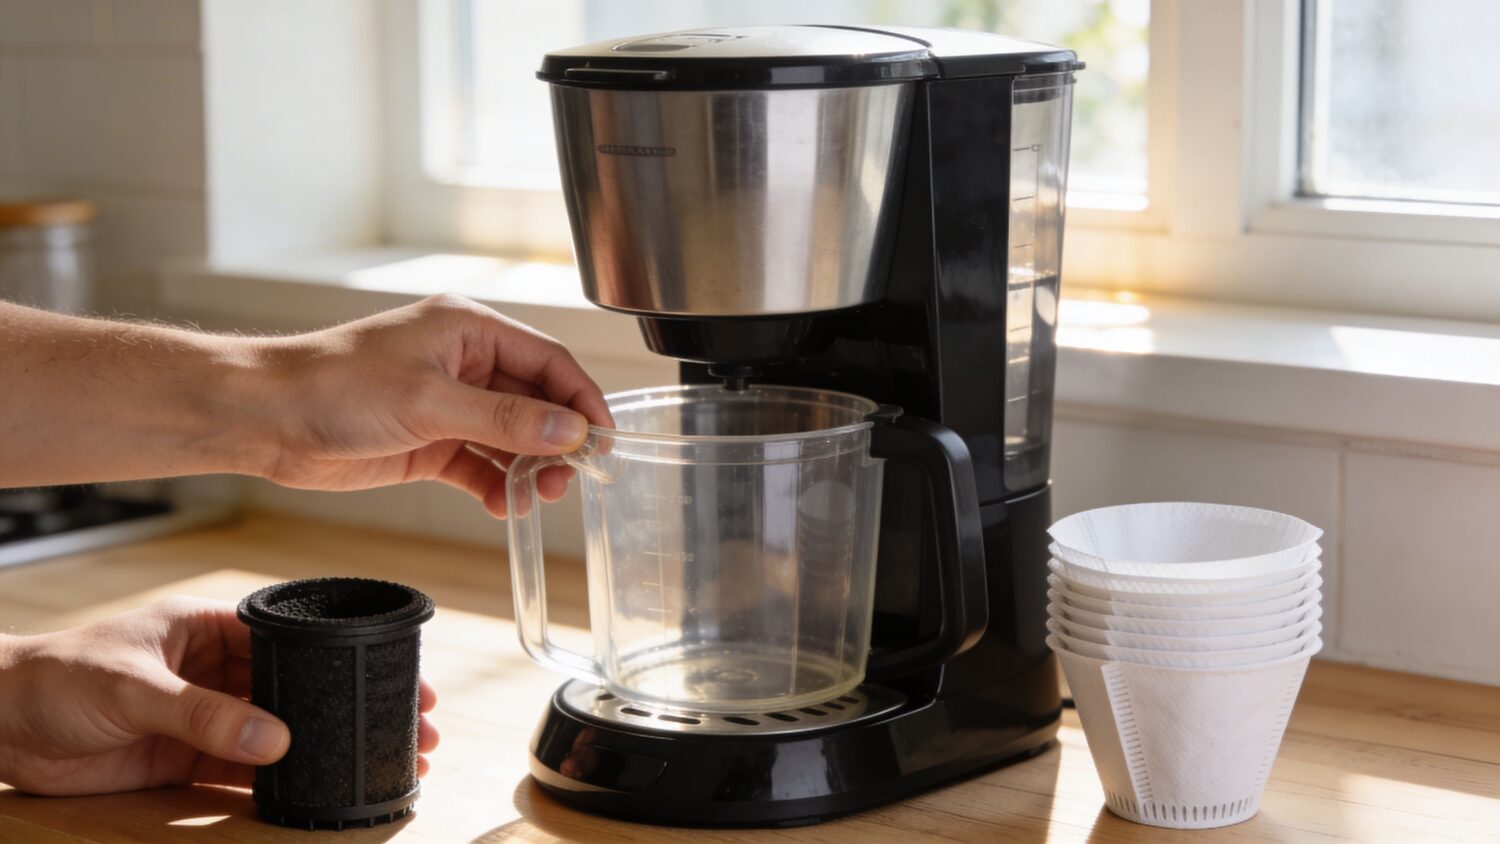
Water filters for reservoir filtration
These sit in a holder or frame inside the brewer and help clean the water before it reaches the grounds.
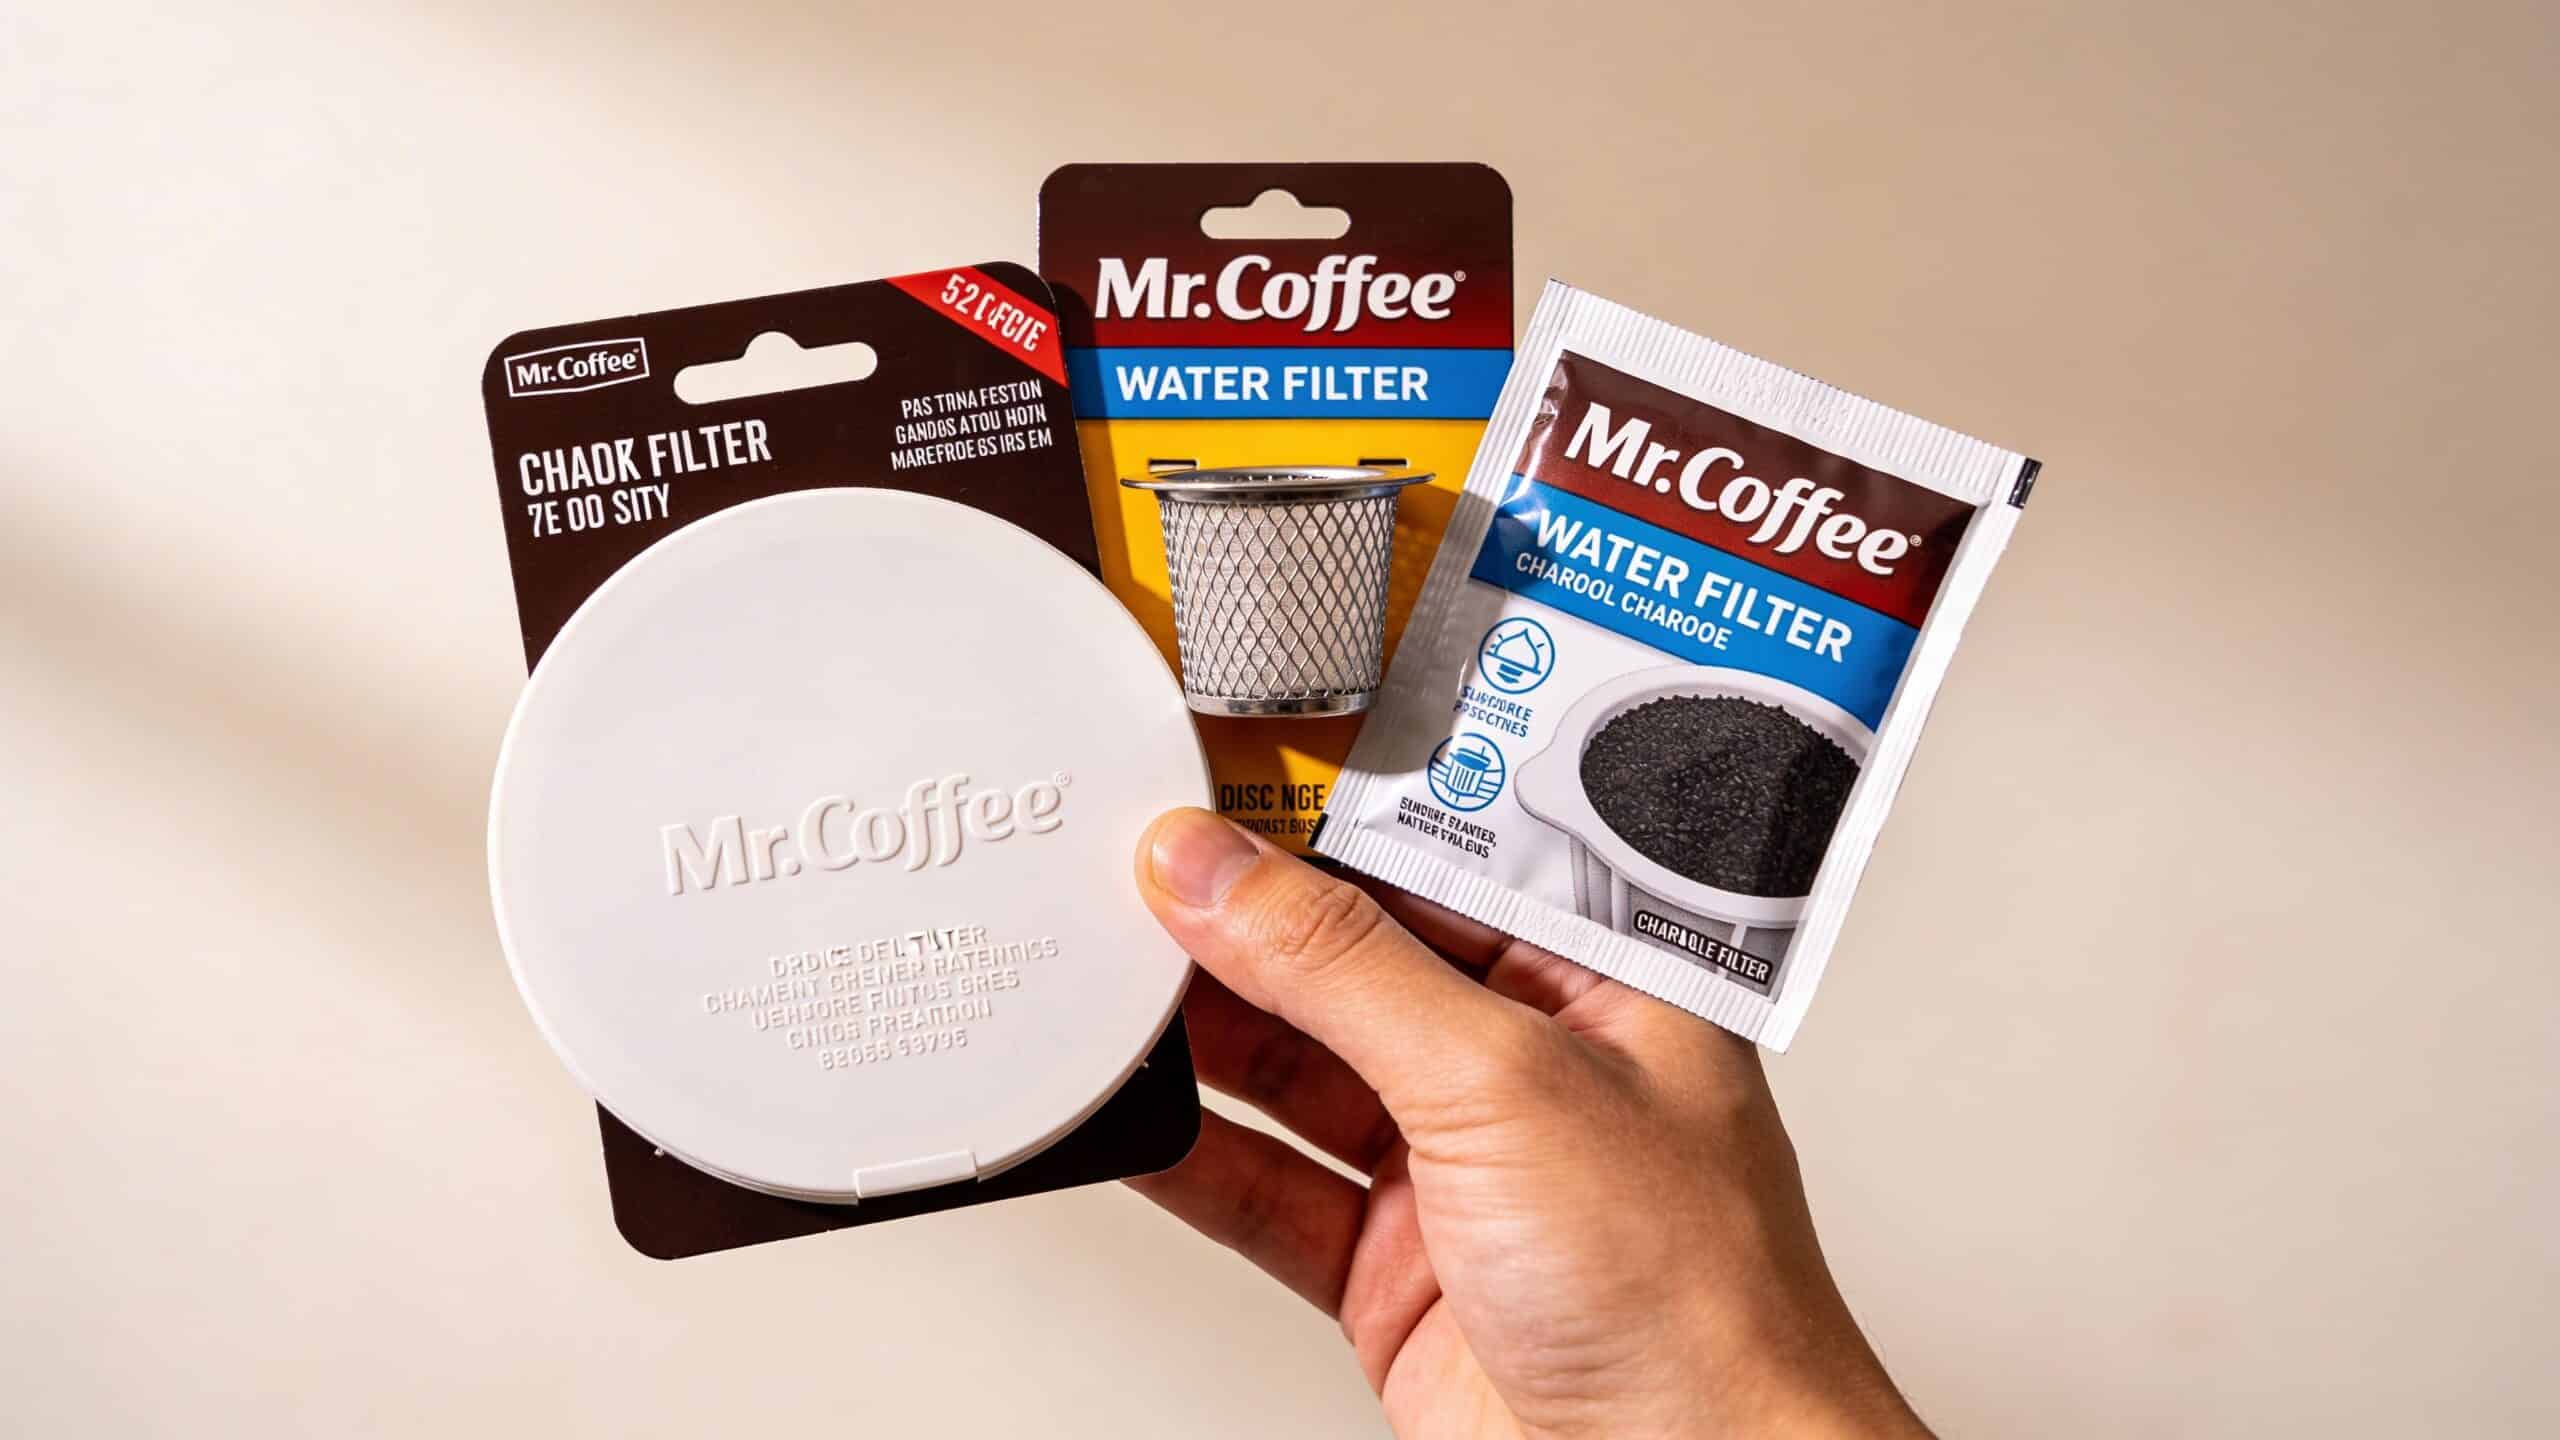
For Mr. Coffee, the two main types are:
- Round water filter disks
- Rectangular charcoal cartridges such as WFF-3 style filters
If your machine has no built-in holder in the reservoir area, it may not use a water filter at all.
How to tell disk vs cartridge at a glance
A quick visual check usually solves it.
You probably have a disk filter if
- The filter itself is flat and circular
- It installs into a small frame
- The holder sits inside the reservoir area and often involves a top piece or knob
- Your brewer falls into the common 8 to 14 cup range that uses reservoir-mounted disk assemblies
You probably have a cartridge if
- The filter is rectangular
- It snaps into a holder with braces or a retainer
- The assembly includes a month tab or tracking marker
- Your machine resembles models that use WFF-3 charcoal cartridges, such as some 10-cup or Duo-style brewers
If the filter shape and the holder shape don’t obviously match, stop there. Don’t force it. A poor fit usually leads to leaks, bypass, or a floating filter.
The fastest way to confirm compatibility
Use this sequence:
- Check the model number on the bottom or back of the brewer.
- Open the reservoir and inspect the holder shape.
- Compare the old filter before throwing it away.
- Look for a month tab, braces, frame, or round disk holder.
- Avoid “universal” claims unless the listing clearly names your brewer family.
A lot of confusion comes from broad compatibility language. Owners assume one Mr. Coffee filter works across every drip model. It doesn’t.
For a deeper look at how reservoir filtration systems work across these brewers, this guide to Mr. Coffee water filtration helps clarify the main styles.
Common identification mistakes
Some mistakes show up again and again.
Buying by cup count alone
Two machines with similar capacity can use different filter systems.Replacing only the basket filter
If the water filter stays old, taste can still suffer.Throwing away the old part too early
Keep it until the new one is installed and confirmed.Assuming all round filters are the same
Diameter, frame fit, and holder design still matter.
A simple field test
If you want a no-nonsense test, remove the filter holder and inspect the cavity.
| What you see | What it usually means |
|---|---|
| Flat round recess with matching frame | Disk-style water filter |
| Rectangular slot with clip points or braces | Cartridge-style filter |
| Standard brew basket only, no reservoir holder | Grounds filter only |
This step saves time because it shifts the decision from guessing to matching physical parts.
The best Mr Coffee filter replacement starts with that match. Once you know whether you’re dealing with paper, reusable mesh, a round disk, or a rectangular cartridge, the rest gets much easier.
A Practical Guide to Replacing Your Water Filter
Most replacement problems happen before the filter ever goes into the machine. People skip the soak, install the part upside down, or force a loose fit and hope the brewer sorts it out.
It won’t.
Replacing a round water filter disk
For many 8 to 14 cup Mr. Coffee brewers, the disk-style filter is the one you’ll see inside the reservoir assembly.
The process is straightforward, but one step is essential. According to Majesty Coffee’s Mr. Coffee water filter disk placement guide, a new disk should be pre-rinsed or soaked for 15 minutes to remove activated charcoal dust and support filtration performance that removes up to 97% of chlorine. That same source notes that skipping the rinse can lead to a 50% initial contamination rate with black particles.
Disk replacement steps
- Remove the new disk from its packaging with the frame.
- Find the water reservoir. On many models, it’s front-mounted and uses a black knob.
- Unscrew the knob and lift the top.
- Place the disk into the frame with the “UP” side facing upward.
- Seat it level in the reservoir holder.
- Lower the top and tighten the knob so the assembly stays secure.
A disk filter that sits crooked often causes the next problem people notice, poor flow or overflow. If it doesn’t look level, reinstall it before brewing.
What not to do with a disk filter
- Don’t skip the soak or rinse
- Don’t ignore the “UP” marking
- Don’t overtighten the holder if the frame is visibly misaligned
- Don’t brew immediately after seeing black dust. Remove, rinse again, reinstall
Replacing a WFF-3 style charcoal cartridge
Cartridge-style systems use a different holder and a different prep method. They’re common on some 10-cup and Duo brewers.
The biggest error here is installing the cartridge dry. The charcoal needs to absorb water first so the filter seats and behaves correctly during brewing.
Cartridge replacement steps
- Open the reservoir top
- Slide the retainer bar aside
- Lift the holder
- Flip or open it to remove the old cartridge
- Submerge the new cartridge for 5 minutes
- Insert it into the holder braces
- Set the month tab
- Reseat the holder and close the reservoir
A short visual walkthrough can help if your holder design is unfamiliar:
Why prep matters more than people expect
A new charcoal filter often releases harmless dust at first. That’s normal. What matters is whether you dealt with it before installation.
If you prep the filter properly, your first brew should run cleanly. If you don’t, you may see black specks, odd taste, or a cartridge that doesn’t sit right.
That prep step is also where many “defective filter” complaints begin. In a lot of cases, the filter isn’t defective. It was just installed dry or seated badly.
A quick leak and fit check
Before you brew a full pot, do one water-only cycle.
Look for these signs:
- Water moves normally
- No overflow around the holder
- No visible floating or shifting
- No black residue after the initial rinse cycle
- The holder closes without force
If something looks off, remove the filter and check the obvious points first: orientation, soaking, and seating.
One practical objection people have
A common concern is simple. “What if a third-party filter leaks?”
That can happen with poorly made parts, but the immediate cause is usually one of two things: the wrong filter type for the holder, or a correct filter that wasn’t seated fully. In day-to-day use, fit matters more than brand name alone.
For the best results, treat installation like a small maintenance task, not a toss-it-in replacement. Two extra minutes at setup save a lot of wasted coffee.
Choosing the Best Replacement Filter for Your Machine
Once you know your filter type, the next question is quality. That’s where people often go too cheap, get a sloppy fit, then decide every compatible replacement is a gamble.
The bigger issue is compatibility confusion. A broader market summary tied to appliance accessories notes in a video discussing filter fit and compatibility gaps that many drip coffee owners struggle with part mismatches, often wasting money on incorrect purchases. That lines up with what many coffee users run into in practice. The wrong filter doesn’t just fail. It wastes time and creates doubt about what your machine needs.
What separates a good replacement from a bad one
For Mr Coffee filter replacement, I’d judge options on four things first:
Fit inside the holder
If it rocks, floats, or needs force, it’s the wrong part or a poorly made one.Consistent filtration media
Charcoal only helps if water passes through it instead of around it.Clean installation
Good replacements seat predictably and don’t turn a simple swap into trial and error.Clear compatibility guidance
If the listing is vague, expect problems.
Mr Coffee filter replacement options compared
| Feature | PureHQ Premium Filters | OEM Mr. Coffee Filters | Generic/No-Name Filters |
|---|---|---|---|
| Fit approach | Built for compatible models with emphasis on broad fit guidance | Made for brand-specific systems | Often marketed with broad claims that may be vague |
| Buying experience | Useful when you want a third-party option that targets compatibility questions | Familiar choice for owners who prefer original branded parts | Commonly chosen on price alone |
| Risk of mismatch | Lower when the product listing clearly names supported models | Lower if you match the exact machine | Higher when sizing details are thin |
| Value trade-off | Can make sense if you want a compatible replacement without guessing | Often the simplest default option | Lowest upfront cost, but poor fit can waste money |
| Best for | Owners who want compatible replacements and clearer part selection | Owners who want to stay with OEM parts | Owners willing to troubleshoot fit issues |
One good third-party route is PureHQ’s reusable filter guide, especially if you’re also deciding whether to replace paper basket filters with a reusable option. That can simplify your routine while you sort out the water side separately.
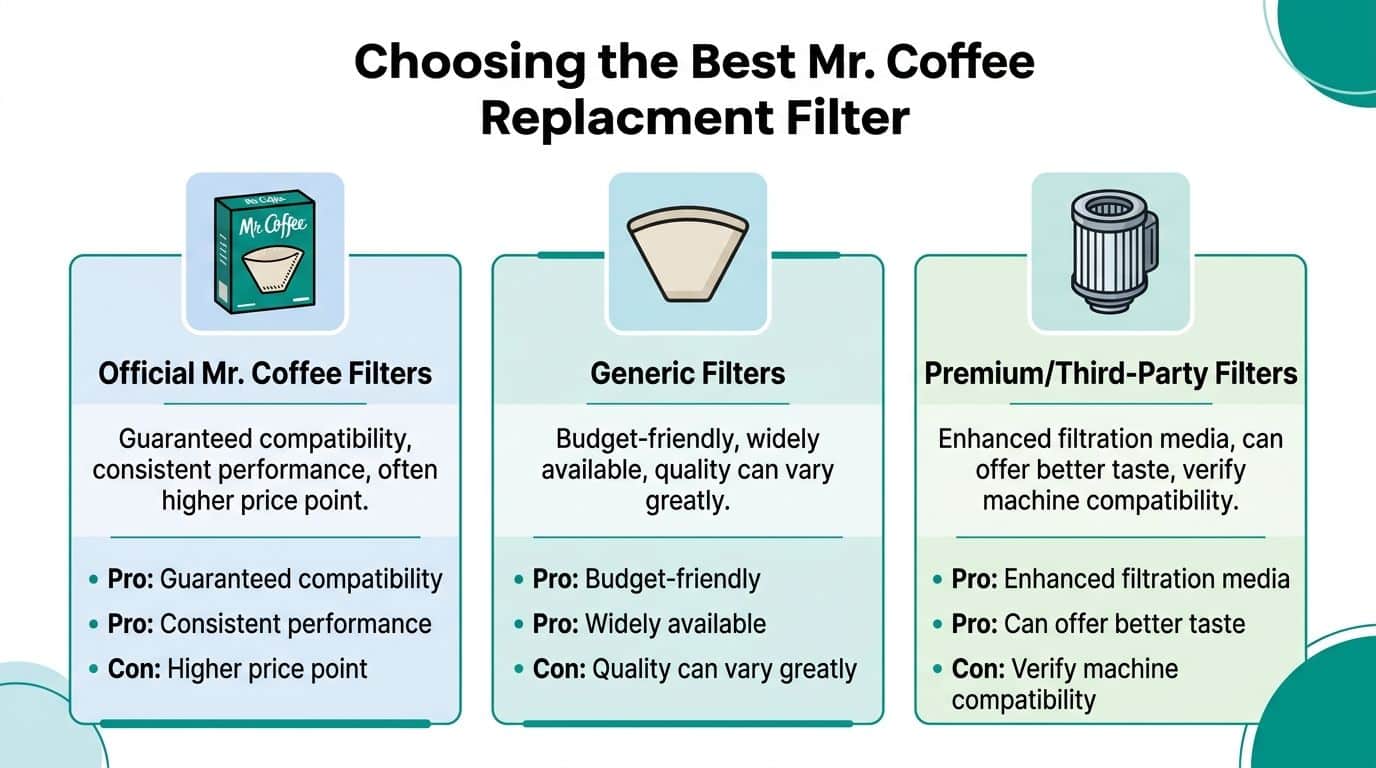
Official, generic, or premium compatible
Each option has a real trade-off.
OEM filters
These are the safe choice when you already know the exact part number. They usually remove guesswork, but not always confusion. Brand catalogs can still be broad, and older models can be harder to match.
Generic filters
These win on price. They lose when tolerances are inconsistent.
A generic filter that “almost fits” is one of the worst buys in coffee gear. You save a little upfront, then lose that savings to leaks, bypass, or a replacement order.
Premium compatible filters
These make the most sense when you want a better-organized compatibility path than the bargain end of the market. The key is not hype. The key is whether the dimensions, holder engagement, and model guidance are precise enough to avoid guessing.
Buy the filter that matches your brewer’s holder design, not the filter with the broadest marketing claim.
A specific objection about compatibility
A lot of buyers say the same thing. “I don’t want to order another filter that doesn’t fit.”
That’s reasonable. The best response is practical:
- Check the brewer model number.
- Compare the existing holder shape.
- Keep the old filter until the new one is installed.
- Avoid listings that rely on “universal” language without naming models.
One more upgrade that helps
A fresh water filter improves incoming water. It does not remove old mineral buildup already inside the machine.
That’s why pairing replacement filters with a descaling product makes sense. If your coffee has stayed slow or dull even after a filter swap, the brewer may need internal cleaning too.
Filter Maintenance Schedules and Common Questions
Most filter trouble starts because owners replace parts reactively instead of routinely. They wait until coffee tastes bad, black specks show up, or the machine starts acting strangely.
A better approach is to tie replacement to brew frequency.
A schedule that’s easy to follow
For Mr. Coffee water filter disk replacement in many 8 to 14 cup brewers, the guidance tied to the disk method is every 30 brewing cycles or monthly, whichever comes first, as described in the earlier installation source. If you have hard water, changing more often is the safer move.
For WFF-3 charcoal cartridges, the replacement window is much longer. In a video covering WFF-3 cartridge replacement, the cartridge can last 6 to 12 months, and submerging it for 5 minutes before installation helps avoid 40% of float-related failures while allowing the charcoal media to filter up to 97% of chlorine and impurities.
A simple maintenance rhythm
Use the filter type to set the routine:
Disk-style filters
Replace monthly or after about 30 brews. If your household runs several pots a day, that date comes quickly.Cartridge-style filters
Check the month tab when you install the new one. That small step prevents the usual “I forgot when I changed it” problem.Reusable brew basket filters
Rinse after every brew. Deep clean them when coffee oils start building up.
If you can’t remember your last filter change, assume it’s time.
Common questions people ask
Can you run a Mr. Coffee maker without a water filter
Usually, yes, if the machine is designed to brew whether the holder is filled or not.
But coffee quality can drop, especially if your tap water has noticeable taste or leaves mineral buildup. Running without a water filter is a convenience choice, not a flavor choice.
Why are there black specks after I install a new filter
That’s usually charcoal dust from a new filter that wasn’t soaked or rinsed enough.
With disk filters, a proper pre-rinse or soak handles this. With cartridges, the short pre-soak helps stabilize the filter before installation. The specks are annoying, but the fix is simple: remove the filter, rinse or soak again, then run a water-only cycle.
How do I know if the filter is seated correctly
Look for three things:
- The holder closes normally
- The filter sits flat or locked in place
- A test brew runs without overflow, shifting, or visible bypass
If you have to force the holder shut, something’s wrong.
Does replacing the filter clean the machine too
No. A fresh filter treats incoming water. It doesn’t remove old scale or stale residue from inside the brewer.
If your machine still brews slowly or your coffee still tastes off, clean the brewer separately. This guide on how to clean a coffee maker is a practical resource if you want a full maintenance routine beyond filter changes.
What’s the best way to dispose of old filters
Follow your local waste rules and the filter material guidance on the packaging when available.
Paper brew filters are simple to discard. Charcoal water filters and plastic-framed components usually go out as household waste unless your local program accepts those materials separately.
The habits that save the most frustration
The owners who get consistent coffee usually do the same few things every time:
- They identify the filter before ordering
- They prep new filters before installation
- They run a water-only cycle after a change
- They track replacement dates instead of guessing
That’s the whole game. Good beans matter. Grind matters. But if the filter is wrong, old, or badly installed, the rest of your setup has to work uphill.
If your coffee has started tasting off or you’re tired of guessing which replacement fits, shop compatible filters and coffee machine accessories from PureHQ Inc..
