
Coffee Machine Care
Water in Keurig Not Coming Out: Quick Fixes That Work
Oct
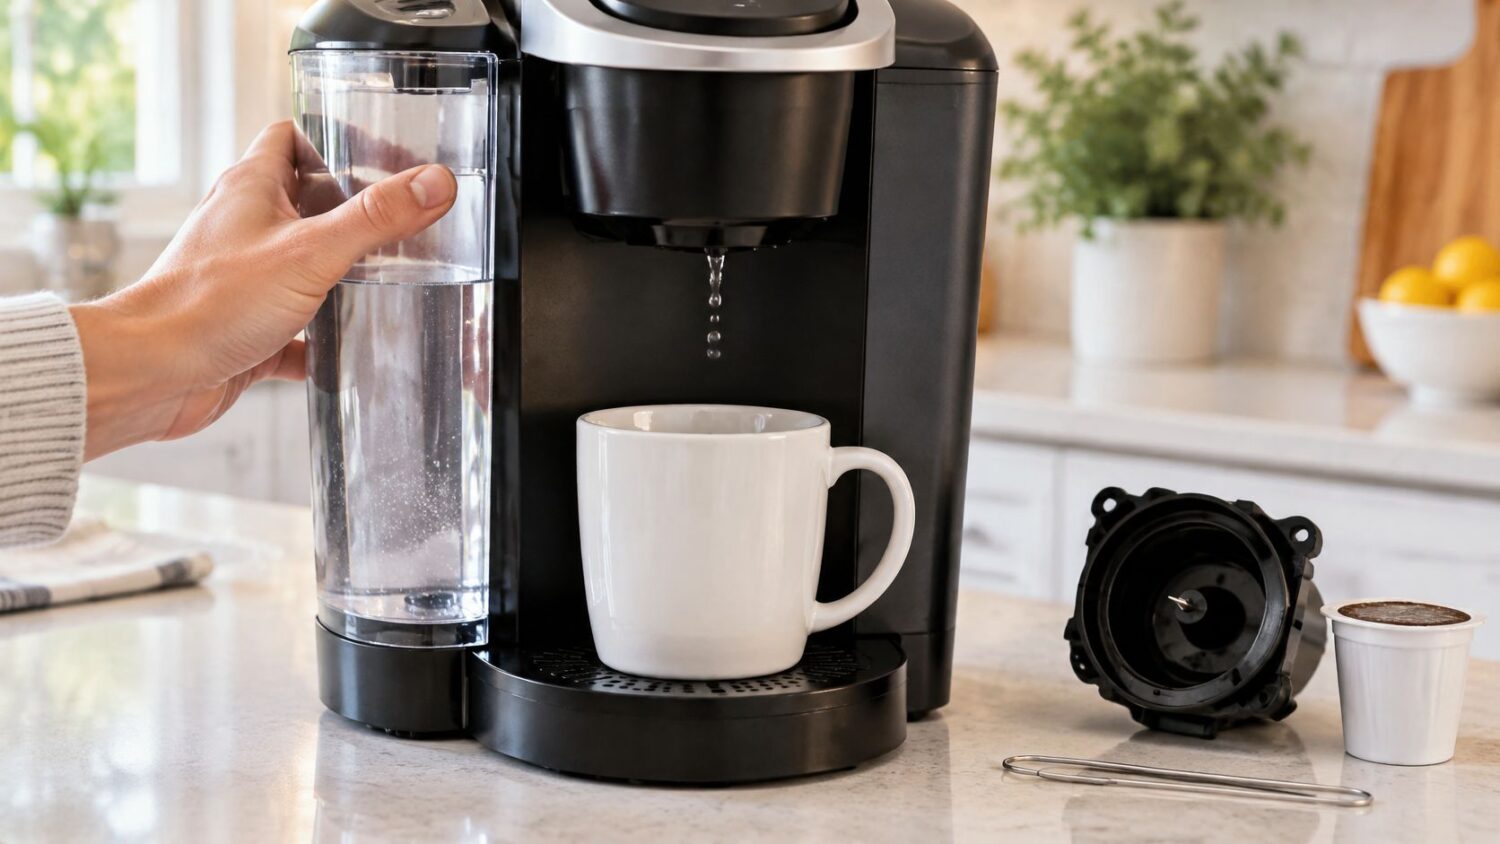
You hit brew before your eyes are fully open, hear the pump start, then watch an empty mug stay empty. That's the water in Keurig not coming out problem at its worst, because the machine sounds alive while doing nothing useful. Don't descale it on reflex. The sound, the water level, and a single pod-free test usually tell you which failure you're dealing with.
Why Your Keurig Is Silent When You Need It Most
It's 6:47 a.m. You close the handle, press the flashing button, and listen. There's a click. There's a hum. Then there's silence, or a sad trickle, and you're staring at a mug with nothing in it.
That empty cup doesn't mean the pump died overnight. In most kitchens, no water in your mug isn't one failure, it's three different failures sharing the same symptom. Sorting them out takes minutes. Guessing costs you a morning.
Three Culprits Behind One Empty Mug
The first is a reservoir or airlock problem. The tank looks full enough, but it isn't fully seated, it's sitting below the minimum sensor level, or air has settled in the intake so the pump runs without establishing continuous flow. Keurig's own care guidance identifies restricted flow from mineral scale, an air lock, or insufficient reservoir water as the core reasons a brewer makes noise but dispenses little or nothing, as detailed in Keurig's K-Supreme user and care guide.
The second culprit is mechanical. Fine grounds pack into the exit needle or the upper entrance needle, and water that entered the pod can't leave it. You'll sometimes see water backing up or overflowing around the pod holder instead of draining down.
The third is mineral scale inside the boiler and tubing. Scale narrows the internal water paths gradually, so flow slows over weeks before it stops. That's different from a sudden stop after yesterday's normal brew, and the distinction matters.
The symptom is no water. The cause could be air, grounds, or stone. Treating all three the same way is how a simple clog turns into an afternoon project.
Most of these cases are fixable at home with a paper clip, hot water, and patience. No screwdriver should touch the housing. Your job right now isn't to fix anything yet. It's to figure out which of the three problems is sitting on your counter.
The Two-Minute Checks You Should Always Run First
Unplug nothing yet. Reach for nothing sharp. The fastest answers live in the reservoir and one test cycle, and they'll tell you whether deeper work is even necessary.
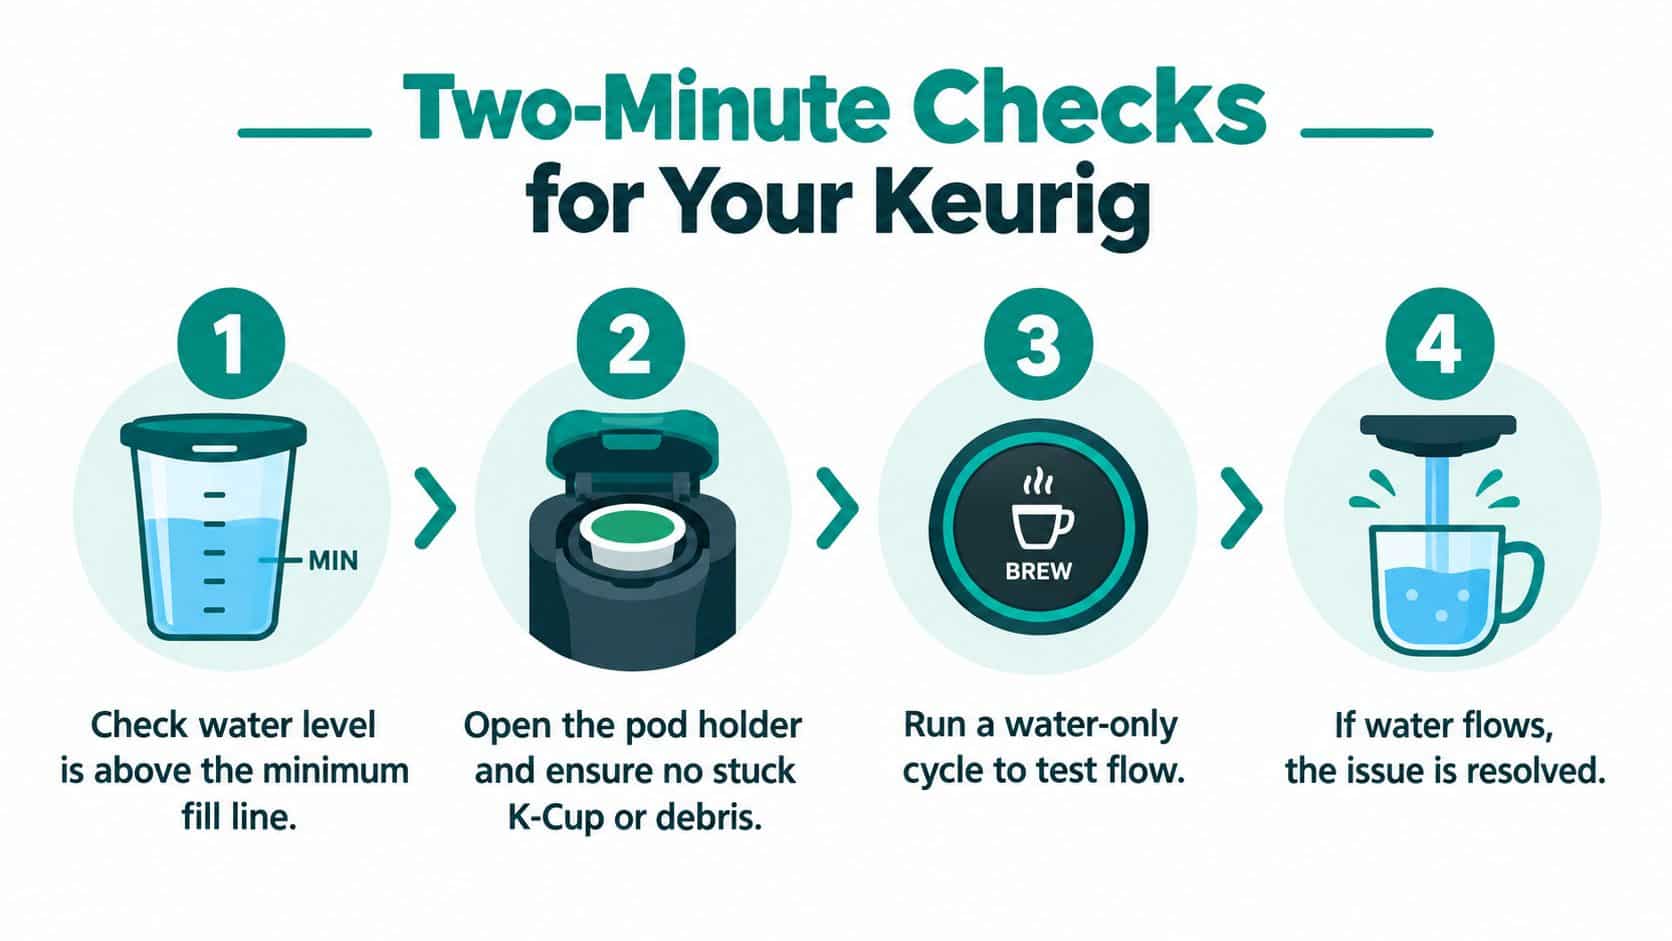
The visual below lays out the sequence in order, so you can run it without rereading.
Start With the Tank, Not the Tools
Lift the reservoir off and set it back down firmly. A tank that's a few millimeters off its base can starve the intake while looking perfectly fine. Check the outlet on the bottom for debris while it's in your hand.
Then check the level against the actual minimum, not your estimate. Keurig specifies a minimum brew volume of 177 milliliters (6 ounces) for the K-Supreme, and when the water sits near that threshold the maker recommends adding another 59 milliliters (2 ounces) and repeating the brew cycle until dispensing begins. If your machine has been giving you vague add-water behavior, understanding how the water level indicator reads the tank explains why a nearly full looking reservoir can still fail the sensor.
Run the Pod-Free Test
Remove any pod, close the handle, put a mug in place, and run a water-only cycle. Now listen and watch, because the result splits your diagnosis cleanly.
- Water flows normally: The pump, reservoir path, and boiler work. Your blockage sits around the pod, holder, or needles.
- Pump hums, nothing moves: Suspect an airlock, a restricted reservoir outlet, or a deeper internal blockage.
- Trickle or sputter: Something is partially open. Grounds in a needle or early scale is likely.
- No sound at all: Stop here and check power, lid closure, and the handle position before anything else.
This model-neutral test is the logic behind Keurig's official support guidance, which separates low water and seating problems from needle clogs and scale instead of lumping them together. Water overflowing around the pod holder points one way. A reservoir that never drains points the other.
Diagnostic rule: If water flows without a pod, don't descale. Clean the needles. If it won't flow without a pod, don't touch the needles first. Chase the air and the tank.
Write down, or just remember, which of the four outcomes you got. Every next step depends on it.
Cleaning the Needles the Right Way
Your pod-free test trickled, or water flowed but a real pod produces nothing. That pattern puts grounds in the needles at the top of the list, and that point is where most owners stop one needle too early.
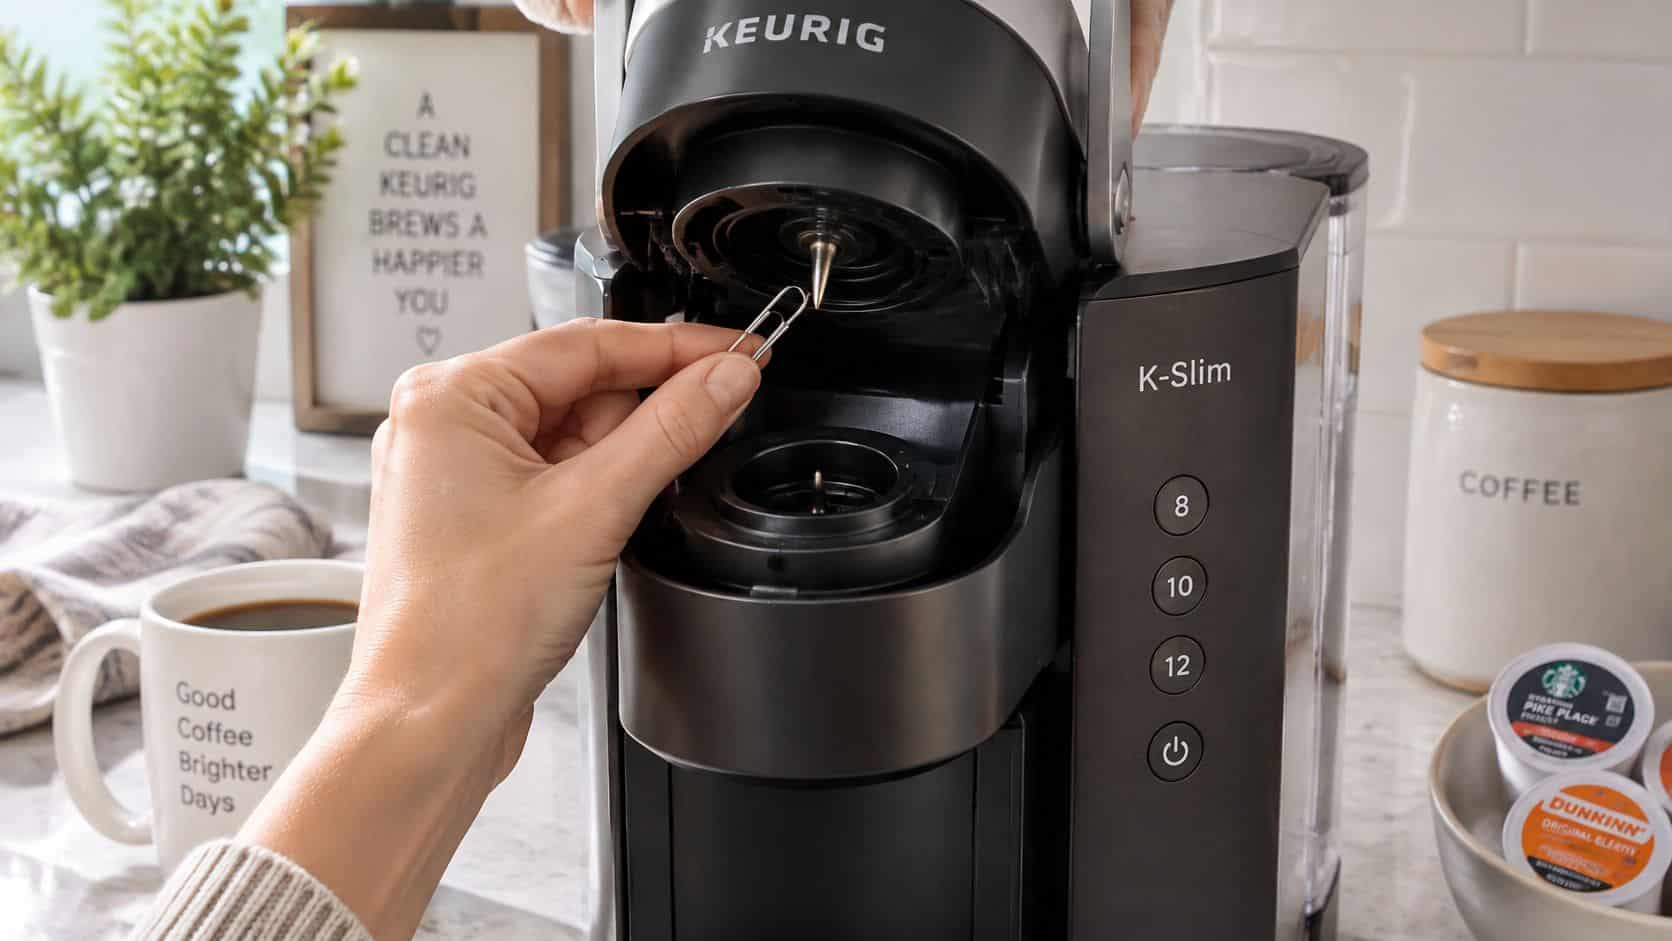
The photo below shows the exit needle position on a K-Slim style holder before you start.
The Exit Needle Comes First
Power the brewer off and unplug it. Remove the pod holder assembly and separate the funnel. On the inside bottom of the holder you'll find the exit needle, the part that pierces the pod and gives brewed liquid its only way out.
Keurig's K-Slim use and care guide instructs you to insert a straightened paper clip into that needle to loosen trapped coffee grounds, then rinse the assembly. The motion is gentle wiggling, not drilling. You're breaking up a plug of wet grounds, not enlarging the opening. Force bends needles and turns a free fix into a parts order.
Rinse the holder under hot water afterward. Grounds you loosened but didn't flush will repack the next time hot water hits them.
The Upper Needle Is the One People Miss
Here's the candid part. Cleaning only the lower needle fixes maybe the obvious half of these cases. Grounds also pack into the upper entrance needle above the pod, and on some models that needle has more than one hole.
Keurig's K-Duo use and care guide tells you to raise the handle upright and insert the straightened paper clip into all three holes in the needle, moving it gently to loosen grounds in each one. Miss two of the three and the brewer often keeps dispensing slowly, which convinces people the cleaning did nothing. It did something. It just didn't finish.
Keurig's broader technical procedure in the K500 use and care guide follows the same order. Expose the exit needle, loosen the obstruction, rinse with hot water, clean every hole in the upper needle, reassemble, then run two water-only brew cycles.
If watching the hand position helps more than reading about it, this walkthrough shows the needle access and clip angle clearly.
Confirm It Before You Brew Coffee
Those two pod-free cycles are your pass or fail test. Consistent flow across both cycles means you cleared it. Good flow on the first and a trickle on the second means debris is still moving around inside.
Never work near either needle with the machine plugged in, and never put fingers where the clip goes. If flow stays absent after both needles are clean and the reservoir is reseated, stop applying force. At that point you're likely facing a pump, valve, air path, or internal scale issue, and more metal in the needle won't change that.
When Descaling Helps and When It Is a Waste of Time
Search this problem online and nearly every result tells you to descale. That advice isn't wrong exactly. It's just incomplete in a way that wastes solution, time, and occasionally makes the machine worse before it gets better.
What Scale Failure Actually Looks Like
Scale builds slowly. The honest symptoms are gradually weakening flow, cups that come up short, a descale indicator if your model has one, and a long gap since the last descale. Sudden total stoppage after a normal brew yesterday rarely fits that pattern.
There's also a failure mode people misread as the machine dying mid-repair. After descaling, a heavily scaled brewer may produce only a small amount of water or none at all, followed by air blowing from the system. The solution loosened scale that then shifted into the flow path. Keurig's documented response is to discard the solution, rinse the reservoir thoroughly, refill with fresh water, and repeat the fresh water rinse cycle. That's covered in the care guide cited earlier, and it's worth knowing before you panic.
If you do run a descale, follow a complete Keurig descaling sequence with the rinse cycles included rather than stopping after the solution cycle, because leftover solution and loosened debris are exactly what cause the next complaint.
When the Problem Isn't Scale at All
Needle and holder obstructions frequently come from fine grounds, oils, and debris, even on a machine descaled last month. GE Appliances support guidance on coffee maker flow problems reflects the same split, associating clogged entrance and exit needles with reduced flow, overflow, and no dispensing, separate from mineral buildup.
So here's the contrarian rule that saves people the most money. Repeated descaling cannot clear a mechanical plug. If your brewer hums and can't move water because grounds are packed into a needle, a second and third chemical cycle just runs the pump dry against a wall. Clean first, chemically treat second, and only when the symptoms point at scale.
- Descale now: Flow has declined gradually, brews taste off, and you can't remember the last descale.
- Clean needles first: Flow stopped suddenly, water backs up around the pod, or you use reusable pods with fine grounds.
- Stop cycling chemicals: The machine got worse after a descale started. Rinse with fresh water instead.
- Call it in: No flow after needle cleaning plus one proper descale and rinse.
If a fix makes the symptom worse, the fix is telling you something. Believe it the first time.
That stopping rule matters. Owners who run five descale cycles in a row on a mechanically clogged brewer don't have a dirtier machine than everyone else. They have the wrong diagnosis, and each cycle costs them solution without moving a single coffee ground.
Vinegar Versus a Purpose-Made Descaling Solution
You've confirmed scale is the problem. Now you have a genuine choice, and the right answer depends on your water, your machine, and how much rinsing patience you have.
The Honest Trade-Offs
White vinegar is cheap, available tonight, and it does dissolve mineral scale. Its costs show up elsewhere. The smell fills the kitchen, the taste can linger through several rinse brews, and Keurig doesn't approve vinegar for every newer model, which matters if your brewer is still under warranty. Check your specific model's care guide before assuming it's fine.
A purpose-made descaler costs more per cycle. In exchange you get a solution formulated for boilers and tubing, no lingering odor to rinse out, and no compatibility guessing. For a small office machine cycling all day on hard water, that reliability usually wins. PureHQ Inc. offers a universal descaling solution made for Keurig systems including the K-Classic, K-Supreme, K-Slim, and K-Duo, sold as one option alongside its compatible water filters for the same maintenance routine.
| Factor | White Vinegar | Purpose-Made Descaler |
|---|---|---|
| Cost per cycle | Low, uses a pantry staple | Higher, sold per bottle or dose |
| Scale removal | Effective with full soak and cycles | Effective, formulated for boiler deposits |
| Residue and taste | Strong odor, can linger without thorough rinsing | Little to no odor, rinses clean faster |
| Model compatibility | Not approved for all newer models | Designed for coffee machine internals |
| Best fit | Casual home use on municipal water | Hard water regions and high-volume brewers |
Answering the Durability Objection
The objection I hear most is that bottled descaler is a markup on acid, so why pay. Fair question. The counterpoint is component care over years of cycles, seals and tubing included, plus the rinsing time you don't spend. If you're a one-cup-a-day home user on soft municipal water, vinegar with disciplined rinsing serves you well for years and nobody should upsell you otherwise.
If your kettle furs up visibly, your office brewer never cools down, or a previous vinegar descale left three cups tasting like a salad, the purpose-made route earns its price. Either way, neither product fixes a needle clog. That part you already handled with a paper clip.
Stopping the Next No-Water Morning
The brewers that never strand their owners aren't luckier models. They're on a rhythm, and the rhythm is short enough that nobody dreads it.
A Calendar You Can Actually Keep
- Weekly: One pod-free water cycle to flush the exit needle path before grounds harden.
- Monthly: Pull the pod holder, rinse it, and check both needles with the machine unplugged.
- Every three to six months: Descale, sooner on hard water, later on soft.
- Twice a year: Inspect the reservoir outlet and seating surface for buildup.
Reusable pod users need one extra habit. Overly fine grounds and overfilled pods push debris straight toward the outlet path, so a medium grind, a level fill, and a paper liner if your pod supports one will cut the clog rate noticeably. Filtered water slows scale at the source, and replacing the Keurig water filter on schedule keeps that protection real instead of theoretical. Just remember the limit. A fresh filter prevents future buildup. It will not remove grounds already lodged in a needle.
Diagnose by symptom, clean before you descale, and let filtered water do the quiet work between cleanings.
Keep the next empty mug from happening by stocking what the routine needs, a universal descaling solution for scale days and compatible Keurig water filters to slow buildup between them. Shop both, plus reusable pods and cleaning accessories for K-Classic through K-Duo models, directly from PureHQ Inc. and set your brewer up for a quieter morning.

