
Coffee Machine Care
Reusable Cup Keurig: Your Complete Guide to Refillable Pods
Oct
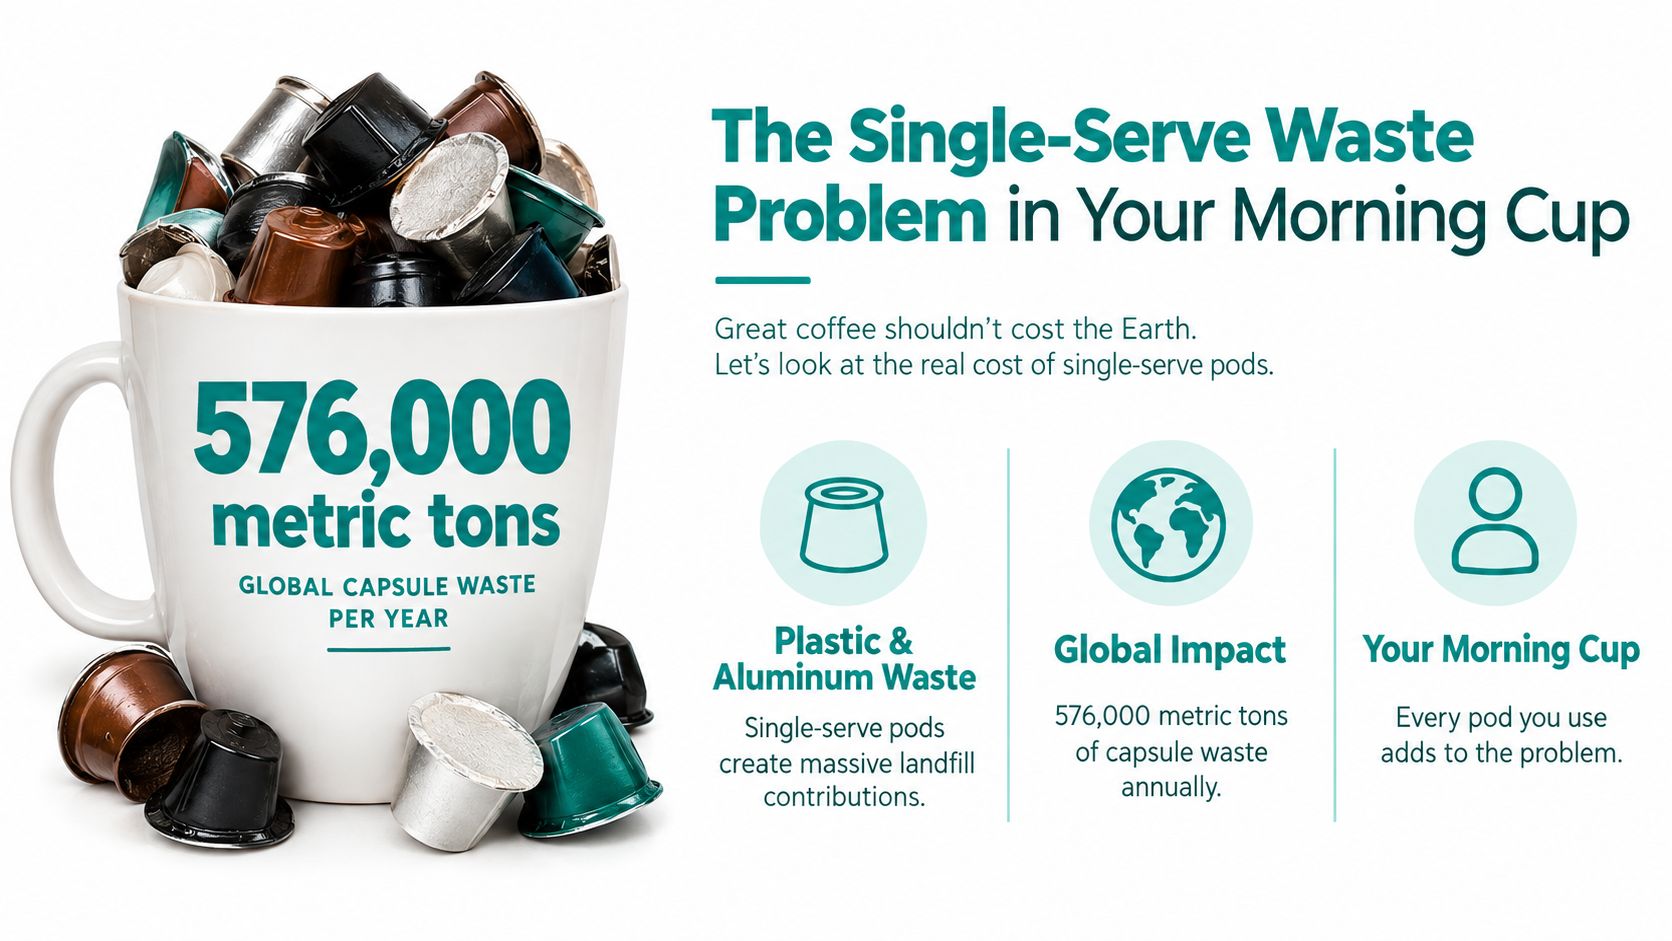
Coffee capsules generated an estimated 576,000 metric tons of waste globally, according to a literature review published in 2021. That estimate covers coffee capsules broadly, not just Keurig pods, but it puts your morning convenience into perspective. My recommendation: switch to a reusable cup your Keurig supports, not whichever refillable pod looks close enough in a shopping photo.
The Single-Serve Waste Problem in Your Morning Cup
Your morning routine feels small: make coffee, remove the pod, get on with the day. The packaging problem becomes easier to understand when you stop looking at an individual cup and start considering the disposable containers that routine requires.
The review cited above also identified packaging production as a substantial environmental contributor. In a life-cycle assessment it discussed, packaging accounted for about 51.6% of impacts for pod systems and 55.3% for capsule systems, while the use phase contributed roughly 28%. Those are assessment-specific findings, not universal percentages for every brewer or household.
The visual below puts the packaging issue into focus.
Reduce packaging without overselling the result
My advice is to treat a refillable pod as a repeated-use tool, not an environmental purchase you make once and forget. The same review cautions that electricity, coffee quantity, cleaning, and actual reuse all affect the overall result. Cutting disposable packaging and reducing your coffee's total environmental impact aren't identical goals.
Keep those distinctions clear:
- Replace a routine: Choose a refillable setup you're willing to fill and clean regularly.
- Handle remaining disposables deliberately: Consult this K-Cup recycling guide when you still use packaged pods.
- Separate the brewing vessel from the drinking cup: For ideas about the latter, IFM Gourmet Food Store's cup guide offers a different angle on serving coffee.
Practical rule: Buy for the routine you'll maintain, not the sustainability claim you'd like to believe.
I wouldn't recommend a refillable cup solely because its listing says “eco-friendly.” I'd recommend it when its compatibility, preparation, and cleanup fit your actual morning.
How Reusable K-Cups Evolved With Keurig
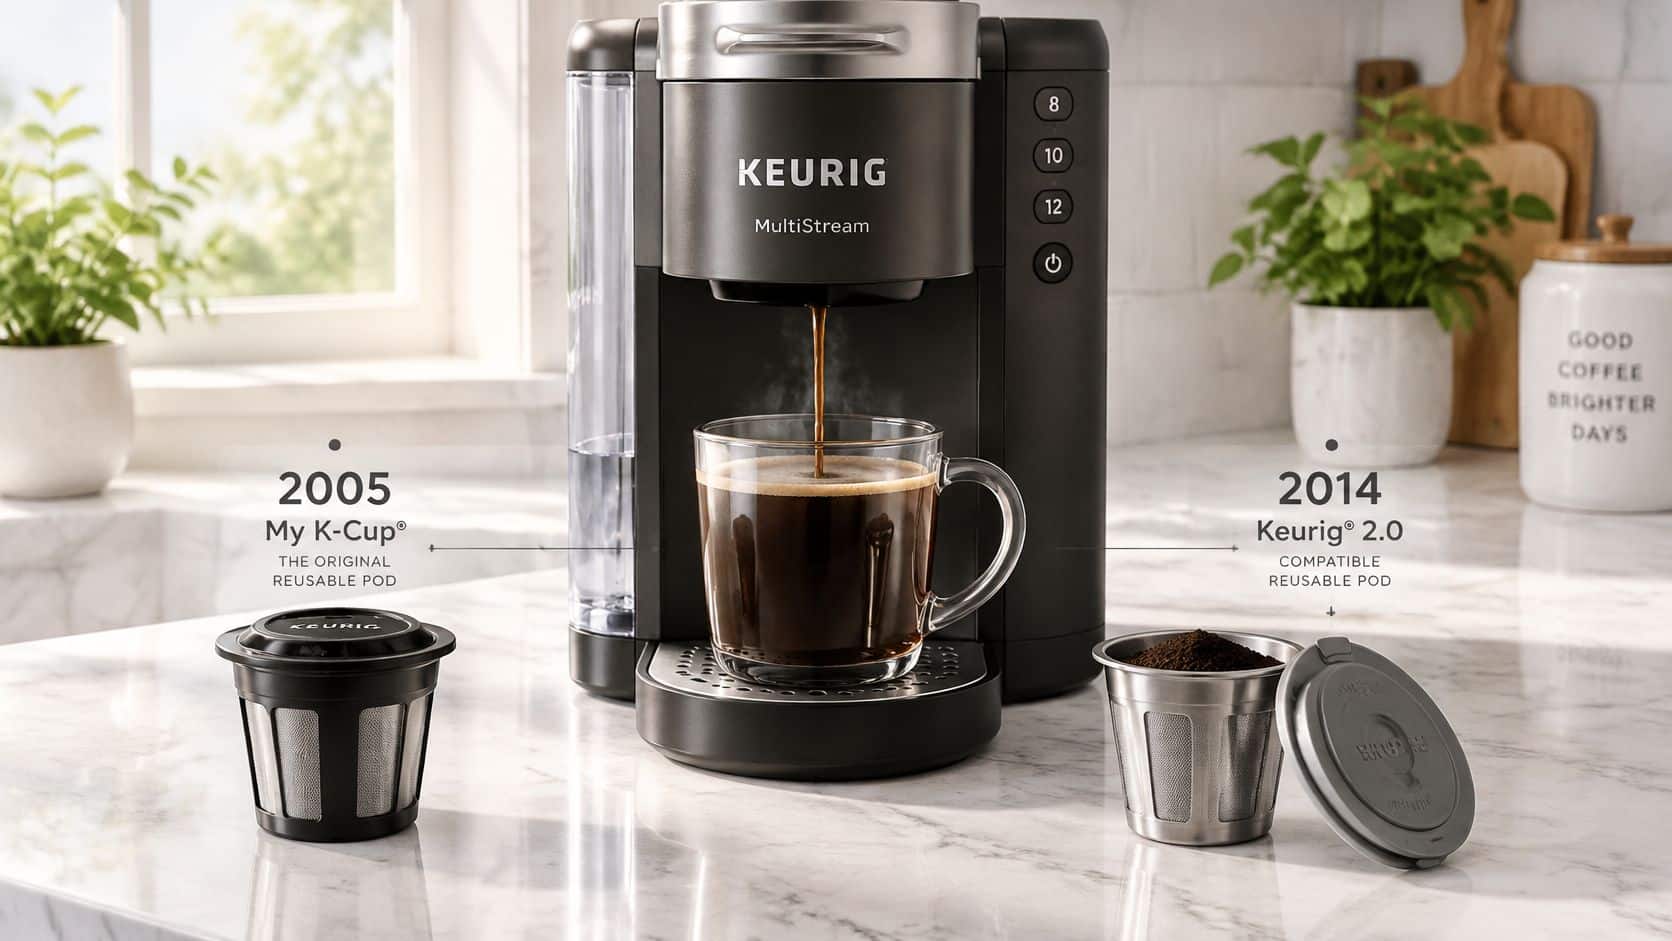
Reusable K-Cups were not an aftermarket workaround. Green Mountain Coffee Roasters and Keurig introduced My K-Cup in late 2005, letting consumers brew their own ground coffee; the original accessory was then discontinued in August 2014 when the Keurig 2.0 platform arrived without support for that earlier reusable design, as documented in Keurig's product and company history.
That history also records the scale of the surrounding business: coffee-pod-machine sales increased more than sixfold between 2008 and 2014, and Keurig's fiscal 2014 revenue included approximately $822.3 million from brewers and accessories, compared with $3.6 billion from coffee pods. Disposable pods weren't a side business. They established the commercial baseline that reusable accessories challenged.
The useful lesson isn't nostalgia
A refillable accessory can be useful, popular, and still become the wrong choice when the brewer changes. That's the historical lesson I'd carry into any purchase today.
A familiar brand name doesn't establish compatibility across generations. Nor does an old accessory's successful service in your previous machine tell you whether it belongs in your replacement brewer.
The newer brewing setup below illustrates why you should shop for the complete system rather than the cup's appearance.
Treat “universal” as a product name that needs verification, not permission to skip your model check.
My buying rule is straightforward: identify the machine first, then choose the accessory. Don't start with stainless steel versus plastic, a bundle discount, or an attractive lid color. Those decisions matter only after you know which reusable design your brewer accepts.
I also wouldn't throw away the accessory instructions after opening the box. Keep them with the brewer documentation so future replacements don't become another guessing exercise.
Which Keurig Models Actually Accept a Reusable Cup
Compatibility means correct brewing, not merely physical fit. Start with your exact model designation, then compare the reusable filter's instructions with the brewer's requirements.
Keurig's model-specific accessory information identifies the original reusable filter for Classic Series machines including the K15 and K50/K55, identifies newer universal-filter compatibility with the K-Select and K-Elite, and excludes the Plus Series K575 from the My K-Cup accessory, specifying logo-bearing pods instead. Don't flatten those distinctions into “fits Keurig.”
Keurig Reusable Cup Compatibility at a Glance
| Brewer Family | Reusable Cup Need | Key Cue |
|---|---|---|
| Classic Series K15 and K50/K55 | A reusable filter documented for that Classic model | Match the accessory generation |
| K-Select and K-Elite | A compatible newer universal-filter design | Check the named model listing |
| Plus Series K575 | Follow the documented accessory exclusion | Don't assume a My K-Cup will work |
| K-Supreme and K-Supreme Plus | The newly designed compatible My K-Cup filter | Check the lid's water-entry arrangement |
| K-Slim and newer K-Duo variants | Exact-version confirmation | Don't buy from the family name alone |
Keurig's K-Supreme care documentation specifies a compatible reusable filter with five lid holes and warns that older or incompatible filters can prevent closing or brewing and may damage the brewer. That's a mechanical requirement, not a cosmetic preference.
Check the brewing system before ordering
- Record the exact model: Include the generation or variant, especially when shopping for a K-Duo.
- Compare the entry pattern: Check whether the accessory accommodates your machine's water-entry arrangement.
- Review the holder instructions: Confirm whether the filter requires a particular insert or configuration.
- Check clearance without force: If the handle resists closing, stop and recheck the match.
For a shopping reference, use this single-needle and MultiStream compatibility guide. I'd use broad reusable-cup compatibility guidance only to identify questions, then rely on the manufacturer's documentation for the purchase decision.
Keep beverage-specific advice separate, too. Matcha and kombucha brewing tips from Pep Tea belong with those preparation methods, not as substitutes for a Keurig accessory check.
Stainless Steel vs Plastic vs Mesh Reusable Cups
Don't pay a premium for a material while ignoring the lid. I'd choose a clearly documented compatible plastic cup over an impressive-looking stainless pod with vague fit claims.
Also, “mesh” isn't a mutually exclusive material category. Compare the complete product: body, filtering surface, lid, seals, and cleaning instructions. A material label alone isn't enough information to judge the finished accessory.
Reusable Cup Materials Compared
The table below is a buying checklist, not a claim that every product in a category performs identically. There's no verified material-by-material testing or current price dataset here to support universal rankings.
| Material | Heat Safety | Durability | Taste Impact | Typical Price |
|---|---|---|---|---|
| Stainless-steel body | Require brewing-use documentation for the complete pod | Check lid, seal, and filter construction | Don't assume neutrality from the body material alone | Compare actual listing prices |
| Plastic body advertised as BPA-free | Verify intended hot-brewing use, not just the BPA-free label | Check the hinge, closure, and warranty terms | No verified category-wide taste advantage | Compare complete accessory costs |
| Fine-mesh filtering design | Check mesh material and the surrounding assembly | Inspect the filtering surface and attachment points | Evaluate with your coffee and preparation method | Check whether liners are additional |
| Mixed-material design | Review every component that contacts brewing water | Assess the complete assembly | Avoid unsupported material-based promises | Compare included parts and replacements |
What earns a premium price
For me, premium means less uncertainty, not just more metal. I'd pay more for explicit model coverage, understandable setup instructions, a clear cleaning method, and useful support when an accessory doesn't behave as expected.
Here's how I'd contrast the shopping options:
- Documented premium accessory: Worth considering when it explains its fit, required configuration, and care requirements.
- Standard model-specific cup: A sensible choice when it supplies the same essential information without extras you don't need.
- Generic “fits most” cup: A poor gamble when the seller won't identify supported brewer versions.
The common objection is fair: “I don't want something that leaks.” My answer is to demand better compatibility information before buying, rather than assume a heavier pod solves the problem.
For an existing leak, use an inspection sequence: check the model match, examine the lid and sealing surface, then review your loading method. Don't diagnose every spill as a material failure, and don't keep replacing pods before checking the setup.
I also wouldn't accept an unsupported promise of hundreds of brewing cycles. Ask for the product's actual care and warranty information, then judge whether its construction and replacement policy justify the price.
Brewing Better Coffee From a Reusable Pod
Start with a repeatable preparation method, not a heaped scoop and crossed fingers. A comparative review discussed in BBC's examination of coffee's environmental footprint reported that controlled single-serve portions can save approximately 11–13 grams of coffee per serving compared with brewing more than people consume.
That isn't a guaranteed saving against a disposable K-Cup. It's a reason to control what you prepare and avoid making coffee you won't drink.
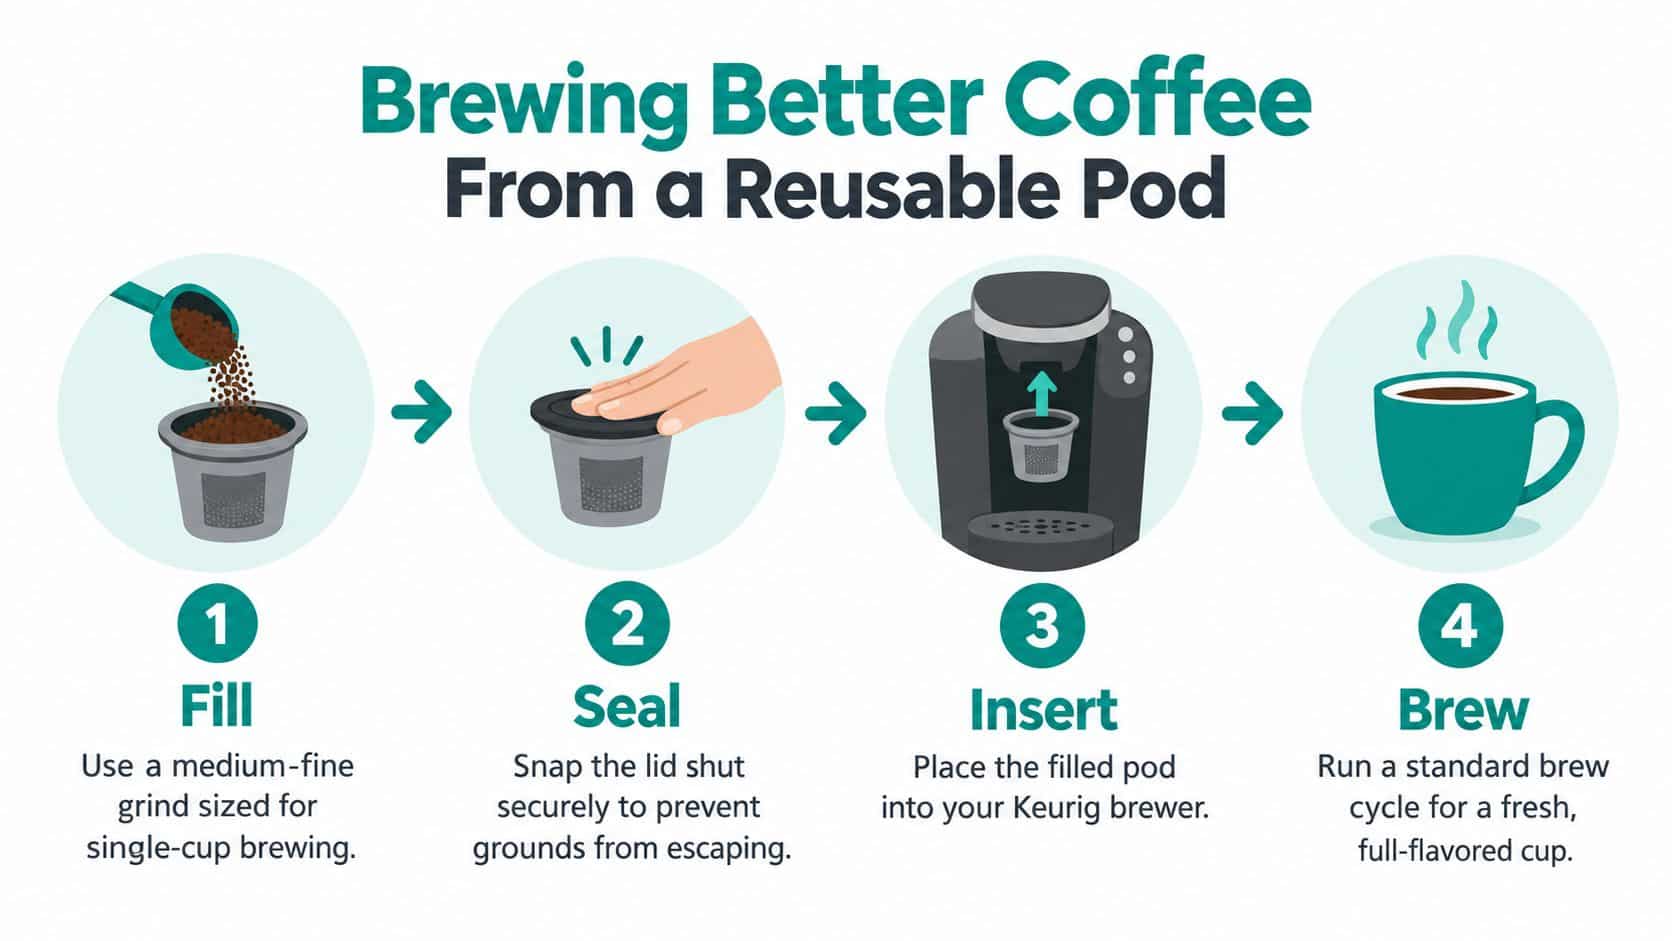
Use the visual routine as a starting point, then follow your particular filter's loading instructions.
Make the preparation repeatable
- Choose an appropriate grind: Start with coffee intended for single-cup brewing rather than ultra-fine espresso grounds. Treat medium-fine as a starting point, not a universal requirement.
- Leave the closure clear: Keep grounds below the lid's closure or puncture interface.
- Skip hard tamping: Level the coffee without compressing it tightly.
- Match brew size to your dose: Adjust the selected water volume deliberately instead of compensating for weak coffee with an overfilled basket.
The BBC discussion highlights why dose and resource use matter alongside packaging. For reusable brewing, overfilling can restrict water passage and contribute to uneven extraction or escaped grounds, while too little coffee can produce a thin drink.
Diagnose before changing everything
If your cup tastes weak, don't change the grind, dose, and brew size simultaneously. My recommendation is to change a single preparation choice, record the result, and keep the rest consistent.
For escaped grounds, first inspect the closure area and confirm that the lid closes securely. For handle resistance, return to the compatibility check rather than pushing harder. Keep a brief preparation note beside the machine in a shared office.
These reusable K-Cup preparation tips provide a useful companion checklist. You can also compare your handling sequence with this demonstration.
Cleaning and Maintenance That Actually Lasts
A reusable cup includes a cleaning commitment. If you want a completely hands-off preparation routine, be honest about that before you buy.
Keurig's My K-Cup operating and care instructions describe filling the filter, securing the lid, inserting it, and selecting a brew size, followed by rinsing out grounds and washing with soap and warm water or using the dishwasher's top rack. That dishwasher guidance applies to the documented accessory, not automatically to every third-party cup.
Use a simple care schedule
I recommend an after-use rinse and a regular, more deliberate inspection. Treat the schedule below as a habit-building reminder, not a substitute for your accessory's care instructions.
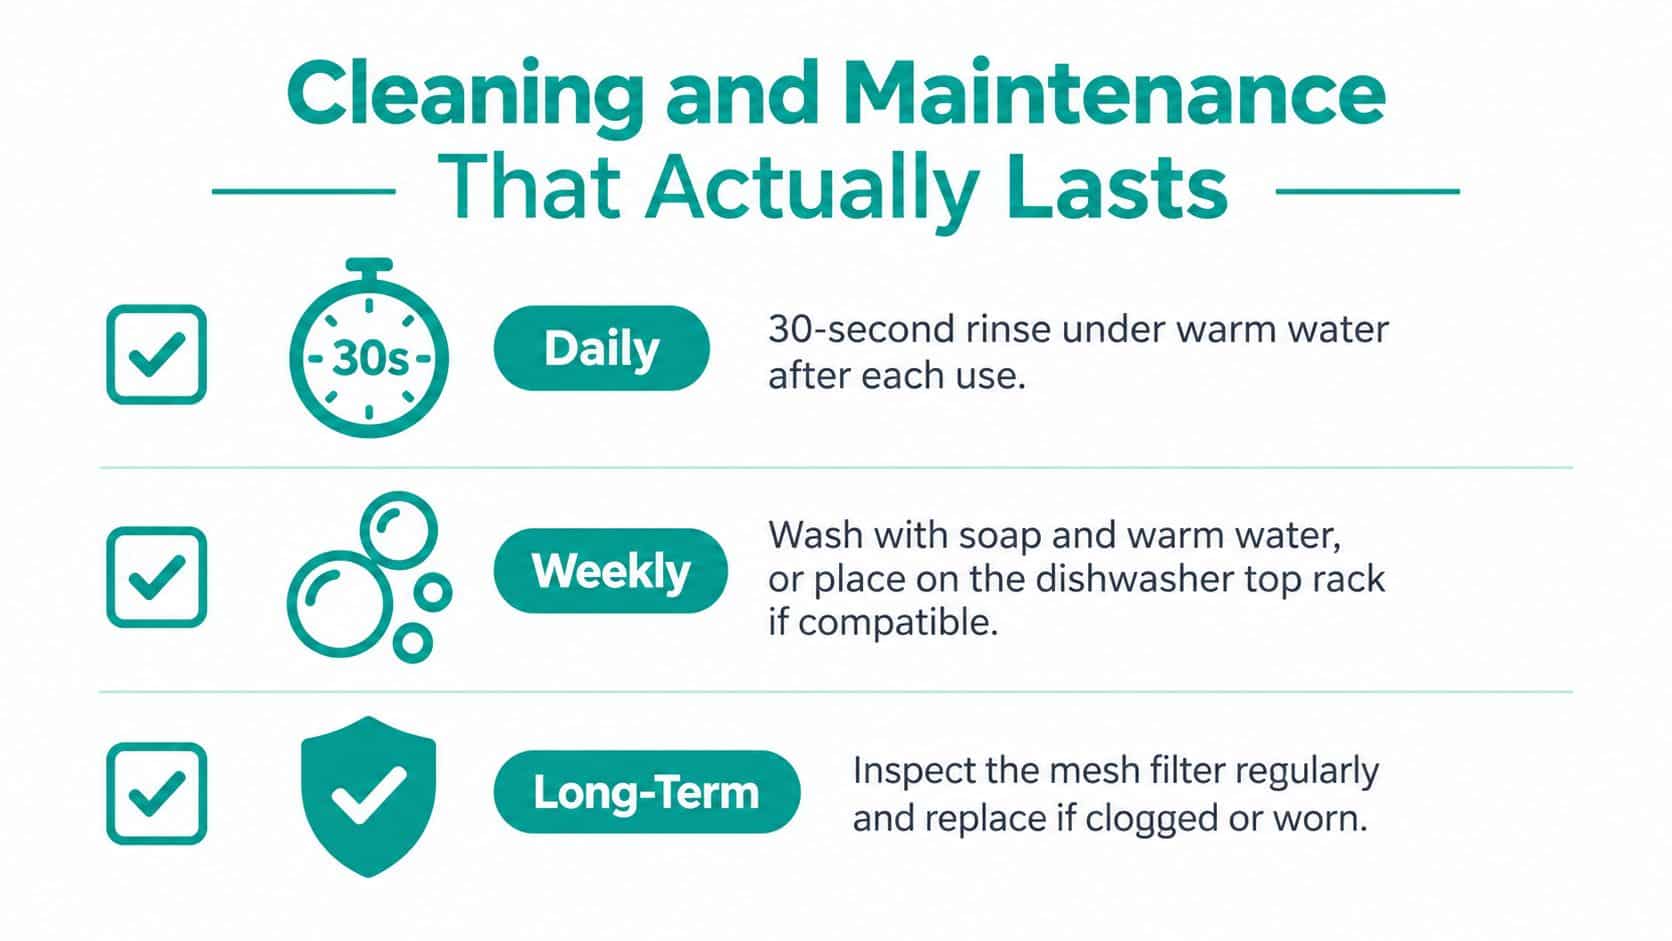
- After use: Remove the grounds and clean the filter according to its instructions.
- During your regular wash: Examine the rim, closure, and filtering surface rather than rinsing only the center.
- Before dishwasher cleaning: Confirm that your exact accessory permits it.
- During longer-term checks: Look for damage or persistent obstruction and consult the replacement guidance.
Separate filter care from brewer care
Don't invent a universal monthly chemical treatment for every pod and brewer. Follow the machine's instructions for its pod holder, accessible needle areas, seals, and descaling procedure, and avoid handling sharp parts unnecessarily.
Maintenance boundary: A cleaner approved for the brewer isn't automatically approved for soaking a reusable filter.
A compatible paper liner is worth considering if you prefer that handling format, but include its ongoing cost in your decision. Pair any descaler or cleaning tablet with the machine's documented procedure rather than treating maintenance products as interchangeable.
For a shared breakroom, I'd assign ownership of cleaning supplies and inspection. An unnamed responsibility is easy to postpone; a visible checklist and a designated person make the routine easier to manage.
When a Reusable Cup Actually Pays for Itself
A refillable pod isn't automatically cheaper. Calculate the cost of your actual routine, including unsuccessful brews, rather than comparing an empty reusable cup with a box of finished pods.
Consumer discussions about the practical trade-offs of reusable pods are useful for identifying frustrations to investigate, not for establishing universal savings. Your receipts and preparation records are better inputs than someone else's claimed payback.
Calculate your own break-even point
Use these relationships without assuming a standard coffee dose or accessory lifespan:
Ground-coffee cost per successful cup = coffee price per unit of weight × coffee weight used per successful cup
Net saving per cup = disposable-pod price − ground-coffee cost − liner cost − cleaning cost − replacement allowance − failed-brew cost
Break-even successful cups = upfront reusable setup cost ÷ net saving per cup
Break-even time = break-even successful cups ÷ average successful cups brewed per day
Include washing time if you want a full convenience comparison. For an office, value paid staff time explicitly; at home, decide how much that effort matters to you.
The denominator matters. If your net saving isn't positive, there's no financial break-even under those assumptions. You might still prefer the coffee choice or reduced disposable packaging, but don't call that a cash saving.
Home and office decisions differ
| Setting | What to measure | My recommendation |
|---|---|---|
| Home with a consistent routine | Actual dose, coffee price, and cleaning effort | Trial the routine before buying a large bundle |
| Shared office | Successful drinks, discarded brews, staff time, and replacements | Standardize preparation and assign maintenance |
| Occasional use | Purchase cost against infrequent avoided pod purchases | Prioritize convenience honestly |
Remember the earlier environmental distinction: reduced packaging doesn't establish a complete life-cycle advantage. Include cleaning, electricity, consumables, and replacement frequency in a broader assessment.
If nobody in the office will maintain the accessory, don't buy a drawer full of refillable pods. A disposable setup may suit that workplace's practical needs better, even if it doesn't meet your packaging-reduction goal.
Choosing the Right Reusable Cup for Your Keurig
My recommendation is a documented, model-specific reusable cup with a preparation routine you'll keep. Choose the body material after those requirements, not before.
For a first purchase, resist the large assortment pack. I'd rather test a suitable design with my usual coffee and cup size before committing to extra accessories.
Make the final purchase check
- Confirm the exact brewer: Match the full model and generation to the accessory listing.
- Read the configuration instructions: Understand any holder, insert, or adapter requirement before ordering.
- Compare complete construction: Assess the lid, sealing surfaces, and filter, not just the body.
- Check the care requirements: Choose a cleaning method you can sustain at home or in the office.
- Calculate ongoing costs: Include liners, cleaning products, and eventual replacement where applicable.
If your main worry is leaking, don't accept “it fits” as the seller's entire answer. Ask whether the exact brewer is supported and what installation checks the accessory requires.
For a cup you already own, inspect its closure and sealing surfaces, then consult the brewer's instructions for its gasket and exit-needle area. The manufacturer warning discussed earlier is the reason not to force a resistant handle or improvise around an incompatible filter.
I wouldn't buy on an unverified promise of stronger coffee, indefinite durability, or instant savings. Buy the right match, establish your method, and judge the result in your own kitchen. That's a more useful standard than a universal-fit slogan.
PureHQ Inc. offers reusable K-Cups, stainless-steel refillable pods, paper liners, water filters, and descaling supplies for supported brewing systems. Visit PureHQ Inc. to shop reusable K-Cups for your exact Keurig model, then choose the filters and maintenance accessories that fit your setup.

