
Coffee Machine Care
K Cup Dispenser Buyer’s Guide for Keurig Owners (2026)
Aug
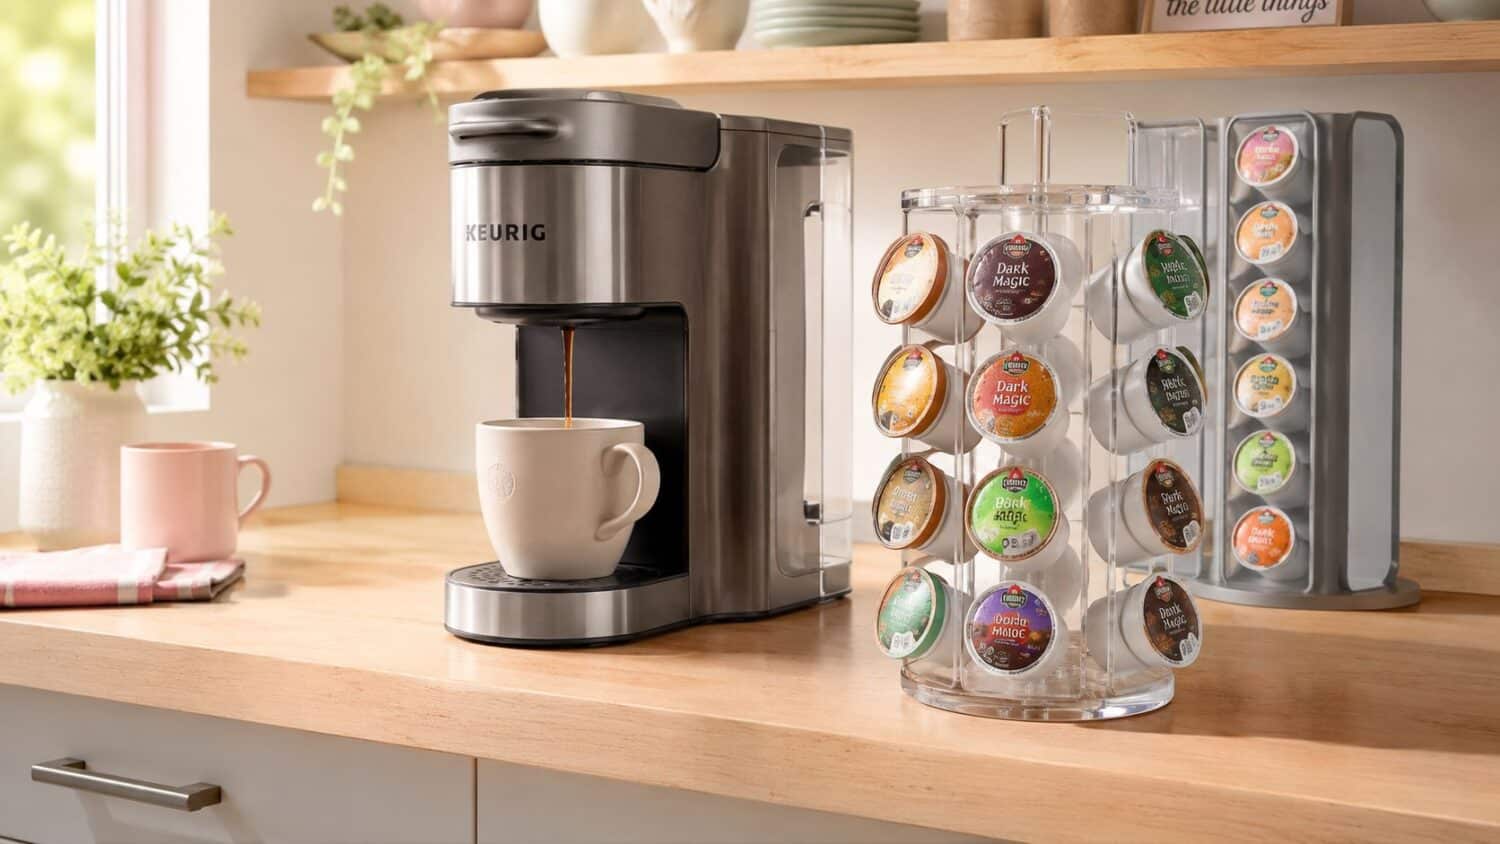
The counter starts out neat. Then one cardboard sleeve turns into three, a drawer stops closing, and the Keurig reservoir gets topped off every other morning while loose pods migrate between the microwave, the cabinet, and the breakroom shelf. A K Cup dispenser looks like a small fix, but the right one solves three separate problems at once, space footprint, pod format, and machine compatibility.
That matters because K-Cups didn't stay a niche office item for long. Keurig launched its first brewers and K-Cup pods in 1998, Green Mountain Coffee Roasters first offered coffee in the format in 1997, and the main K-Cup patent expired in 2012, which opened the market to broader competition and helped compatible pods spread faster Keurig history and patent timeline. The scale grew fast too, with Keurig confirming 9.8 billion K-Cup pods sold in fiscal year 2014 and one report noting estimates as high as 60 billion produced by that period, while U.S. coffee pod machine sales rose from 1.8 million units in 2008 to 11.6 million in 2013 K-Cup adoption and machine sales figures. That is why storage choices now affect freshness, fit, and cleanup, not just neatness.
If your pods are taking over the counter, this guide helps you choose the right storage shape for your room, then match it to the pod you use. That includes reusable pods, brewer clearances, and the maintenance habits that keep coffee tasting clean. PureHQ's reusable K-Cups, filters, and descalers fit naturally into that setup, especially when the dispenser is doing more than sitting there and looking organized.
Why Your Counter Needs a Real K Cup Storage Plan
A half-empty sleeve on the microwave, a stack of pods next to the toaster, and a brewer whose tank seems to need refilling every other morning is a real coffee station, not a styled one. In that kind of setup, people stop choosing pods by roast and start grabbing whatever is easiest to reach. That usually leads to clutter, missed flavors, and a drawer that turns into a catch-all for torn boxes and loose foil lids.
A better plan starts with three decisions. First, decide how much counter or cabinet footprint you can spare. Second, decide whether you're storing single-use K-Cups or reusable pods that need a little more care. Third, check the brewer's shape and clearance, because a storage piece that blocks the reservoir lid or crowds the drip tray creates a daily annoyance.
Practical rule: buy for the space around the brewer, not for the number on the package. A tidy holder that blocks the lid becomes a bad organizer fast.
A lot of buyers only think about storage capacity, but coffee quality sits behind the scenes too. Pods stored in heat, light, or clutter get harder to keep clean, and loose handling can damage seals before brewing. That's why a K Cup dispenser should be treated like part of the brew station, not a separate accessory.
For a deeper look at airtight storage habits, this coffee storage guide is a useful companion piece. The best setup usually pairs a dispenser with a pod style that fits your machine and a maintenance routine that keeps the brewer itself from becoming the weak link.
The Four Main Types of K Cup Dispensers Explained
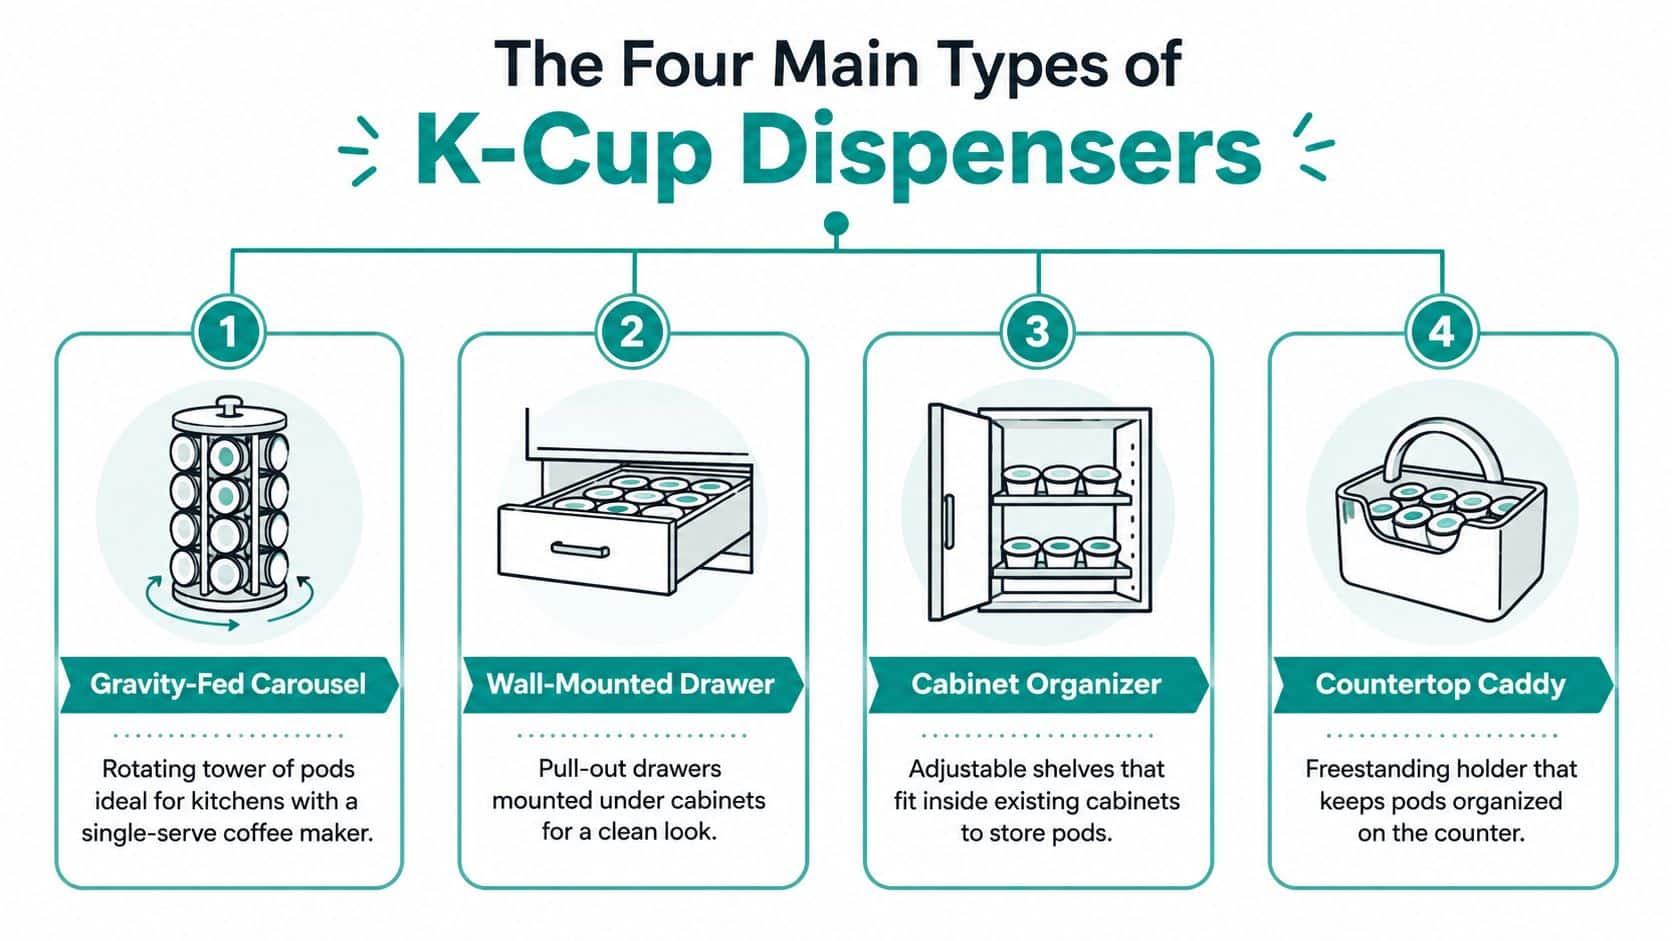
Gravity-fed carousel
A gravity-fed carousel is the classic rotating tower. Pods sit in angled lanes, and the front pod drops into place as you pull one out. It works well for a kitchen where one roast gets used over and over, because the motion is simple and the selection is visible at a glance.
This style makes sense for a couple that drinks two cups a day and wants one-handed access without opening a cabinet. It also works in a breakroom where people can see the available flavors without digging through packaging. The trade-off is that it usually claims more width than a vertical caddy, so it belongs where the brewer already has a bit of breathing room.
Drawer-style organizer
A drawer-style organizer stores pods in horizontal rows that slide out when needed. It disappears neatly into a cabinet or sits under the brewer if the footprint is wide enough. I like this format when the counter must look calm, because it hides the pods without forcing you to label every slot.
This is the better choice for a home that wants the station to look built-in rather than displayed. It also suits a small office that wants easy rotation by flavor or by employee preference. Drawer units feel slower than open carousels, but they protect the visual surface of the counter better.
Vertical tower
A vertical tower uses height instead of width. It's the right answer for a studio kitchen, a narrow apartment counter, or a breakroom corner where every inch matters. The access is simple, but the loading pattern matters more, because the highest slots are only as useful as the people who can reach them comfortably.
Wall-mounted or under-cabinet holders
A wall-mounted or under-cabinet holder frees the counter almost completely. That makes it attractive when the brewer shares space with meal prep, a sink, or a toaster oven. It does require installation, though, either with screws or a strong adhesive, so it works best when the surface is stable and the pod selection won't change constantly.
For buyers comparing storage styles with other brewer accessories, this Keurig accessories guide is a good reference point. It helps to think of the dispenser as the visible part of the station and the brewer accessories as the parts that keep it usable day after day.
Comparing Capacity, Footprint, and Best Environment
The question is not which k cup dispenser looks tidiest. It is which one fits the room, the brewer, and the number of hands reaching for pods every day. A small office with one brewer and a few daily users needs a different setup from a one-person apartment kitchen, because the refill pattern and the available surface area are not the same.
| Type | Typical Capacity | Footprint | Best For |
|---|---|---|---|
| Modular countertop merchandiser | 192 single-serve units | about 17.25 in H × 14.56 in W × 17.75 in D countertop merchandiser dimensions | Small office, breakroom, or shared station with regular restocking |
| Vending-style dispenser | 256 pods | 17.6 in H × 26.3 in W × 23.8 in D | Higher-volume environments where footprint is less constrained |
| Compact modular organizer | 24 pods | 17.2 in high, 26.6 in wide, 14.5 in deep 24-pod organizer dimensions | Home counters or compact office corners that need a defined footprint |
| Slim vertical holder | Depends on model | Narrow footprint, stacked vertically | Studio kitchens, tight corners, and small-apartment counters |
The trade-off is straightforward. More capacity means fewer refills, but it also means the dispenser has to earn its place on the counter and stay organized so old pods do not sit at the back untouched. A 14.5-inch-deep compact organizer can work well in a breakroom if the brewer sits beside it, while a slim tower makes more sense in a studio kitchen where width is the limiting factor.
Freshness matters here too. A bigger dispenser can hold more variety, but that only helps if the pods turn over quickly enough for the flavors to stay useful and the station to stay clean. If the layout makes people reach around the brewer, the sink, or a toaster oven every time they want coffee, the dispenser is too large for the space.
Practical rule: choose the dispenser that keeps the brew path clear, not the one that stores the most pods.
For most homes, the compact or vertical style is usually the cleaner fit. For small offices, a modular countertop unit often makes more sense because it can handle heavier use without spreading pods across the room.
Will Reusable K Cups Work With Your Dispenser?
Compatibility worries usually come down to one thing, whether the reusable pod fits cleanly without snagging, rattling, or dumping grounds where they do not belong. Standard K-Cups are about 51.5 mm at the top, 37.2 mm at the bottom, 44.0 mm tall, with a 3.0 to 3.5 mm flange width K-Cup dimensions. Those dimensions explain why most dispensers accept reusable pods, but a few tight holders can still cause a jam if the geometry is too snug.
The other concern is the foil seal and pod handling. Keurig's user guide emphasizes that the pod should remain intact before brewing and that used pods should be removed after brewing Keurig user care guide. A dispenser should let you grab a pod cleanly without crushing the lid or rubbing the seal against a rough edge.
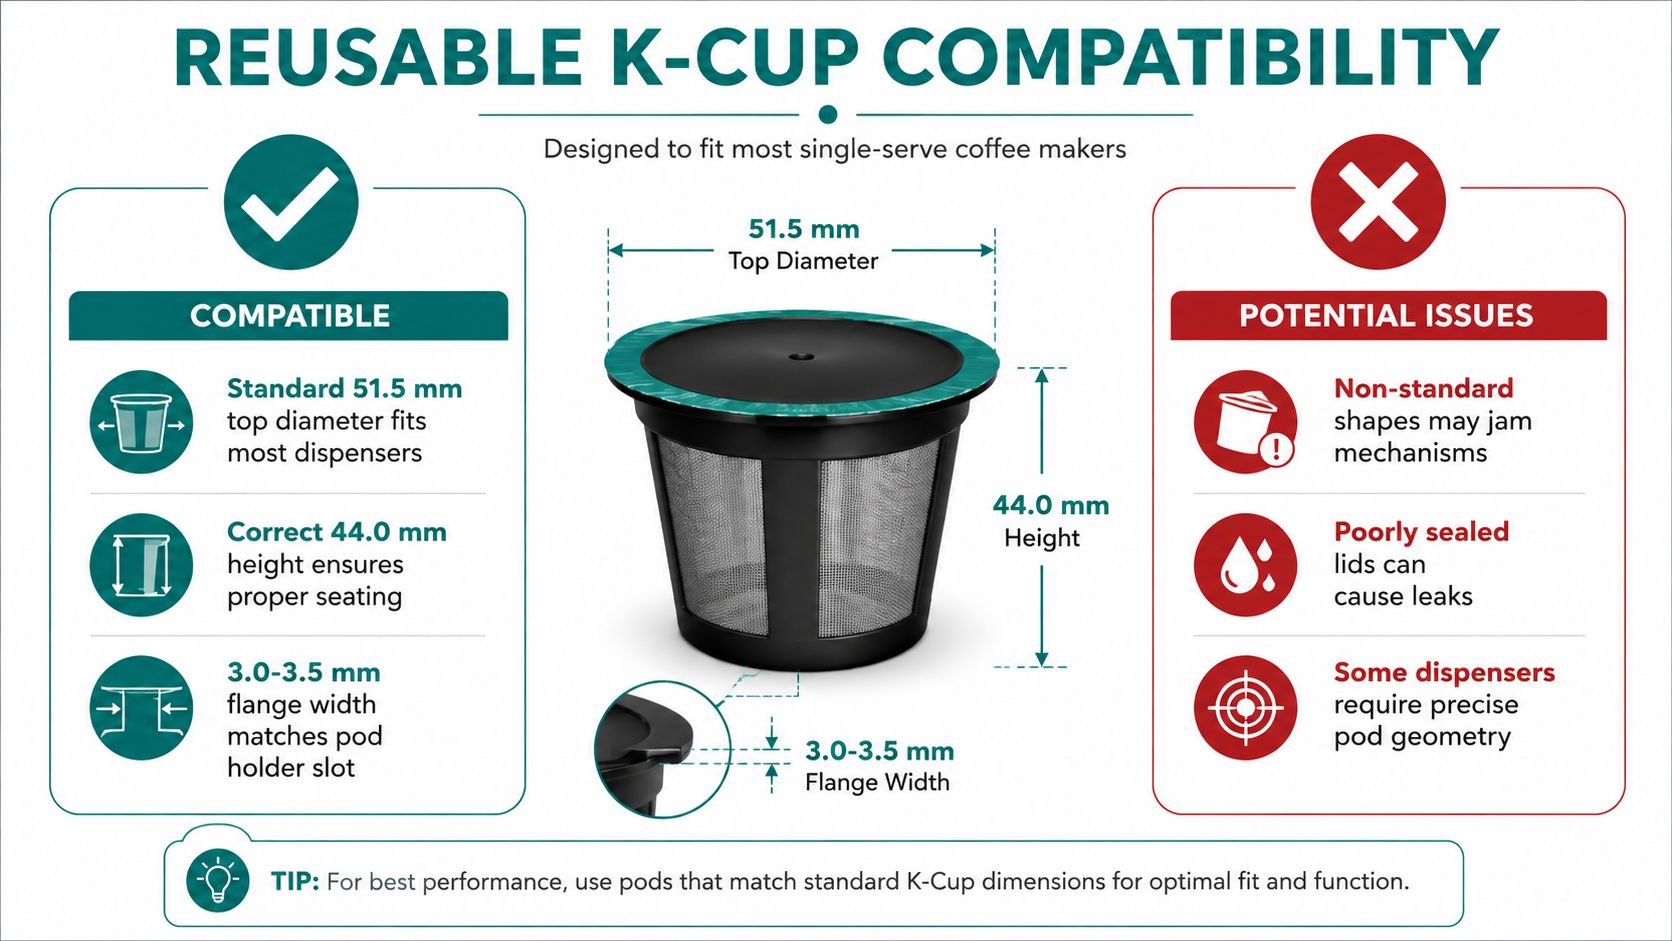
PureHQ's stainless steel reusable K-Cup is built for Keurig K-Classic, 2.0, K-Supreme, K-Slim, and K-Duo, including Gen 2 and Essentials. That matters because a dispenser choice becomes easier when the pod itself already matches the brewer family. If you want to move from organizer-only storage to a cleaner reusable system, the pod format is what makes the dispenser useful.
Premium Setup vs a Basic Organizer
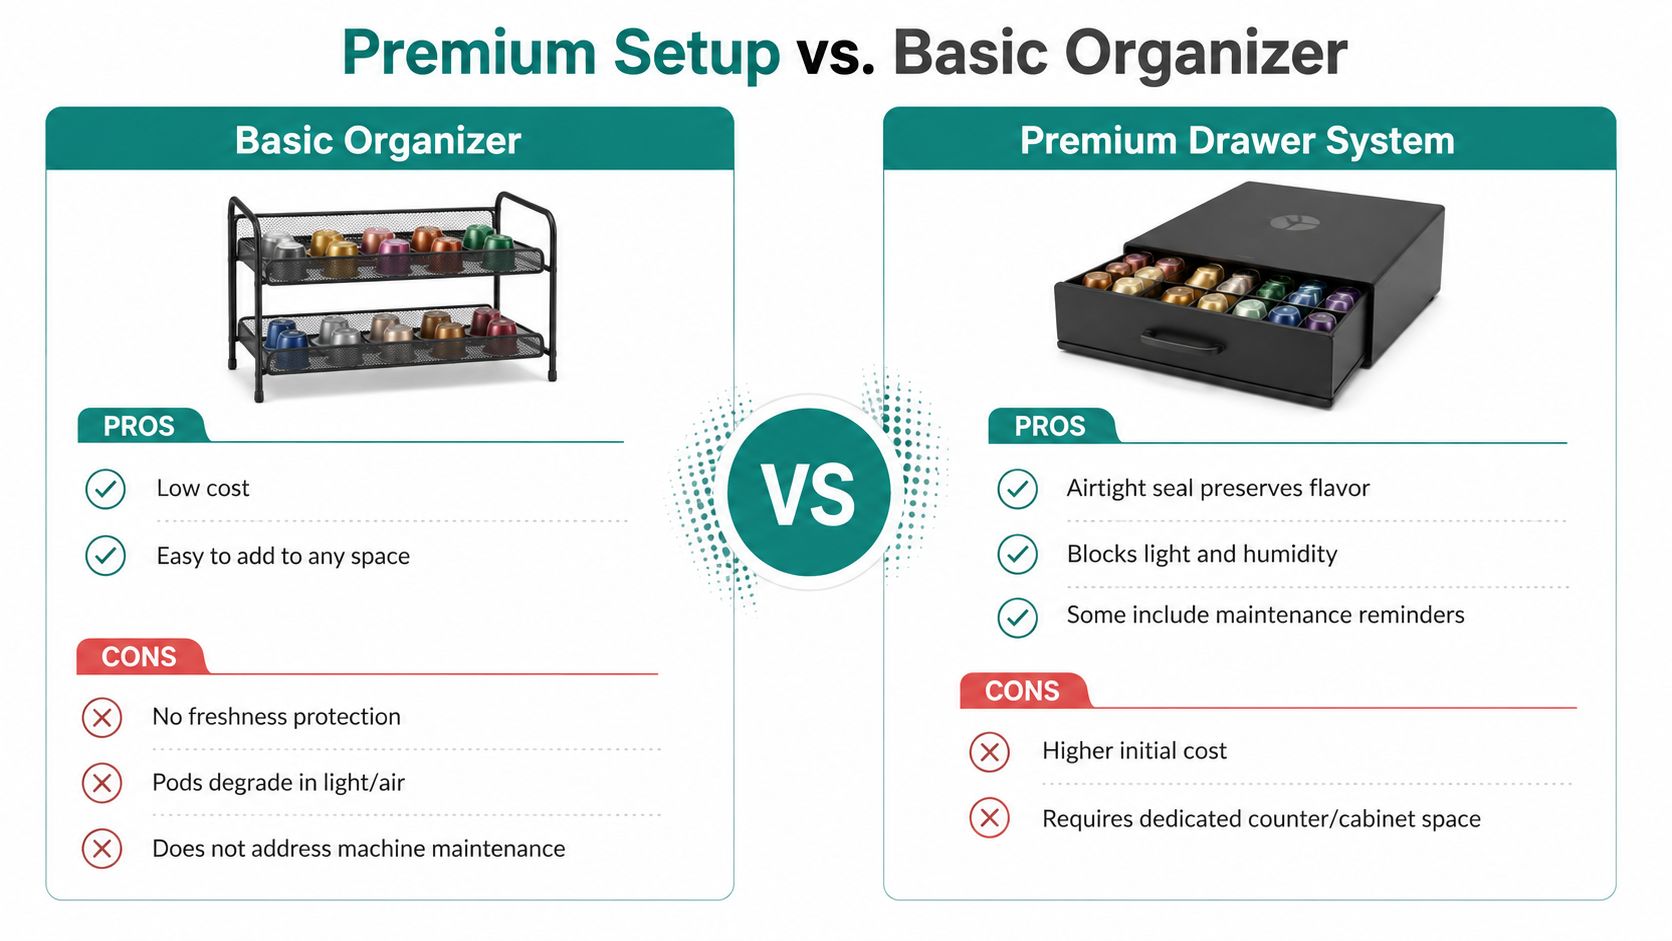
A generic countertop holder only solves one job, it keeps pods from rolling around. That's useful, but it doesn't protect freshness, it doesn't improve fit, and it doesn't help when the brewer needs maintenance. A premium setup does more because it treats the dispenser, the reusable pod, and the machine as one system.
| Setup | Pros | Cons |
|---|---|---|
| Basic organizer | Low cost, easy to add to almost any space | No freshness protection, pods sit in light and air, no maintenance support |
| Premium setup with reusable pod, dispenser, and descaler | Cleaner storage, better fit control, easier machine care | Higher initial cost, needs dedicated space |
That maintenance piece is where a lot of buyers get stuck. A generic organizer can't remind you to descale, and it can't correct pod wear or residue in the brewer. By contrast, the Keurig K-Express Essentials includes a maintenance alert after every 250 brews and a 36 oz removable reservoir, plus back-to-back brewing and three cup sizes, which shows how machine convenience and upkeep already belong together Keurig K-Express Essentials specs.
That's why the better setup usually includes a reusable pod, a dispenser that matches the counter, and a cleaning routine that keeps the hot-water path clear. If you want the whole station to work with less mess, fewer leaks, and less waste, the organizer has to support the machine instead of sitting beside it like a decorative box.
Placement and Installation Tips That Prevent Daily Frustration
A dispenser can be technically compatible and still annoy you every day if it sits in the wrong spot. Clearance matters around the brewer, especially if you use travel mugs or removable trays. Best Buy's Q&A for a K-Mini/K15 says removing the drip tray allows a 12 to 14 oz travel mug, while the tallest cup that fits is just over 5 inches, which limits how high a nearby storage piece can sit if mugs are pulled from underneath K-Mini and K15 clearance guidance.
The simplest rule is to keep the dispenser out of the mug path and away from the reservoir lid. Keurig's brewer features page shows tank sizes ranging from 40 oz to 80 oz, so there's no single universal clearance layout that works for every machine Keurig brewer reservoir sizes. A bulky organizer that blocks refills will feel wrong every time you use it.
Placement habits that save time
- Keep the most-used pod at hand level: The flavor you brew most often should sit at the easiest reach point, not tucked in the back row.
- Leave the lid path open: Reservoir access needs more room than most first-time buyers expect.
- Match the mounting method to the surface: Under-cabinet units need secure support, while tower units need stable corners and clear side access.
For tight kitchens, corner countertop storage ideas can help you map out where a vertical unit belongs. Drawer-style units also need a quick check on drip-tray height, because a drawer that bumps into the brewer base becomes dead weight fast.
Keeping Pods Fresh and Your Machine Brewing Clean
Sunlight and heat are rough on pods. A dispenser parked near a stovetop or in a bright window adds unnecessary exposure, and that's a freshness issue before it becomes a taste issue. The brewer itself is just as sensitive, because the water path moves quickly from heating to extraction, and any residue in that path shows up in the cup.
One academic breakdown of pod coffee machines notes that water heats from 20°C to 85°C in under one minute, then a pump and compressed air drive it through the pod filter into the cup pod coffee machine process. That speed is convenient, but it also means the brewer doesn't have much time to compensate for a damaged pod, a dirty needle, or leftover grounds.
Practical rule: a clean dispenser helps, but a clean brewer matters more.
That is where maintenance products earn their space. PureHQ's descaling solution and cleaning tablets fit the hot-water path side of the problem, and the brand's universal descaler and water filtration options are made to support Keurig, Ninja DualBrew, Breville, and Cuisinart machines. If you want a one-stop routine, the companion guide on descaling a Keurig machine for better coffee taste gives a straightforward maintenance frame.
A sensible routine is simple. Check your dispenser for dust and pod damage regularly, descale on a 3 to 6 month cadence depending on water use, and swap filters on the same rhythm your machine's condition calls for. A tidy pod rack and a clean water path work together, and neither one can fully rescue the other alone.
Where to Buy and How to Build Your Matched Setup
The easiest way to buy this once is to match the dispenser to the brewer, then add the reusable pod and maintenance items that keep the setup stable. PureHQ sells reusable K-Cups, water filters, descaling solutions, cleaning tablets, gold-tone carafe baskets, paper liners, and stainless steel refillable pods through its site and Amazon Store. That gives you a path from pod-only brewing to a cleaner ground-coffee setup without rebuilding the whole station.
If you're choosing between drawers, towers, or wall-mounted holders, start with the space you have, not the space you wish you had. Then pair that footprint with the PureHQ reusable K-Cup that fits your Keurig model, and add a descaler bundle so the brewer doesn't become the weak point. A matched setup is quieter, cleaner, and easier to live with than a counter full of separate fixes.
PureHQ Inc. makes reusable K-Cups, filters, descaling products, and related accessories for Keurig and compatible brewers, which makes it easier to turn a messy pod corner into a workable coffee station. If you're ready to match your K Cup dispenser to the right reusable pod and maintenance kit, visit PureHQ Inc. and build a setup that fits your counter, your brewer, and your daily routine.

