
Coffee Machine Care
Coffee Machine Maintenance Checklist: Preserve Flavor & Life
May
A coffee machine rarely fails all at once. It usually starts with small warnings: brew time gets longer, the cup tastes flat or bitter, the spout drips after the cycle, or the machine gets louder than it used to be. By the time many home users notice a real problem, residue and scale have already been building for weeks.
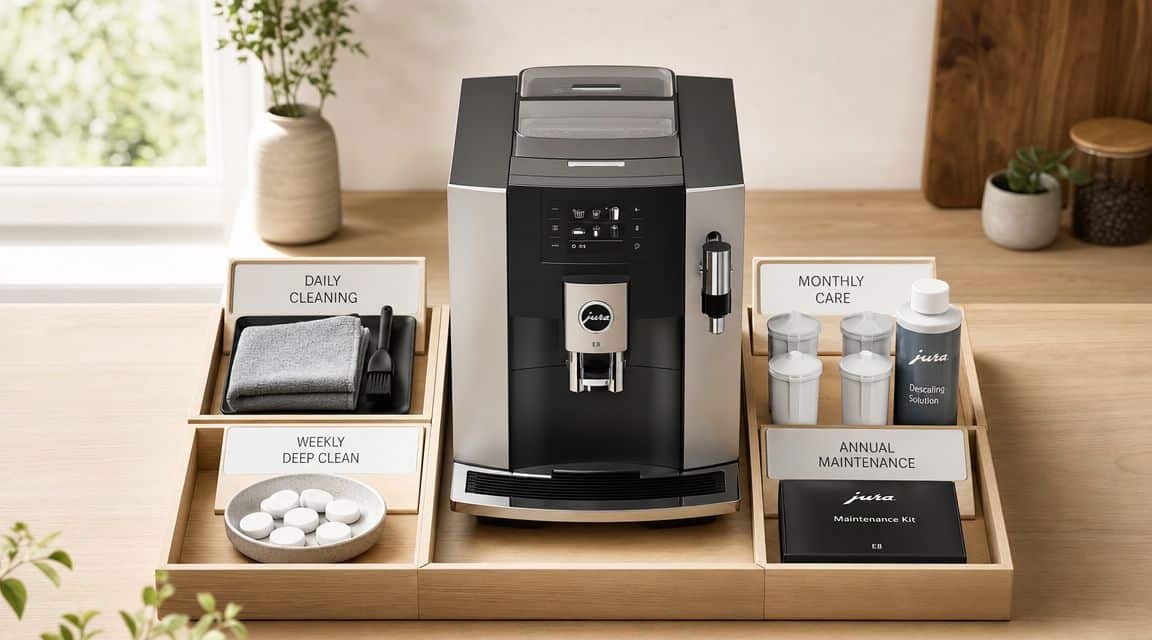
That is why a useful coffee machine maintenance checklist should follow a schedule, not a random grab bag of tips. Daily jobs deal with fresh grounds, splashes, and standing water. Weekly cleaning removes oils and hidden residue before they turn stale. Monthly checks catch filter issues, scale buildup, and worn parts before they become repair bills.
This guide is built the way technicians approach routine care. It is organized by frequency so you know what to handle now, what can wait until the weekend, and what deserves a monthly inspection. It also calls out machine-specific differences for Keurig, Ninja, and Breville models, because the trouble spots are not always the same.
Cost matters too. OEM filters, descalers, and seals usually fit more predictably, but universal supplies can work well if the material, dimensions, and compatibility are right. That trade-off shows up throughout the checklist so you can decide where to save money and where cutting corners usually backfires.
If you need a machine-specific starting point for pod-style brewers, this guide to cleaning a Keurig filter pairs well with the checklist below.
Stay on top of the daily, weekly, and monthly work, and you get better flavor, fewer clogs, and a machine that lasts longer instead of slowly ruining your first cup of the day.
1. Cleaning the Reusable K-Cup or Pod Filter Basket
Reusable pods save money and cut waste, but they punish lazy cleanup. Fine grounds cling to the mesh, coffee oils coat the inside wall, and the rim can collect residue that interferes with sealing. The result is familiar: weak brews, stray grounds in the cup, or a stale note that doesn't match the coffee you bought.
For Keurig owners, this is one of the easiest wins in a coffee machine maintenance checklist. Knock out the grounds right after brewing, while they're still damp. Once they dry, they stick to the mesh and take twice the effort to remove.
What to do after each use
- Empty immediately: Tap used grounds into the trash or compost before they dry into the mesh.
- Brush the screen gently: Use a soft brush or old toothbrush to clear fines from the filter wall and bottom.
- Rinse the rim well: The rim and seal area collect oils that can affect fit and flow.
- Air dry fully: A damp pod tossed into a drawer can pick up odor and mildew fast.
If your Keurig starts brewing slower with a reusable basket but works fine with standard pods, the basket is often the culprit. I've seen users blame the machine when the actual problem was a clogged mesh wall and a dirty pod lip.
Practical rule: Clean reusable pods while the residue is still soft. Waiting until later turns a 20-second rinse into a scrubbing job.
If you want a machine-specific walkthrough, this Keurig filter cleaning guide shows commonly overlooked spots. Paper liners can also help reduce buildup between cleanings, especially in homes that brew several cups back to back.
Brand note: Keurig reusable baskets need extra attention around the puncture and lid-contact areas. Ninja pod adapters and refillable baskets also trap fines around the hinge and underside, so open every moving part when rinsing. Breville users with small filter baskets should focus on oil removal more than mesh clearing, but the same habit applies.
2. Cleaning the External Water Reservoir and Filler Lid
A clean brew starts with the part many people ignore most. The water reservoir looks harmless because it only holds water, but it's dark, damp, and usually warm enough to collect film, dust, and mineral residue.
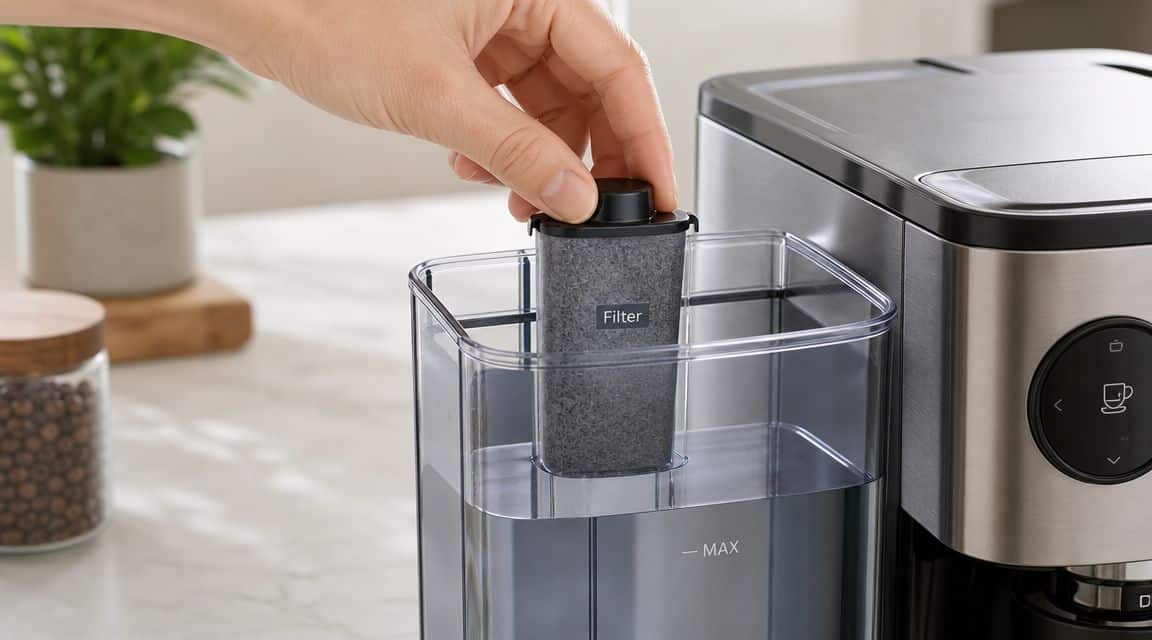
If you top off yesterday's water instead of emptying and rinsing the tank, you're asking old residue to stick around. In home kitchens this shows up as a faint off smell. In offices, it usually shows up as vague complaints that the coffee tastes "flat" or "weird."
The weekly reset that matters
Remove the reservoir, empty it, and rinse it with fresh water. Then wipe the filler lid, the rim, and the corners at the bottom where film tends to gather. Use a soft bottle brush if your hand can't reach inside comfortably.
A good habit is to let the tank air dry before reinstalling it. That simple pause helps prevent moisture from lingering under the lid and along the seam.
Reservoir hygiene matters for the same reason water dispenser hygiene matters. Moist surfaces collect residue long before the problem becomes visible. This guide to water dispenser hygiene makes the broader point well.
For Keurig machines, pull the tank regularly and check the valve seat area. On Ninja brewers, inspect the reservoir channel and the underside of the lid, because splashback can leave a film there. On Breville machines, don't forget the tank intake screen and any float mechanism that can stick if scale or slime starts building.
If you spot dark specks, a slippery interior feel, or chalky residue, don't just rinse and refill. Wash it thoroughly, dry it, and start with fresh filtered water. That last part helps on two fronts: cleaner taste now, and less mineral buildup later.
3. Inspecting and Cleaning the Drip Tray and Exit Spout
The drip tray tells you a lot about how a machine is being treated. If it's full of old coffee splatter, standing water, or sludge under the grate, the rest of the machine probably isn't getting enough attention either.
This isn't only a cleanliness issue. Overflow can creep under the machine base, and dried residue around the exit spout can redirect the stream so coffee dribbles down the front instead of into the cup.
Where problems start
Check the tray before it gets obviously full. In heavy-use kitchens and breakrooms, it fills faster than people expect because rinse cycles and accidental starts add up. Lift the grate, rinse the tray with hot water, and wipe the cavity before sliding everything back in.
Then look up at the exit spout. If you see dried coffee around the opening, wipe it away with a damp cloth or use a small brush to clear buildup. A clean spout gives you a straighter pour and fewer drips after the brew ends.
- Watch for odor: A musty smell usually starts in the tray, not the brewer internals.
- Check for cracks: A cracked tray can leak slowly and make you think the machine itself is failing.
- Clean the underside: Residue often hides below the grate where nobody looks.
- Wipe the spout face: That small area collects more coffee than most users realize.
A common objection here is, "It just catches water, so why clean it so often?" Because trays don't just catch water. They collect coffee, rinse water, dust, and whatever splashes back from mugs that were slightly off-center. That's enough to create odor and mess quickly.
For Keurig and Ninja single-serve machines, the tray can usually be cleaned in under a minute. Breville and other espresso machines need more careful attention because milk splatter and puck debris can end up there too.
4. Cleaning and Replacing the Water Filter
If your machine has an internal water filter, treat it like a maintenance part, not a decoration. A spent filter doesn't announce itself. It just stops doing useful work, and then scale, chlorine, and off flavors start reaching the brew path more directly.
This is one place where a coffee machine maintenance checklist should connect cleaning with actual water conditions. One preventive schedule for espresso equipment specifies total chlorine at or below 0.5 ppm, free residual chlorine at or below 0.5 ppm, total hardness from 50 to 250 ppm as CaCO3, and pH from 6.8 to 7.3, with filter replacement required if values exceed limits. That's a strong reminder that filtration isn't guesswork.
Filter habits that actually help
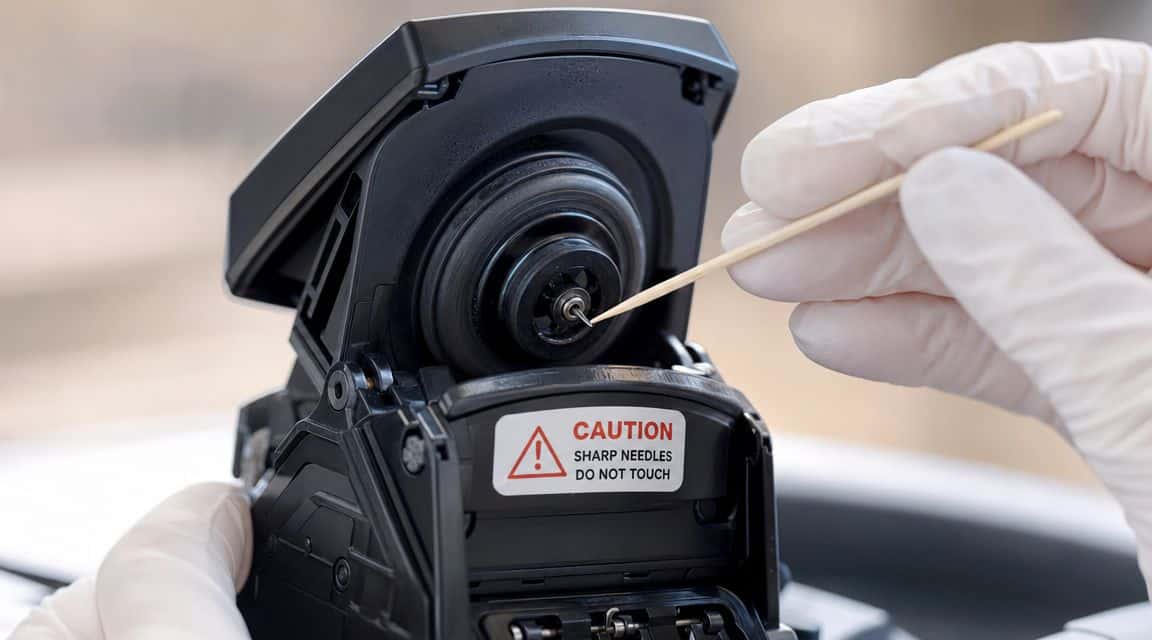
Rinse or prep a new filter according to the machine's instructions, install it correctly, and log the install date. If your home has hard water, don't wait for bad taste before you think about replacement. Check your local water profile or test it, then adjust your routine accordingly.
This is also where budget concerns come up. OEM filters are the easy default because fit is predictable. Universal or third-party filters can be a smart buy if they're made for your model and you install them carefully, but poor fit can cause bypass and make the filter less useful.
If you're trying to decide whether filtration is worth the trouble, this piece on why coffee water quality matters is a helpful starting point.
Brand note: Keurig users should confirm the filter holder matches the exact tank design. Ninja owners need to check basket or tank compatibility before buying universal parts. Breville owners usually get the best results by matching the charcoal filter style to the specific reservoir housing.
5. Cleaning the Machine's Needle and Puncture Areas
When a Keurig starts producing partial cups, spraying unevenly, or brewing weak coffee, the needle area is high on the suspect list. Grounds and dried residue collect around the puncture points, especially if you use refillable pods or flavored coffee.
The frustration is that the machine can seem half-broken. It still powers on. It still makes noise. It just doesn't brew correctly. Often, the path is partly blocked rather than fully clogged.
Clean gently, not aggressively
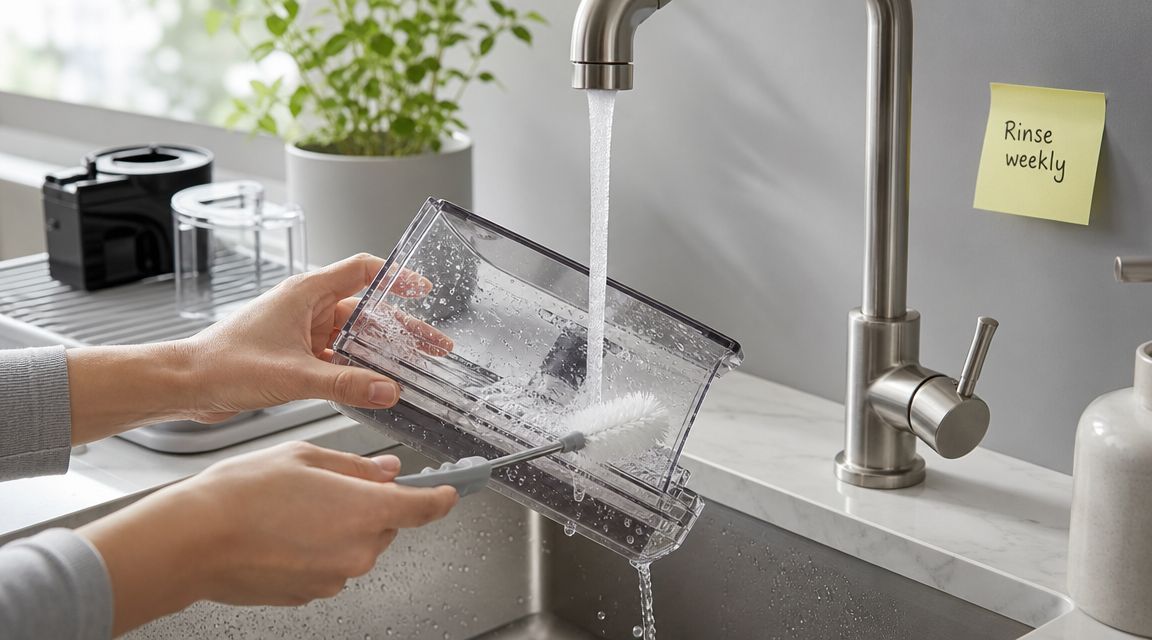
Start with the manual for your exact machine. Needle access differs by model, and some brew heads come apart more easily than others. Once you know where the entry and exit points are, use a non-damaging tool and light pressure to loosen stuck grounds.
Then run plain water cycles to flush the loosened debris. If you skip the flush, you can knock residue loose only to have it settle somewhere else.
- Wear gloves if needed: Those puncture points are sharp.
- Use the right tool: A soft cleaning tool is safer than forcing a hard metal pick.
- Check both sides: Many users clean the top puncture point and forget the exit area below.
- Test with water first: Run a rinse cycle before brewing coffee again.
Keurig owners deal with this most often, but Ninja pod systems can develop similar residue around the piercing area. Breville machines don't use K-Cup needles, yet the same principle applies to restricted flow points, screens, and outlet passages. Clean the path, then verify flow with water before blaming the pump or heater.
If the machine still struggles after cleaning, look at the reusable pod, the filter, and descaling status before assuming a bigger failure.
6. Descaling the Machine, Carafe, and Brew Basket
Mineral scale is one of the most common reasons a brewer starts acting old prematurely. Brew times creep up, the pump sounds strained, water temperature gets less consistent, and the coffee starts tasting flat or bitter. In hard-water homes, this usually shows up long before a machine is worn out.
Descaling works best on a schedule tied to water conditions, not guesswork. If your tap water leaves white residue on faucets or kettles, move descaling into the monthly column of your maintenance plan. If your water is softer, you can usually stretch it out a bit, but waiting for a warning light alone is a mistake. By the time that alert appears, scale has already had time to restrict flow.
The machine internals need the most attention, but the carafe and brew basket should be cleaned in the same session. A carafe can hold a dull mineral film even when it looks clean at a glance. The brew basket picks up a different mix of residue, with scale from water and oils from coffee. If you only descale the machine and ignore those removable parts, old residue keeps affecting flavor.
A practical approach looks like this:
- Match the interval to your water: Monthly for many hard-water households, less often for softer water.
- Run the full descale process: Stopping early leaves loosened scale in the system.
- Rinse with fresh water more than once: One rinse is often not enough, especially on larger drip machines.
- Wash the carafe and basket separately: Use a cleaner that can handle both mineral film and coffee residue.
- Check brew speed after cleaning: A properly descaled machine should fill, heat, and drain more evenly.
Brand differences matter here, a factor often overlooked by many generic checklists. Keurig brewers often show scale as short cups, sputtering, or long pauses between pumping. Ninja drip systems tend to show it as slow brew cycles and heavier buildup in the carafe area. Breville machines, especially espresso-focused models, are less forgiving because scale affects temperature stability and flow at the same time.
Supply choice matters too. OEM descalers remove the compatibility question and are the safest pick if your machine is under warranty or uses a brand-specific program. Universal descalers usually cost less per cleaning and can work well if they are labeled for coffee equipment and mixed exactly as directed. I usually tell people to save money on universal solution only if they are disciplined about following the instructions. If they tend to eyeball measurements, OEM is the safer buy.
For a closer look at what these formulas contain, this guide to Keurig descaling solution ingredients gives useful context without turning the decision into chemistry homework.
Good descaling habits also fit the bigger cleaning routine around the machine. These operational cleaning insights are aimed at broader kitchen upkeep, but the same principle applies here. Consistent maintenance is cheaper than troubleshooting preventable buildup after performance drops.
7. Running Cleaning Cycles and Using Cleaning Tablets
A lot of coffee machines get wiped down regularly and still brew stale, bitter, or oddly flat coffee. The reason is simple. The parts you can scrub are only part of the system. Oils and residue collect in the brew path, valves, and internal channels, and manual cleaning does not reach them.
Built-in cleaning cycles solve that problem. They push water or cleaning solution through the machine the way a normal brew does, which is why they work better than surface cleaning alone. As noted earlier, good maintenance follows a rhythm. Daily cleaning removes fresh residue, weekly cleaning handles heavier buildup, and monthly checks catch problems before they turn into bad flavor or mechanical issues.
How to run a cleaning cycle properly
Use the cycle your machine already provides, if it has one. Then use the cleaner intended for that machine type.
A rushed cycle causes a lot of avoidable problems. If the machine calls for a full clean program, let it finish. Empty the waste water. Run the required rinse cycles with fresh water. Skipping that last part is one of the fastest ways to make the next cup taste chemical or chalky.
Here is the practical version:
- Fill the reservoir with the cleaner or water mixture listed in your manual
- Start the machine's cleaning mode
- Let the full cycle complete without interrupting it
- Discard all waste water
- Run the recommended fresh-water rinses
- Brew one plain water cycle if you want a final check for odor or residue
Tablets versus liquid cleaners
Cleaning tablets are convenient because the dose is consistent and storage is easy. That matters in busy kitchens, shared offices, or households where nobody wants to measure anything before the first cup.
Liquid cleaners make more sense when the manufacturer specifies a particular formula or your machine uses a process that depends on exact dilution. Espresso machines often fall into this category. If you own a Breville machine, I usually suggest following the manual closely here because brew quality reacts quickly to internal oil buildup and incomplete rinsing.
Brand matters, but fit matters more. Keurig, Ninja, and Breville do not all use the same cleaning process, even if the tablet looks interchangeable. OEM tablets cost more, but they remove the compatibility guesswork. Universal tablets can save money if they are clearly labeled for coffee equipment and your machine type. If you are stocking supplies for a larger household or break room, that price difference adds up. If you want the safer option with fewer surprises, OEM is usually worth it.
For people comparing cleaning formats beyond coffee gear, HYDAWAY bottle cleaning solution gives a useful look at how tablet cleaners are designed for convenience and consistent dosing.
Brand-specific notes
Keurig owners should treat cleaning cycles and descaling as separate jobs. A rinse or maintenance cycle helps with coffee residue, but it does not replace scale removal.
Ninja machines vary by model. If yours has a Clean button or programmed cycle, use it on schedule instead of waiting for performance to drop. These brewers often hide buildup in places that do not look dirty from the outside.
Breville machines benefit the most from doing this correctly and on time. Internal residue affects flavor fast, and espresso systems are less forgiving about neglect than basic drip brewers.
For shared kitchens, the fix is simple. Keep tablets near the machine, set a weekly reminder, and treat the cycle like part of the normal routine instead of a repair task. That habit is what keeps a checklist useful instead of theoretical.
8. Checking and Replacing Machine Seals and Gaskets
Leaks rarely start as dramatic failures. More often, a seal hardens, a gasket shifts, or a connection stops seating cleanly. Then you notice a little water under the brewer, coffee dribbling where it shouldn't, or a brew that suddenly lacks pressure.
This is the part of a coffee machine maintenance checklist people postpone because rubber parts don't look urgent. That's a mistake. Seals are cheap compared with the mess and confusion a slow leak creates.
What to inspect every month
Look at the brew head gasket, lid seals, tank valves, and any O-rings your machine exposes during normal cleaning. You're checking for cracking, flattening, stiffness, or residue that keeps the part from sealing. If the machine leaks only during brewing, pay attention to the brew head area first.
For espresso machines and Breville models, gasket wear often shows up as water escaping during extraction. On Keurig and Ninja brewers, seal trouble may show up as drips around the pod chamber or water pooling under the base after a cycle.
- Inspect by touch: Rubber that feels brittle is usually near the end of its useful life.
- Confirm the location: Don't order a generic gasket until you've matched the model and part.
- Clean before replacing: Sometimes coffee oils or scale mimic seal failure.
- Test over a sink if needed: A controlled brew test makes leaks easier to spot.
A common objection is compatibility. OEM seals usually fit with less drama, which matters when the part sits in a tight groove or around a hot component. Universal replacements can work, but only when dimensions and material match closely. This is one area where "close enough" often isn't.
If you use cleaning tablets for bottles or small water-contact parts elsewhere in your routine, the idea is similar: residue removal helps parts seal and function properly. The HYDAWAY bottle cleaning solution overview makes that general cleaning point from another angle.
8-Point Coffee Machine Maintenance Comparison
| Item | Implementation complexity | Resource requirements | Expected outcomes | Ideal use cases | Key advantages |
|---|---|---|---|---|---|
| Cleaning the Reusable K-Cup or Pod Filter Basket | Low, manual scrub, ~2–3 minutes | Brush/toothbrush, water, mild soap, drying time (optional paper liners) | Removes oils/residue, better flavor, prevents bacteria, extends pod life | Daily home users and reusable-pod adopters | Fast, inexpensive, improves taste consistency and reduces waste |
| Cleaning the External Water Reservoir and Filler Lid | Low to moderate, removable reservoir, periodic soak | Vinegar or mild cleaner, bottle brush, water, time (5–10 min) | Reduces minerals/algae/mold, improves water taste and safety | Hard-water areas, frequent-use machines, offices | Improves water purity and prevents contamination; easy replacement if damaged |
| Inspecting and Cleaning the Drip Tray and Exit Spout | Low, remove/rinse tray, wipe spout (3–5 min) | Hot water, sponge/brush, occasional dilute bleach for stains | Eliminates odors, prevents mold and spills, maintains even coffee flow | High-traffic kitchens, office breakrooms, users noticing odors | Quick, inexpensive, prevents surface damage and unpleasant smells |
| Cleaning and Replacing the Water Filter | Low to moderate, rinse monthly, replace every 2–3 months | Replacement filters, water for soaking/rinsing | Better flavor, reduced minerals, longer intervals between descaling | Machines with cartridge filters, hard-water households, taste-focused users | Improves taste, protects internals, reduces descaling frequency |
| Cleaning the Machine's Needle and Puncture Areas | Moderate, careful access required, ~5–10 minutes | Thin non-metal tool (paper clip/toothpick alternative), gloves, hot water | Restores flow and pressure, fixes weak brews and clog errors | Users with weak/slow brews or error codes, monthly maintenance | Resolves common brewing issues and avoids costly repairs |
| Descaling: Machine, Carafe, and Brew Basket | Moderate to high, multi-step cycles, 30–45 min for machine | Descaling solution or vinegar, distilled water, time for cycles | Removes limescale, restores heating efficiency, improves flavor and lifespan | Hard-water regions, periodic deep maintenance, commercial machines | Dramatically extends lifespan and restores performance |
| Running Cleaning Cycles and Using Cleaning Tablets | Low to moderate, automated cycles (30–45 min) if supported | Cleaning tablets/solution, time, rinse cycles | Cleans internal pathways unreachable manually, prevents clogs, improves taste | Machines with built-in cycles, users preferring low-effort upkeep | Reaches internal components with minimal user effort; consistent results |
| Checking and Replacing Machine Seals and Gaskets | Moderate to high, inspection monthly, replacement may require disassembly | Replacement seals/gaskets specific to model, basic tools | Prevents leaks, restores brewing pressure, avoids water damage | Older machines, units with leaks or pressure loss, preventive care | Prevents costly water damage and restores optimal extraction |
Brew Better Coffee, Not a Replacement Machine
Consistent maintenance is what separates a machine that lasts from one that slowly becomes frustrating. When you follow a frequency-based coffee machine maintenance checklist, daily work keeps fresh residue from hardening, weekly work removes the oils and buildup that rinsing misses, and monthly inspection catches wear before it turns into leaks, clogs, or weak brews.
The pattern is well established in commercial guidance for a reason. Daily cleaning, weekly deep cleaning, and monthly inspection keep pace with how coffee residue, milk residue, and mineral scale build up in real machines. Add water-aware descaling and filter checks, and you're no longer reacting to problems after flavor drops or the machine starts acting up.
The biggest mistake I see is treating every maintenance task the same. They aren't the same. Cleaning a reusable pod basket after a brew is immediate, simple sanitation. Descaling depends on water hardness and usage. Seal inspection is preventive. If you roll them all into one vague "clean the coffee maker sometime" habit, important work gets skipped.
The second mistake is buying the cheapest supplies without thinking about fit. OEM parts usually remove compatibility doubts, especially for gaskets and machine-specific filters. Universal supplies can be a smart budget choice for items like descalers, cleaning tablets, and some compatible accessories, but only if they're made for your machine type and model. That's the trade-off. Spend a little more for guaranteed fit when fit matters. Save with compatible maintenance consumables when the product is clearly designed for coffee equipment and your brewer.
For Keurig owners, the highest-payoff tasks are reusable pod cleaning, needle care, reservoir hygiene, and regular descaling. Ninja users usually benefit most from basket, carafe, and reservoir upkeep, plus attention to pod adapters and clean cycles. Breville owners should stay disciplined with water filtration, descaling, and seal checks, because espresso machines punish neglect faster than simple drip brewers do.
If you want to simplify the routine, keep the right accessories together near the machine. A spare filter, a descaler, and the right cleaning tool remove a lot of excuses. PureHQ Inc. is one relevant option if you need compatible reusable pods, filters, descalers, or cleaning accessories for Keurig, Ninja, Breville, and similar home coffee setups.
Ready to get the most out of your coffee maker? Shop PureHQ's complete collection of premium filters, descalers, and cleaning accessories to make your maintenance routine simpler and easier to keep up.
Keep your coffee machine running clean with compatible filters, reusable pods, descalers, and maintenance accessories from PureHQ Inc..

