
Coffee Machine Care
Keurig Filter Replacement Amazon: Models and Schedules
Nov
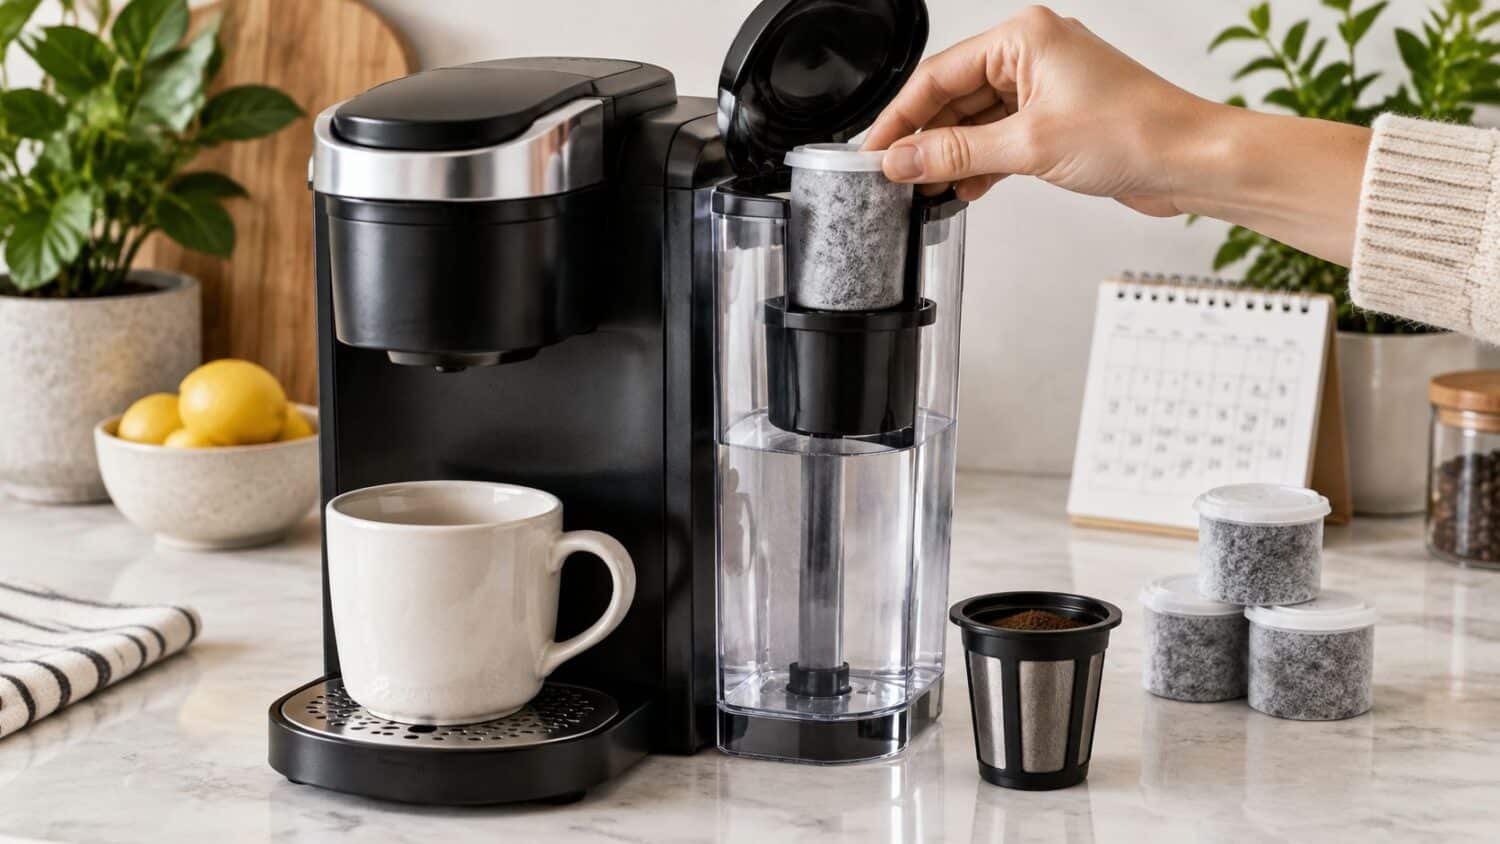
A Keurig water filter can reach its replacement limit after 60 tank refills, even if the calendar says it's not time yet, according to Keurig's maintenance guidance. That makes a replacement cartridge a recurring maintenance expense, not an accessory you buy once and forget.
The harder part is buying the right product. A search for Keurig filter replacement Amazon brings together reservoir cartridges, filter holders, and reusable coffee pods, even though they perform different jobs. Start with the brewer model and its holder, then compare pack sizes against your actual replacement schedule.
Find the Filter That Matches Your Keurig Model
A pack that looks right in an Amazon photo can still be the wrong purchase. Don't treat Keurig-compatible wording as proof that a cartridge, holder, adapter, or reusable pod belongs in your machine.
Filter type and fit by Keurig brewer family
| Brewer family | Filter type | Check before ordering |
|---|---|---|
| Plus Series brewers | Reservoir cartridge with its matching reservoir holder; reusable coffee accessories have separate adapter requirements | For a reusable accessory requiring the Plus Series adapter, confirm that it's included or buy it separately |
| Classic Series brewers | Reservoir cartridge with the compatible reservoir holder | A Plus Series reusable-filter adapter does not fit Classic Series machines |
| Keurig 2.0 brewers | Reservoir cartridge in compatible models | Check the exact guide before buying a My K-Cup reusable filter |
| K-Supreme Plus | Model-specific reusable coffee filter, separate from reservoir filtration | Match the reusable accessory to the K-Supreme Plus manual |
| Brewers without a reservoir filter holder | No cartridge installation without a compatible holder | A cartridge alone won't work; check whether the brewer accepts a holder first |
The adapter distinction matters: Plus Series adapter instructions concern the reusable coffee-filter accessory, not a rule that reservoir charcoal cartridges install through a pod-filter adapter. Keurig's official accessory instructions distinguish Plus Series and Classic Series fit, while the K475 use-and-care guide provides model-specific instructions for the brewer's reservoir filter. Don't transfer compatibility claims from one accessory category to the other.
Identify what you're replacing
A reservoir water-filter cartridge sits in a holder inside the water tank. A reusable pod filter holds ground coffee in the brewing chamber. Buying the second product won't replace the first, regardless of how prominently the listing uses the word filter.
Remove the reservoir and inspect the existing holder before shopping. If it's missing, establish whether your exact model accepts a compatible starter kit rather than buying loose cartridges and hoping they'll attach somewhere. Our guide to checking whether your Keurig has a water filter can help you identify what to inspect.
Fit first: Compare the brewer's model designation, the accessory's location, and the holder connection before comparing the price.
Before ordering, answer these questions:
- Exact model: What model appears on the brewer's identification label or original manual?
- Accessory type: Are you replacing a reservoir cartridge, its holder, or a reusable coffee pod?
- Listing evidence: Does the selected product name that model and show the matching connection?
If the listing leaves one unanswered, don't make a bulk purchase. Ask for a model-specific answer or choose a listing that supplies one.
How Often to Replace a Keurig Water Filter
Two clocks set your replacement count per year: the calendar interval and a usage limit measured in ounces or tank refills. Your model's manual names both, and the first trigger to arrive wins.
Replacement triggers by Keurig guidance source
| Guidance source | Replacement trigger | Replacements per year | Notes |
|---|---|---|---|
| Keurig maintenance guidance | Every two months or 60 tank refills | About 6 on the calendar schedule; more if the refill limit arrives sooner | Use only with a compatible reservoir filter holder |
| Keurig K475 and K575 use guides | 1,000 ounces or two months | About 6 on the calendar schedule; more with heavier use | Replace at whichever limit comes first |
| Keurig K2.0 user guide | Reminder at 1,000 ounces or two months | About 6 on the calendar schedule; more with heavier use | Select YES to reset the reminder after installation |
The K575 use-and-care guide specifies 1,000 ounces or two months, which is the basis for the model-specific rows above. Keurig's recommendations aren't uniform across its lineup, so price your annual supply off your own brewer's manual rather than whichever interval a listing quotes.
Read the calendar and volume limits together
The table's annual column is planning math, not a cartridge lifespan. A household that brews heavily can reach the ounce or refill limit weeks before the calendar date.
For calendar budgeting, divide the 12 months in a year by the interval your manual specifies. A two-month interval gives roughly six cartridges a year. Treat that figure as a starting inventory estimate, then let the usage trigger correct it upward if your household drinks more.
To estimate brews per cartridge, divide the manual's volume limit by the ounces in your typical cup. Serving size changes the result, which is why no single cup count fits every owner.
A tank refill isn't a fixed ounce count either. Reservoir capacity and topping-off habits both move the number, so don't convert a refill-based instruction into cups unless your manual provides that basis.
Match the schedule to the person using it
For a single person brewing smaller cups, the calendar usually arrives before the volume threshold. Say you make one small morning coffee and rarely touch the brewer otherwise. Record the installation date, follow the manual's calendar limit, and don't stretch it because the cartridge still looks clean.
For someone brewing larger cups, count total water use rather than coffee occasions. A larger serving burns through the volume allowance faster, though cup size alone doesn't justify an earlier calendar change. An occasional travel mug and three travel mugs a day are different maintenance patterns.
For a shared office, assign one person to record refills or approximate brewed volume. Otherwise everyone assumes someone else changed the cartridge. Replace at the usage threshold when it lands before the calendar deadline, and keep the next compatible cartridge on hand.
Water quality shifts the interval too. A customer who fills the reservoir with spring water reports replacing these filters less often and says they work as described.
A replacement pack is an inventory purchase. Its value depends on how many correctly fitted cartridges you'll actually use, not how long the listing says the box should last.
Reset the reminder without relying on it alone
The Keurig K2.0 user guide has you select YES after replacing the filter, which resets the reminder. The prompt tracks elapsed time since the last reset and measures nothing about the cartridge's remaining capacity.
Write the installation date on the cartridge box and note approximate brewing use beside it. In a workplace, add the pack source or lot identification so a fit complaint traces back to the actual supply.
Set your calendar reminder at installation, before taste becomes the signal. For an Essentials brewer, consult the Keurig Essentials water-filter guide alongside the exact model manual so you're tracking the right accessory.
For cost, divide pack price by usable cartridges, then multiply by your expected replacements per year. Count only cartridges that fit your holder. A bigger box doesn't lower your maintenance cost if half its contents can't be installed.
OEM Keurig Filters Compared With Generic Amazon Packs
OEM, generic and reusable filter options compared
| Criterion | OEM Keurig cartridge | Generic Amazon cartridge pack | Reusable pod filter |
|---|---|---|---|
| Compatibility proof | Match the part to the model manual | Require the exact model and holder in the listing | Require named-model compatibility |
| Fit with holder | Confirm the specified reservoir holder | Compare holder connection and exclusions | Match the brewing chamber and entrance needles |
| Replacement guidance | Follow the brewer and cartridge instructions | Don't substitute the seller's claim for the manual | Clean and inspect rather than applying a cartridge interval |
| Certification or testing | Unknown for the specific product until checked | Unknown until supported by product documentation | Unknown until supported by product documentation |
| Warranty and support | Check the current product terms | Check the seller's written terms | Check the accessory's written terms |
Use this visual comparison as a shopping checklist, not proof that every product within a category performs alike.
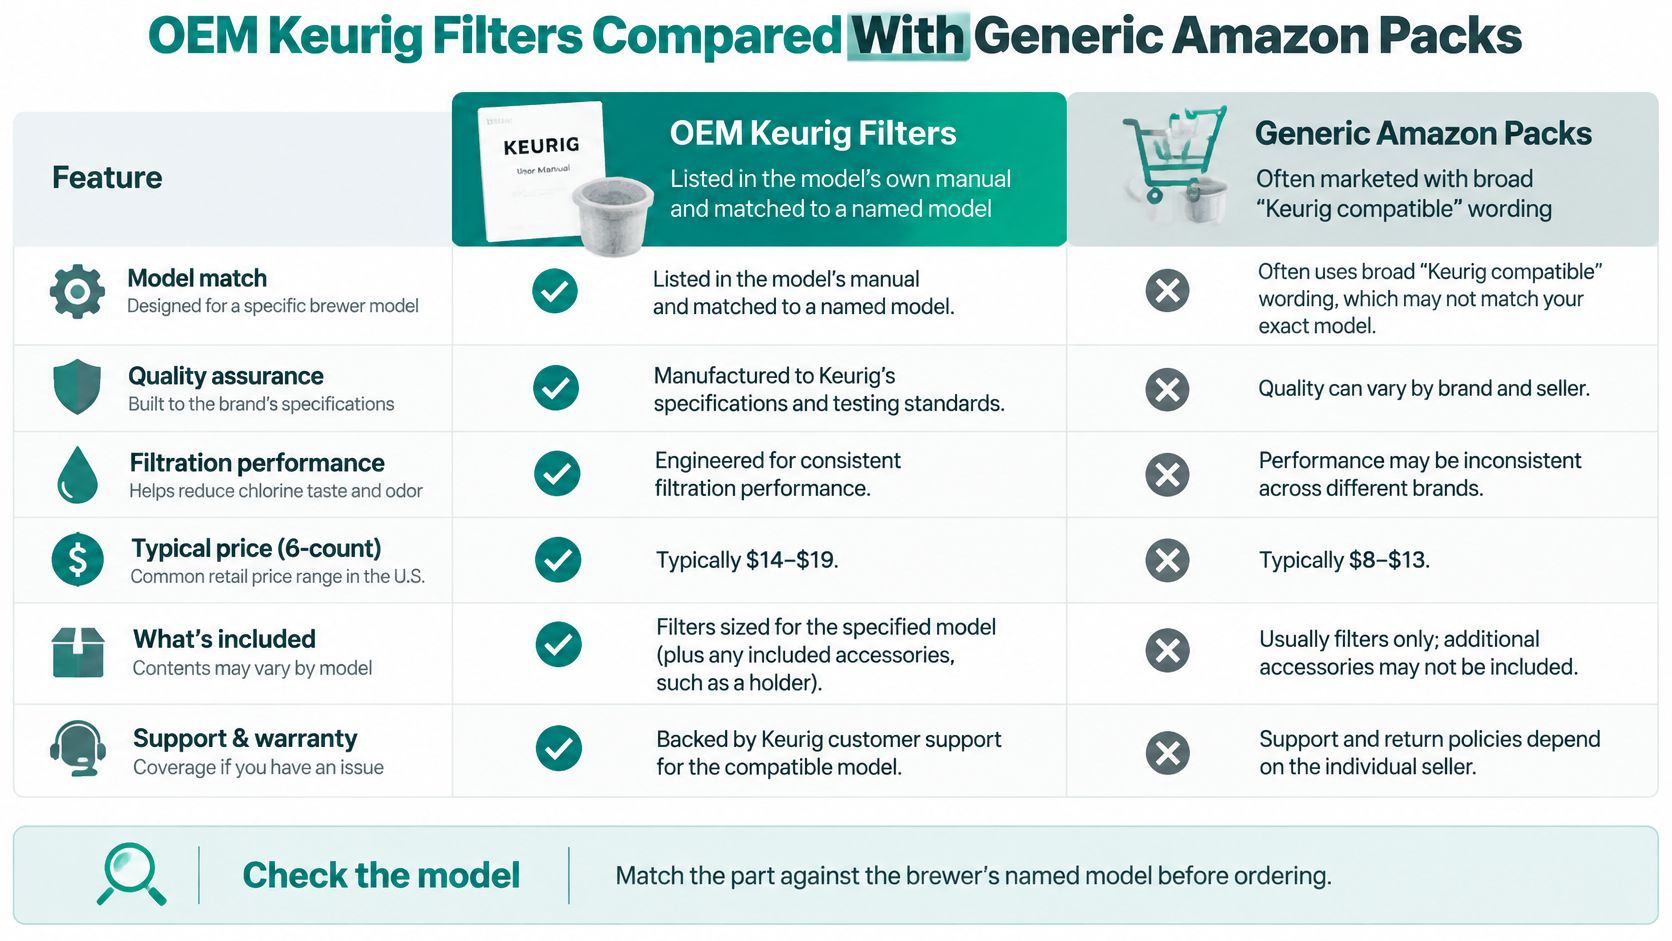
Pay for documented fit, not a premium label
I would choose an OEM cartridge when the manufacturer's part identification resolves a fit question that the alternatives leave open. I would consider a generic pack when its listing names the exact brewer, identifies the holder, and provides usable installation instructions. Neither choice justifies assuming certification, warranty coverage, or a price advantage without checking the actual product.
Reusable accessories need a different comparison. The K-Supreme Plus user guide specifies the newly designed Keurig My K-Cup Universal Reusable Coffee Filter with five holes in the lid, and warns that other filters or earlier versions may damage the brewer because of its multiple entrance needles.
That's a concrete compatibility objection, not a reason to distrust every third-party reservoir cartridge. Keep the product categories separate when evaluating risk.
For broader household water-treatment questions, Everti's guide to filtering microplastics offers additional context. Don't treat a general filtration discussion as evidence that a particular coffee-machine cartridge removes a particular contaminant.
If you're comparing physical accessories, use the video alongside your own brewer manual.
How to Install and Prime a New Filter
A cartridge seated badly costs the same as one seated correctly, so an extra two minutes here protects every replacement you buy this year. Handle the cartridge and the reservoir as two separate jobs. The Keurig K55 care guide describes cleaning the reservoir screen with strong faucet flow or by agitating clean water inside the reservoir. A restricted intake can mimic a dying filter, so inspect it before installing anything.
The illustration summarizes the workflow; the numbered instructions add the preparation and recording steps.
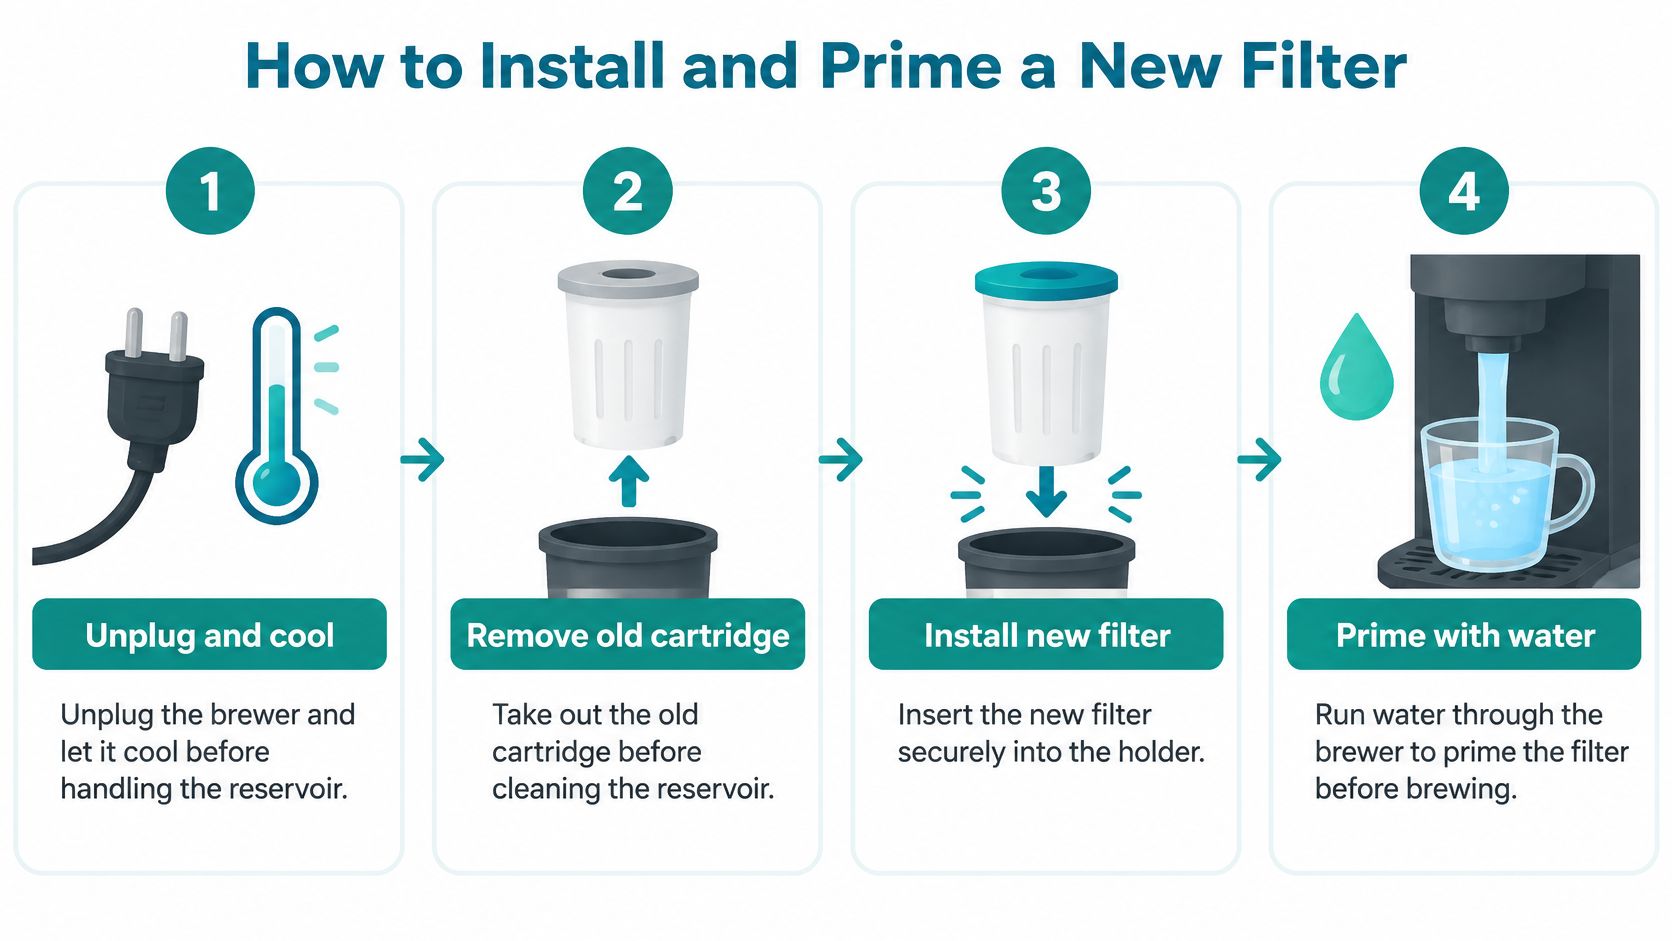
Prepare, seat and rinse
Unplug the brewer and let it cool. You want a cool machine in your hands before parts come off, so give it time first.
Remove the old cartridge before cleaning the reservoir. A cartridge left in place picks up cleaning residue; pull it before the tank gets washed.
Rinse the reservoir and intake screen. Use the cleaning method your manual specifies, whether that is strong faucet flow at the screen or clean-water agitation in the tank. A new cartridge cannot correct a restricted screen.
Soak the new cartridge in fresh water. Follow the soak and rinse directions packaged with it so the charcoal is fully saturated before it enters the holder. A quick splash under the tap leaves the carbon dry at the core.
Seat the cartridge in its matching holder. Reassemble the holder in the correct orientation and set the reservoir back on the brewer. If the connection refuses to engage, stop rather than forcing it.
Fill with potable water to the marked line. Some Keurig guides warn against distilled water, and an Amazon seller's water suggestion does not override your brewer manual.
Run the rinse or water-only cycle your model prescribes. The flush quantity comes from the brewer instructions, and a new cartridge does not excuse skipping the step.
Reset the replacement reminder where fitted. On applicable Keurig 2.0 systems, select YES after installation. Skip it and the reminder drifts out of step with the cartridge you just paid for.
Record the install date. Write it on the box or in a maintenance log and start counting refills or brewed volume. Since this filter is a recurring cost measured in replacements per year, the log is what tells you whether each cartridge earned its price.
Test the symptom, not just the cartridge
If heating stays slow, output stays low, or deposits remain visible after a correctly prepared cartridge, the problem is mineral buildup or a restricted pathway. Swapping in another cartridge is the most expensive way to learn that.
Troubleshooting check: Stop and reassess when a correctly prepared replacement produces no improvement. Inspect the relevant water path and follow the brewer's cleaning and descaling instructions before buying another pack.
Leaks, Fit and Durability Checks Before You Buy
A bargain filter pack only saves money if it remains serviceable through the replacements you expect to make in a year. Before ordering, check recent reviews and product documentation for problems tied to your exact brewer, such as poor holder engagement, a lid that will not close normally, grounds in the cup, or damaged mesh. “Keurig compatible” can hide model-level differences in the reservoir holder, brew head and filter basket.
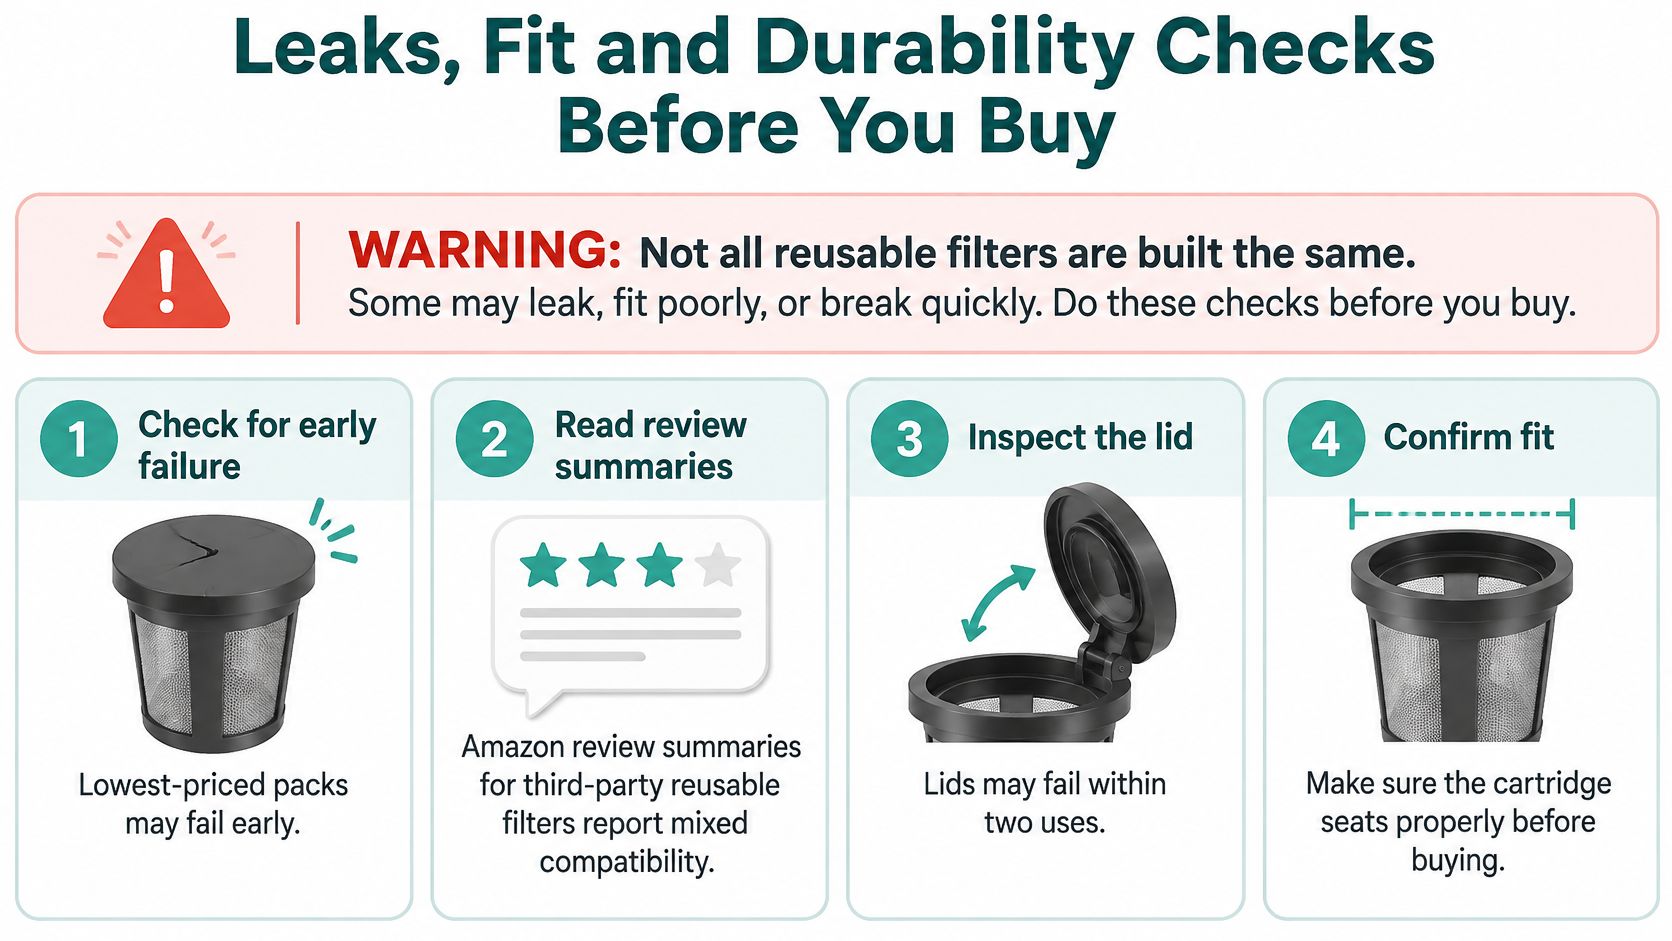
Inspect a reusable filter before trusting it
- Close the lid gently. It should close as designed without forcing the hinge or latch. Reject a visibly damaged lid rather than trying to make the brewer clamp it shut.
- Inspect the basket after washing. Look for separated mesh, cracks, distorted edges or a loose attachment. A quick inspection is useful even when the previous brew seemed normal.
- Check the brewed cup. If grounds appear, inspect the basket, closure and filling method before blaming the coffee. Don't keep brewing with a visibly broken filter.
- Clean the complete assembly. Disassemble and pre-rinse it, then use warm soapy water or a top-rack dishwasher cycle only if the accessory's care instructions permit it. Air-dry the parts before storage.
These checks help you judge the actual product before making it a recurring purchase. Use our product-authenticity guidance to compare the seller, model references and included components before ordering; packaging alone does not prove durability.
Locate a reservoir leak before replacing parts
For a reservoir cartridge, begin with the tank seating and holder engagement. Dry the outer surfaces, reinstall the reservoir correctly and watch where moisture first appears. Water around the brewer can come from the tank, holder or brewing path, so don't automatically blame the charcoal cartridge.
After an office closure or extended storage, clean the reservoir and reusable coffee filter before returning them to service. Inspect the components while they're apart, and don't reinstall visibly damaged pieces.
A lower checkout price is only useful if the accessory stays in service. Compare annual replacements, failed brews and overall condition rather than the pack price alone; a poorly fitting filter can cost more through early replacement.
Order the Filter Your Brewer Model Needs
Make the purchase decision from the machine outward, not from the discount inward. The useful Amazon listing is the one that removes uncertainty about fit and preparation.
- Confirm the exact model. Read the brewer's identification label and match it to the correct manual.
- Identify the holder and accessory. Decide whether you need reservoir cartridges, a compatible starter kit, or a reusable coffee filter.
- Record the replacement trigger. Use the applicable manual's calendar and usage instructions to plan your supply.
- Buy the pack that names your model. Check the selected variation, included components, and seller before placing the order.
Keep filtration and descaling separate
The K-Duo Essentials Gen 2 care guide treats water-filter maintenance and descaling as separate tasks. If mineral buildup or a descale notification needs attention, buy an appropriate descaling product rather than expecting a fresh cartridge to perform that job.
We're PureHQ Inc., a small U.S.-based company, and we oversee our own manufacturing of water filters and reusable coffee pods. Our Keurig & Breville Descaling and Cleaning Tablets come in a 24-count pack with 6 compatible water filters for $19.95. Confirm the current listing, included filter compatibility, and checkout price before purchasing.
Don't buy a large supply until you've resolved the holder question. Once the model and accessory match, choose enough stock to support your maintenance routine without letting a generic annual-supply claim determine when you change the filter.
PureHQ Inc. offers Keurig-compatible water filters, reusable coffee pods, and descaling supplies for home brewers and small workplaces. Check your brewer's exact model, then visit PureHQ Inc. to shop the matching water filters before your current cartridge reaches its replacement limit.

